
Growing your own potatoes is an incredibly rewarding experience. Not only are homegrown spuds far superior in taste and texture to those found at the store, but they also provide a bounty of essential nutrients that you won’t find anywhere else. Our complete potato growing guide will teach you everything you need to know about growing potatoes from either the ground or a container. Now you can enjoy delicious homemade fries, mashed potatoes, or potato salad all year round!
About Potatoes
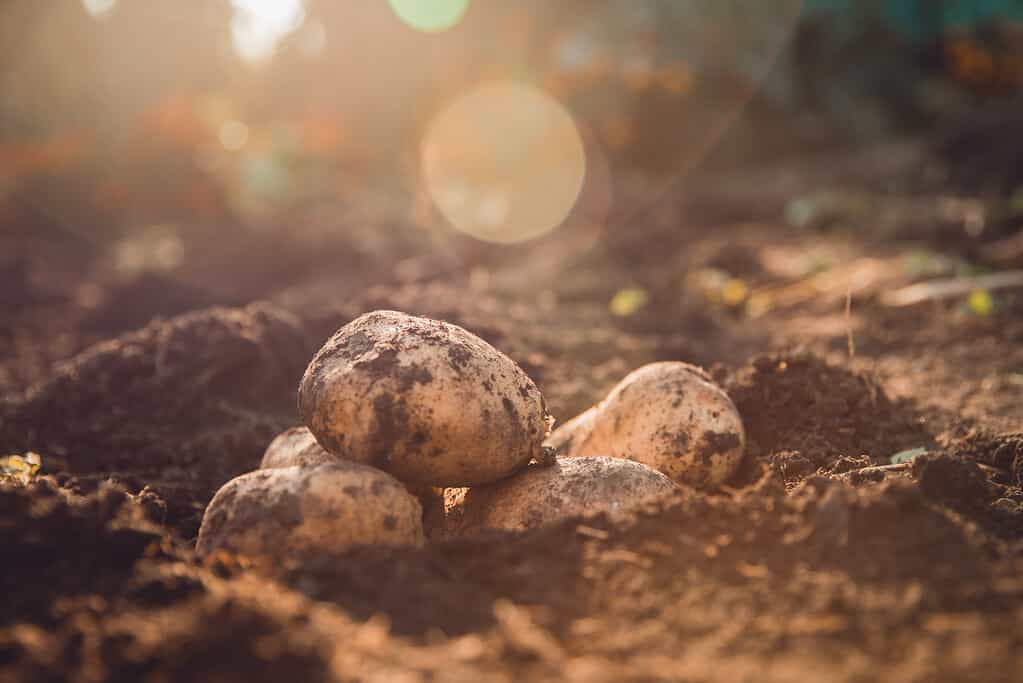
Potatoes have been around for centuries; they were first documented by the Incas of Peru and were brought to the American Colonies in 1621.
©Parilov/Shutterstock.com
The potato (Solanum tuberosum) belongs to the nightshade family, which also includes tomatoes, eggplants, and peppers. It is a cool-weather vegetable that usually produces more in the northern part of the United States but can still be grown as a winter crop in warmer areas. The edible section of the potato is beneath the ground – the tuber – which is an enlarged storage part of the potato plant. It will develop from underground stems (called stolons) when the plants reach 6 to 8 inches in height or around 5 to 7 weeks after planting.
Potatoes have been around for centuries; they were first documented by the Incas of Peru and were brought to the American Colonies in 1621. Today, potatoes are the number one vegetable in America and are a low-fat and cholesterol-free source of carbohydrates. The skin of the potato is particularly beneficial, as it provides a significant portion of the daily required intake of Vitamin C, iron, magnesium, phosphorus, folate, thiamin, riboflavin, zinc, and potassium.
Where to Plant
If you plan to plant potatoes, ensure that the area you choose is bright. Ideally, potatoes must receive at least 6 hours of direct sunlight daily. The soil should be loose and well-drained for optimal tuber growth. Hard or rocky soil can inhibit proper development and create weirdly shaped potatoes.
Additionally, check the soil’s pH level to ensure it falls between 5.8 and 6.5. This will help your plants thrive. Moreover, potato tubers prefer a slightly cool temperature (45ºF – 55ºF).
To get ready for planting season, consider adding compost or organic matter. It’s best to do this during the fall, which can promote healthy potato growth during the summer!
When to Plant
Moreover, potato flavor is enhanced by burying them deeper into the soil.
©ArieStudio/Shutterstock.com
When deciding when to plant potatoes in your garden, paying more attention to the soil than the date is best. The soil should not be too wet that it is hard to work with. Rather it should be dry enough so that it can be worked. Generally, this is two weeks after the last spring frost. However, if the spring is late and wet, then planting can be delayed until April or June.
When planting potatoes, the timing will vary depending on your climate. In cooler regions, it is best to wait until early to mid-April, 6-8 weeks before the average last frost date. Most varieties of potatoes can withstand light frosts.
For gardeners living in warmer climates with mild winters, potatoes should be planted as a winter crop. In those circumstances, planting can be done from September through February. The exact time frame for planting will depend on your region.
How to Plant
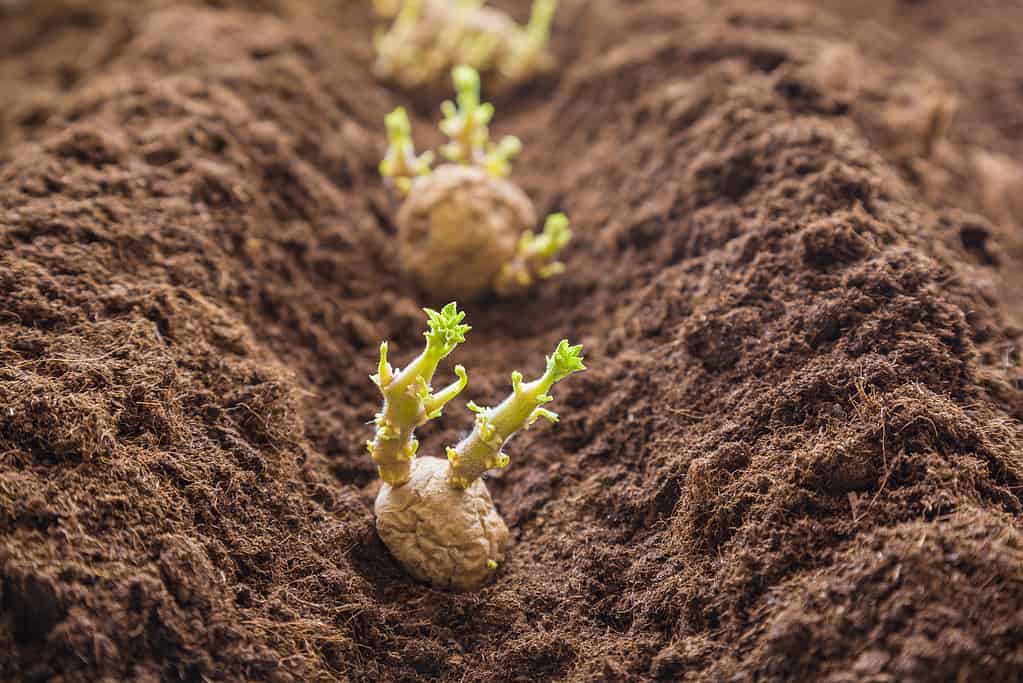
Before planting, it is important to ensure you are using certified seed potatoes that are disease resistant. These should be easily distinguishable from grocery potatoes as they will have eyes (buds) protruding from them. If the seed potatoes are larger than your fist, use a knife to cut them into golf ball-size pieces.
Allow the cut pieces of seed potatoes to heal for 1-2 days before planting. This process helps form a protective layer over the surface so that they don’t rot in the ground. Remember not to cut up any smaller seed potatoes than an egg; plant those ones whole instead!
First, dig a planting trench 8 inches deep and the width of your shovel. Keep each row three feet apart from the next one.
Once the trench row is dug, mix in compost or aged manure. This helps improve soil quality, ensuring your potatoes’ healthy growth.
After adding these ingredients to the bottom of each trench, place a seed potato (cut side down if using sections) every 12 inches and cover it with four inches of soil.
When sprouts appear (in about two weeks), fill in the trench with more soil, leaving just the tiny tip of the shoot exposed to the sun. Repeat as they grow until you have used up all of the soil. The more soil you put on top of the seed potatoes, the larger the harvest, so feel free to mound it higher and higher.
How to Grow
Maintain even moisture, especially from the time after the flowers bloom. It is important to take into account how much water your potatoes need. On average, potatoes require 1-1.5 inches of water per week in order for them to grow properly. Inconsistent amounts of water while the tubers form can cause misshapen or split potatoes. As a general rule of thumb when growing potatoes, stop watering once the foliage begins yellowing. This yellowing is normal and means your potatoes are done growing larger and are using their energy to thicken their skins.
Moreover, potato flavor is enhanced by burying them deeper into the soil. Depth also prevents any spuds from being exposed to sunlight which can turn them green and produce solanine – an alkaloid toxin that gives off a bitter taste. To ensure that none of your potato plants are exposed above ground level and potentially at risk of exposure from direct sun rays, mound up the soil and compost around the plant so that only their top leaves stick out just above ground level.
Hilling Technique
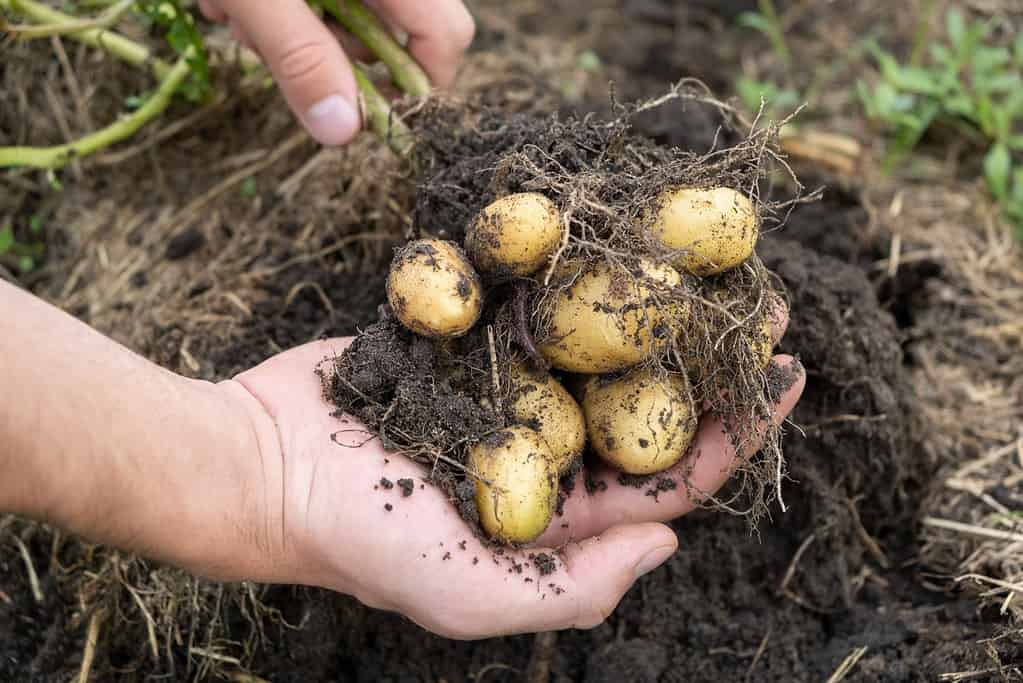
When harvesting potatoes, pick a dry day and dig carefully so as not to puncture the tubers.
©FotoDuets/Shutterstock.com
Hilling is a technique used to increase the number of potatoes that you can harvest from each plant by covering the tubers with soil. It’s best to do this in the morning when plants are at their tallest and before they start sagging under the heat of the day.
Use a hoe or spade to carefully mound dirt up around the base of each potato plant, taking care not to damage any tubers that have already formed beneath it. Check on your plants periodically throughout the growing season and make sure they’re getting enough coverage, hilling them up as needed until they reach about 6 inches tall but before they begin flowering or blooming. This will ensure plenty of room for new potatoes to form without making them too difficult to access when it comes to harvesting!
When to Harvest
When harvesting potatoes, pick a dry day and dig carefully so as not to puncture the tubers. This procedure is best done with gloved hands rather than a garden tool. Avoid cutting or bruising the potato skin, as this can cause spoilage of the potatoes during storage.
Since you have been hilling the soil, it will be light and easy to dig. Generally speaking, you should harvest your potatoes before a hard frost is expected.
For new or baby potatoes, those with tender skin and small in size, you may want to start harvesting 2-3 weeks after plants stop flowering. New potatoes need to be eaten within a few days due to their fragile nature and will not keep for much longer than that without spoiling; they do not require curing either, so they can go straight from harvest into cooking!
For larger potatoes that store well, dig them up three weeks or more after the above-ground foliage has died completely back. Cut off the dry foliage and wait another 10-15 days. This will give them plenty of time to grow a thicker skin that keeps for many months. They also make great baked giant baked potatoes. Another great trick for better storage is to stop watering potatoes after the middle of August. Move potatoes immediately into a cool, dry place, or they will turn green in the sun.
How to Store
Any soil that is still attached must be brushed off but do not wash them until you ready them for consumption.
©Val_R/Shutterstock.com
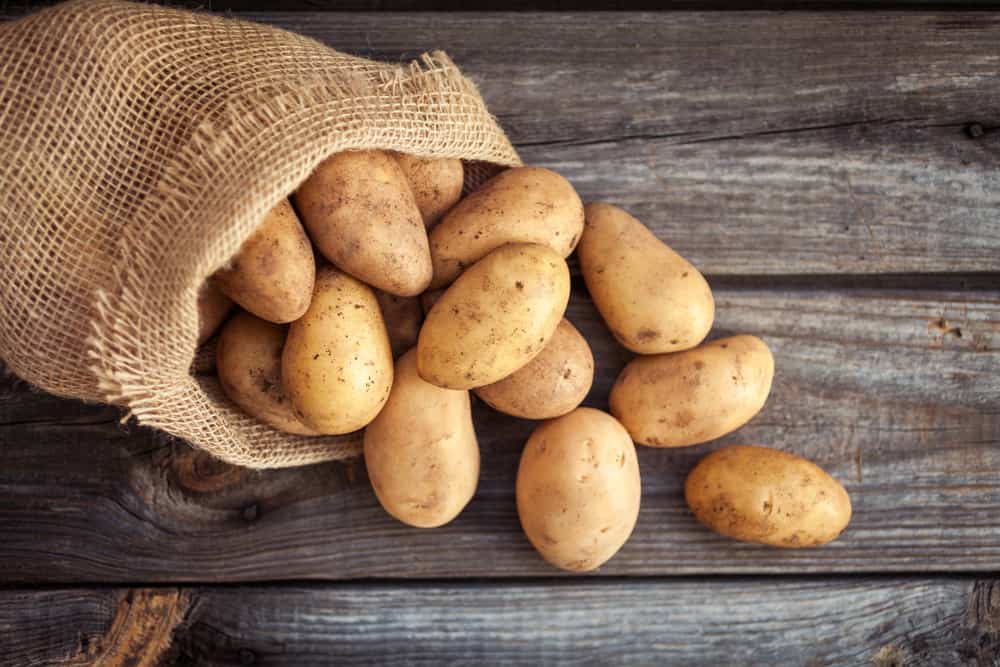
Once freshly dug, potatoes should be placed in a dry and cool area for up to two weeks. This allows the potato skin to age and dry and extends its life span. Any soil that is still attached must be brushed off but do not wash them until you ready them for consumption.
If you plan on eating potatoes within a few days of harvesting, storage is not much of an issue, and they can be stored anywhere. For long-term storage, then an area that is 38° to 40°F with some humidity and darkness will suffice. It’s important that temperatures don’t exceed this guideline as warm temperatures encourage sprouting or even disease amongst your potatoes – plus, keep in mind that potatoes are 80% water, so too little humidity can cause them to wrinkle up and dry out quickly!
Once your potatoes have been harvested, storing them in a way that allows fresh air and ventilation is important. This will help ensure the potatoes do not spoil too quickly, as oxygen is needed for storage, and carbon dioxide should be allowed to escape. The best way to achieve this is by using mesh bags or containers with holes in them. Do not use airtight containers; these can cause moisture buildup on the potato’s surface, leading to mold growth. Additionally, potatoes should never be stored with apples.
Companion Plants
As you create your garden, it is important to consider how to strategically place potatoes since some plants thrive when planted near them, and other plants should be avoided. Taking the time to learn about companion planting techniques will assist in ensuring that your potato patch is well-planned.
Planting potatoes requires that you choose companion plants that will not interfere with their root system, but some root vegetables can be advantageous to have around since they deter pests.
Great companion plants for potatoes include catnip, chamomile, coriander, basil, alyssum, lettuce, peas, spinach, and thyme.
Summary of How to Grow Potatoes
| Growing Potatoes | Potato Recommendations |
|---|---|
| Sun | Six or more hours of direct sunlight |
| Soil | Loose and well-drained. A pH of 5.8 and 6.5. Soil temperature between 45-55°F |
| When to Plant | Two to three weeks after the last spring frost. |
| Planting Measurements | Eight inches deep. 12 inches apart. Rows three feet apart |
| When to Harvest | For new potatoes, harvest three weeks after flowering. For storage potatoes, harvest three weeks after the foliage dies back. |
| Storage | A dark, humid location between 38-40°F |
| Companion Plants | Catnip, chamomile, coriander, basil, alyssum, lettuce, peas, spinach, and thyme. |
Conclusion
In conclusion, growing potatoes is a great and rewarding way to expand your vegetable garden. By following the steps outlined in this guide, you can successfully grow delicious potatoes that are packed with nutrition and flavor! Choose the right variety of potatoes for your climate, prepare the soil correctly by adding compost or fertilizer, space plants appropriately, so they have room to grow, water diligently throughout their growth period, keep an eye out for pests and diseases, and harvest at the right time. With some patience and dedication, you’ll be able to enjoy homegrown potatoes all season long!
The photo featured at the top of this post is © ArieStudio/Shutterstock.com


How to Add Us to Google News


Thank you for reading! Have some feedback for us? Contact the AZ Animals editorial team.