
Do you want to propagate your spider plant? To do so, you’ll need to use its spiderettes. A spider plant develops a tall stalk and small white blossoms as it reproduces. These little blossoms eventually develop into spiderettes, or young spider plants. These young spiderettes can be left on the stem until they form roots, which appear as tiny protrusions at the spiderette’s base. These spiderettes may be propagated either in water, soil, or via the mother plant’s stolons.
In this article, we’ll look at three different ways to propagate spider plants. We’ll also explore some tips for successful propagation.
How To Propagate Spider Plants in Water
Propagating spider plants in water isn’t too difficult to do. All you really need are some clean scissors or a sharp knife, a cup of filtered water, and a spider plant with spiderettes that are ready to chop.
1. Remove the Spiderette From the Mother Plant
Find a newborn spider plant that has little nubs on it first. These are the first signs of those lovely new roots that will support the growth of your new plant. When you remove your spiderette, make sure you grab at least one specimen that has these little nubs.
2. Place the Spiderette in Water
The plants must then be added to a little amount of water. These little spider plants don’t have lengthy stems, so you may use a bowl or a mason jar with a little water in it. Only the region around the plant’s roots should be submerged in water. Place the plant and water in an area that receives plenty of direct light.
Every few days, check on your propagated plants to track the development of the roots and provide extra water as required. Throughout this procedure, make sure the roots are continuously submerged in water. You should give your roots a month or so in water to grow nice and lengthy. Sometimes, you could get away with a little shorter time frame.
3. Plant Your Propogated Spider Plants
You may plant the spider plant once its roots have developed sufficiently, just like you would any other type of plant. As long as there is adequate room for their root balls, you can plant them separately in each container or up to three plants per pot.
A decent, well-draining potting soil will aid in guaranteeing that the roots don’t get overly damp. The ideal soil mixture is one marketed for indoor usage. Add some coconut coir or fine moss, perlite, sand, or all of the above to your soil to make it lighter if you don’t have an indoor potting mix.
4. Maintain Your Propogated Spider Plants
Start numerous spider plant babies in the same pot for a thick, bushy plant. Just as well, plant a few spiderettes next to your mature spider plant if it isn’t as full as you would want. Until healthy new growth shows the plant has rooted, water the fledgling spiderettes as required to keep the soil slightly damp but never saturated. You may begin regular maintenance for your new spider plant now that it is progressing nicely.

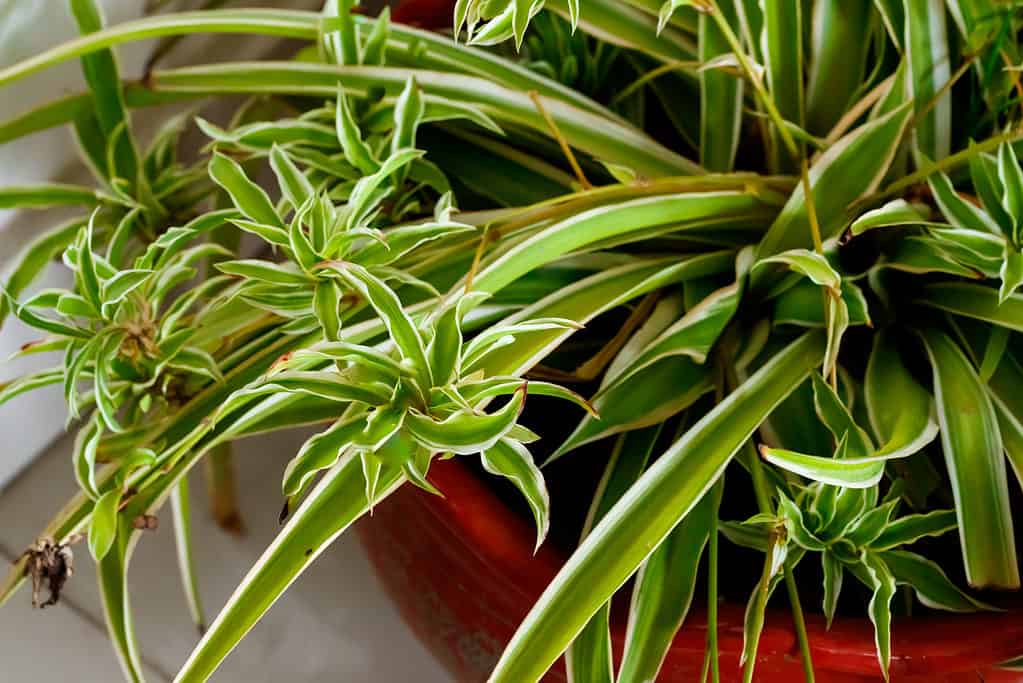
Spider plants (pictured) that are propagated in soil tend to have sturdier roots.
©iStock.com/Greenseas
How To Propagate Spider Plants in Soil
The easiest way to get roots to grow from your spiderettes is by potting, though doing so is more time-consuming than water propagation. Some of the offshoots that dangle from the mother plant may already be developing roots. Others might not yet have established roots, but they will probably do so in the future.
1. Harvest Your Spiderettes
Wipe the blade of your cutting tool with alcohol to clean it, whether it’s an extremely sharp knife, flower shears, or clippers. Take care to delicately remove the spiderettes from the mother plant’s stolon. To do this, cut directly along their base.
2. Fill a Pot with a Seed Starter Mix
Add soil-free seed starting mix to a container. Make a hole just big enough to fit the bottom of the new spider plant using a pencil or stick. Make the hole deep enough to accommodate the roots if you gathered offshoots that have already begun to produce roots.
3. Plant Your Spiderettes
Put the spider plant in the ground, burying the roots completely. Keep the plant’s base parallel to the soil’s surface. Before planting, if you want to apply root hormone, dip the bottom of the spiderette into it as directed by the product’s label. Start by moistening the mixture but do not saturate it.
4. Regularly Check on Your Spiderettes
Put your newly potted plant in a warm location with some light from the side. Give the roots time to spread out and become established in the soil. Try giving the plant a little tug; if you encounter resistance, your plant has rooted. Your plant has not yet been rooted and requires some more time if it feels loose.
How To Propagate Spider Plants via Stolons
This approach most closely resembles what would occur in nature. Asexual propagation occurs when the plant sends out new stolons that are covered in soil, the spiderette roots, and the stolon breaks or is severed. This technique, which may be carried out in the same container as the mother plant and requires no special instruments, is the most natural method. You may transplant your propagated plant later or start it in another pot immediately.
1. Fill a Pot with a Seed Starting Mix
Add soil-free seed starting mix to a container. Make a hole that is only as deep as the starting roots using your pencil or stick.
2. Plant Your Spiderettes
Do not sever any spiderettes from the mother plant! Next to the mother plant, set the pot you intend to use, and insert the spiderette that hangs from it into the newly created hole. Instead of removing any spiderettes, you are creating a sort of network of plants.
3. Ensure Your Plant Gets Lots of Moisture
Your main concern should be keeping the beginning mix wet because the mother plant will still feed the spiderette while it is rooted.
4. Prune Away Your Established Spiderette
Cut the established spiderette plant from the mother plant as it begins to develop to create two separate spider plants. Use the methods we mentioned earlier to test if your spiderette has rooted.
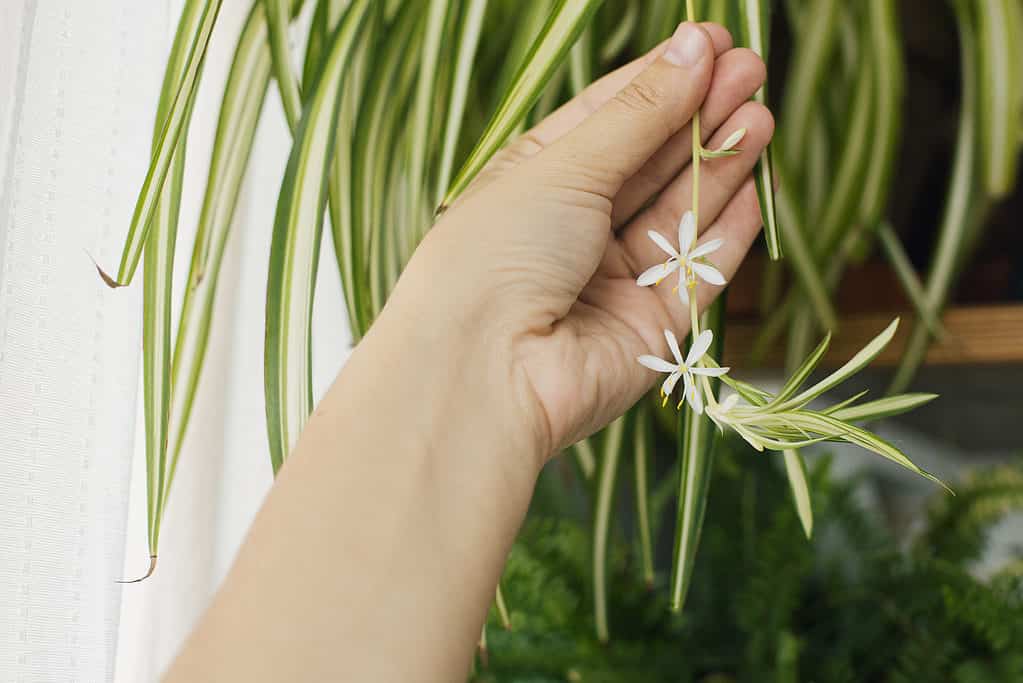
Spiderettes develop after spider plant flowers (pictured) die off.
©iStock.com/Bogdan Kurylo
When Should I Propagate My Spider Plant Babies?
Almost any time of the year is a good time to propagate your spider plants. However, the spring, summer, and fall seasons are the simplest and fastest for doing so. When babies have their roots under them, they are the ideal moment to remove them. They might not propagate if they aren’t grown enough. Before collecting your cuttings, we advise waiting until the infants have developed a few beginning root formations of their own. It’s better to wait till the spider plant babies are a little bit more grown if the roots are absent or you can only see little nubs.
How to Transplant Spider Plant Babies
You shouldn’t move your baby spider plants into a container with new soil until their roots are two to three inches long. Give them plenty of water, and let the extra run down the bottom. Keep it equally wet until the plant has established itself in its new pot but avoid overwatering. After being transplanted, they could droop for a few days, but within a week, they should reappear. Spiderettes that were grown in water will recover from transplanting more slowly than those that were established in soil.
Tips for Propagating Spider Plants
Although the spring and fall growing seasons are the optimum times to propagate spider plants, this plant is so simple to cultivate that it may be propagated at any time of the year. Growing spider plants from seed, dividing them, or cutting spiderettes and re-rooting them in water, soil, or through their stolon are the only ways to produce new spider plants. Spider plants cannot be grown from leaf cuttings.
These warm-weather perennials thrive in warm, humid environments when cultivated inside; they cannot withstand temperatures below 50 degrees F. Regular watering is necessary, and these plants enjoy damp but not soggy soil. At least once per week, and perhaps less in the late fall and winter, water the newly propagated spiderettes.
Although it may grow in various soil conditions, it thrives in loamy, well-draining soil. Throughout the growing season, which runs from spring to fall, fertilizer should be applied once each month. Once the roots of your plant have outgrown the pot, repot it as necessary. Spider plants enjoy bright indirect light or light shade.
Brown tips on the leaves of spider plants (pictured) are a common issue that propagated plants experience.
©iStock.com/niuniu
Common Problems with Propogated Spider Plants
Young spider plants that have been propagated can suffer from a few common problems, each of which have easy solutions.
Brown tips on the spiderette’s leaves are the first possible issue. Young propagated spider plants can often develop dark, desiccated tops that can be removed. We advise retaining a little portion of the brown border to prevent introducing bacteria to a freshly cut leaf. Since propagated spider plants can be quite sensitive to the chemicals used to purify municipal tap water, using tap water is a typical cause of this tip burn. Use filtered water or dechlorinating drops in your tap water to prevent tip burn. Distilled water can also be used. Dried tips can also be caused by inadequate moisture, whether it comes from humidity or irrigation. So, be careful to water your plants enough.
Like other indoor plants, spider plants are susceptible to pests like scale and mealybugs. If the infestation is minor, the pests may usually be eliminated by rubbing alcohol in a cotton swab and subsequent treatment with mild organic soap and vinegar. Unfortunately, for protecting your other plants, it’s usually advisable to throw away your plant after infestations have become well-established.
Issues with Propagated Spider Plants
The problem of root rot is another potential issue that can affect propagated spider plants. Since spider plants like to be somewhat root-bound, it may be easy to overlook if they outgrow their container and begin obstructing the pot’s drains. Pay special attention because if the roots of your plant can’t drain properly, they’ll sit in too much water and decay.
If your spiderettes aren’t rooting, it could be because they are too young or their environment is a bit too chilly. Use only mature spiderettes, and ensure that they are kept in a warm location while they grow.
Spider plants are delightful indoor plants. While they aren’t particularly expensive to buy, you can save a lot of money on new plants by propagating them yourself. Not only is propagation beneficial for the plants, but it allows plant parents to clean up the look of their mother plants by removing their spiderettes. Plus, it’s just plain fun to do!
Do you want to learn even more about the incredible and resilient spider plant? Take a look at our complete guide to spider plants here!
The photo featured at the top of this post is © iStock.com/jaanalisette


Sources
- NCSU Staff, Available here: https://plants.ces.ncsu.edu/plants/chlorophytum-comosum/
- Susan Mahr, Available here: https://hort.extension.wisc.edu/articles/spider-plant-chlorophytum-comosum/
- Mary H. Dyer, Available here: https://www.gardeningknowhow.com/houseplants/spider-plant/propagating-spiderettes.htm
How to Add Us to Google News


FAQs (Frequently Asked Questions)
Can spider plants be propagated from cuttings?
Spider plants can be propagated via division or by cutting off spiderettes, or baby spider plants, from the mother plants. Leaf cuttings cannot grow new plants.
Should I cut off the spiderettes on my spider plant?
Yes. Doing so can help encourage the health of the mother plant, and the spiderettes can be used to propagate new plants.
Should spider plants be propagated in water or soil?
Planting your spiderettes in soil is the easiest way to propagate them. However, letting them sit in water for a week before planting can be beneficial for overall hardiness.
Thank you for reading! Have some feedback for us? Contact the AZ Animals editorial team.