
While Brussels sprouts may have a bad rep for tasting bitter, when prepared properly (baked, roasted, or steamed, not boiled!), they have a delightfully nutty and earthy flavor. They’re also fun to grow and have a great ornamental look in the garden. If you’ve ever wondered how to grow Brussels sprouts and thought of trying your hand at growing these underrated brassicas, you’ve come to the right place!
In this guide, we’ll discuss the botanical classification of Brussels sprouts, their native range, characteristics, and how to grow them from seed and by transplanting.
So, set your childhood memories of badly boiled brussels sprouts aside cause we’re jumping in!
Brussels Sprouts: Botanical Classification, Native Range, and Characteristics
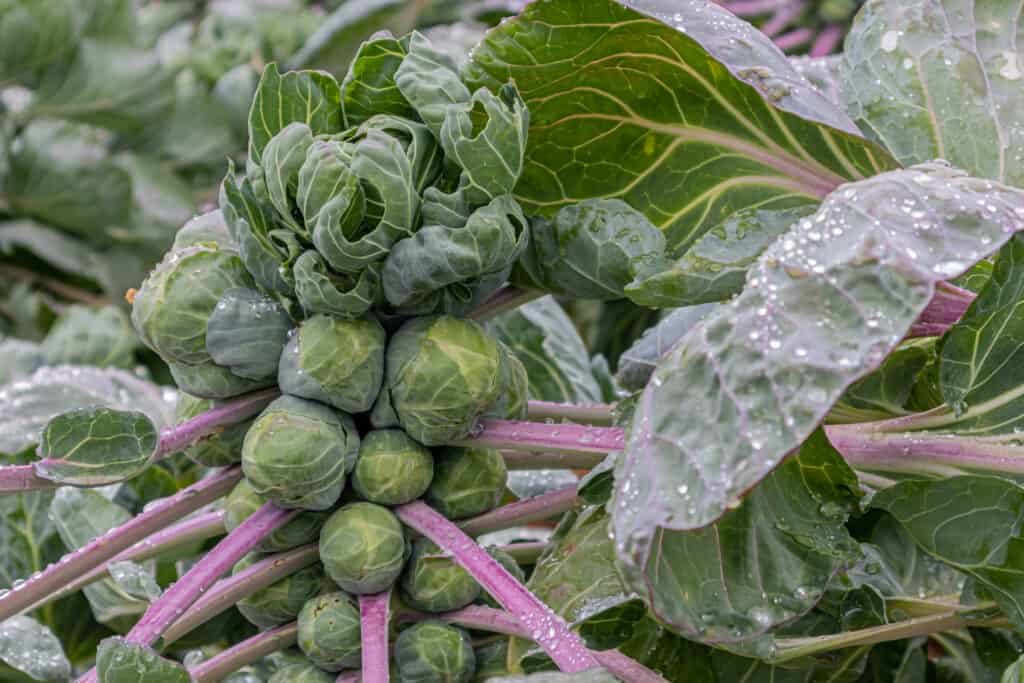
Thanks to their hearty nature, growing Brussels sprouts isn’t very difficult.
©mm7/Shutterstock.com
Brussels sprouts belong to the Brassicaceae family and are descended from the wild cabbage Brassica oleracea. While they are a separate domesticated variety, Brussels sprouts are the same species as other brassicas descended from wild cabbage, such as broccoli, kale, cauliflower, and kohlrabi. As a variety of Brassica oleracea, the botanical classification of Brussels sprouts is Brassica oleracea var. gemmifera.
Native to Southern and Western Europe, wild cabbage has been cultivated by humans for thousands of years, producing the various forms we know today. Researchers generally point to two current hypotheses about the initial location of the domestication of the species: the coastal regions of Western Europe and the Mediterranean regions. One reason that supports the Mediterranean region being the origin point for wild cabbage domestication is the in-depth literary references to domesticated Brassica oleracea crops in Ancient Greek and Roman texts, spanning back to the 6th century BC.
We know that these early farmers selected various traits of the wild cabbage in various locations over thousands of years, leading to the current diversity in domesticated Brassica oleracea varieties.
As the name suggests, Brussels sprouts, which resemble a cluster of dense, small cabbages, likely originated as a cultivar of wild cabbage in Brussels, Belgium. We don’t yet know the exact century farmers first cultivated Brussels sprouts. Still, some researchers believe the date to be as early as the 1200s, with the first clearly recorded description of this vegetable dating back to the year 1587.
French settlers likely introduced Brussels sprouts into North America in the late 18th to early 19th century. Today, we know Brussels sprouts as a cool weather brassica that produces small, 1-2″ wide cabbage-like heads in clusters along a 2-3′ tall stem.
How to Grow Brussels Sprouts
An excellent crop could await you when you grow Brussels sprouts.
©iStock.com/Carmen Hauser
Brassicas are known for their hardy, adaptable nature. So, as long as you provide their basic needs, you should be rewarded with an excellent crop. To help your plants thrive, it’s important to know what growing zones their suitable for, their ideal soil and sunlight conditions, water and fertilizer requirements, and how to direct sow seeds and transplant them.
USDA Growing Zones Suitable for Brussels Sprouts
These cool-loving plants grow best in USDA hardiness zones 2-10 as they do need some cool weather to produce a healthy crop. Across their zones, they’ve typically grown annually, so they don’t require overwintering.
How to Grow Brussels Sprouts: Ideal Soil Conditions
Brussels sprouts love to grow in well-draining, fertile, loamy, and moist soil, although they are fairly hardy and grow in various soil types. If you don’t have this ideal soil type, the best thing you can do for your crop is incorporate well-aged organic compost, as Brussels sprouts need soil that is rich in organic matter. Adding in compost also increases soil moisture retention, which can be important if you have sandy soil since Brussels sprouts need a lot of water.
A slightly acidic-to-neutral soil pH is best for this plant, so aim for a pH range of 6.0-7.0. You can test your soil with a pH meter.
Ideal Sunlight Conditions
Thriving in at least 6 hours of full sun, it’s best to plant your Brussels sprouts in a south-facing direction. Providing them with at least 8 hours of full sun daily is ideal in cooler climates since the sun’s intensity decreases. This plant will tolerate light shade, but you will likely notice slowed growth, legginess, and decreased heads produced per plant.
How to Grow Brussels Sprouts: Watering Requirements
During their growing phase, Brussels sprouts need 1-2 inches of water per week, which you can achieve through deep watering a couple of times per week or using drip irrigation. Generally, when talking about watering gardens, one inch of water typically refers to the amount of water required to cover one square foot of space with one inch of water. This comes out to a bit over half a gallon of water per square foot.
Achieving consistently moist but not soggy soil is the goal. You can also apply mulch around the plants to improve water retention and reduce the growth of weeds.
Fertilizer Requirements
A good rule of thumb for growing Brussels sprouts is to apply about 1/2 cup of high-nitrogen fertilizer (such as 21-0-0) per 10 feet of row at 4 and 8 weeks after either transplanting or thinning. Doing so helps the plant to focus on vigorous above-ground growth before producing sprouts. Once the heads begin to form, you’ll want to switch to using a balanced fertilizer mix to avoid over-foliage development from high nitrogen mixes at the expense of producing dense, healthy sprouts.
When applying fertilizer, always make sure to leave a buffer zone around the plants of 4-6 inches to prevent burns. Water when feeding to increase the availability of nutrients.
How to Grow Brussels Sprouts: Direct Sowing Seeds into Your Garden
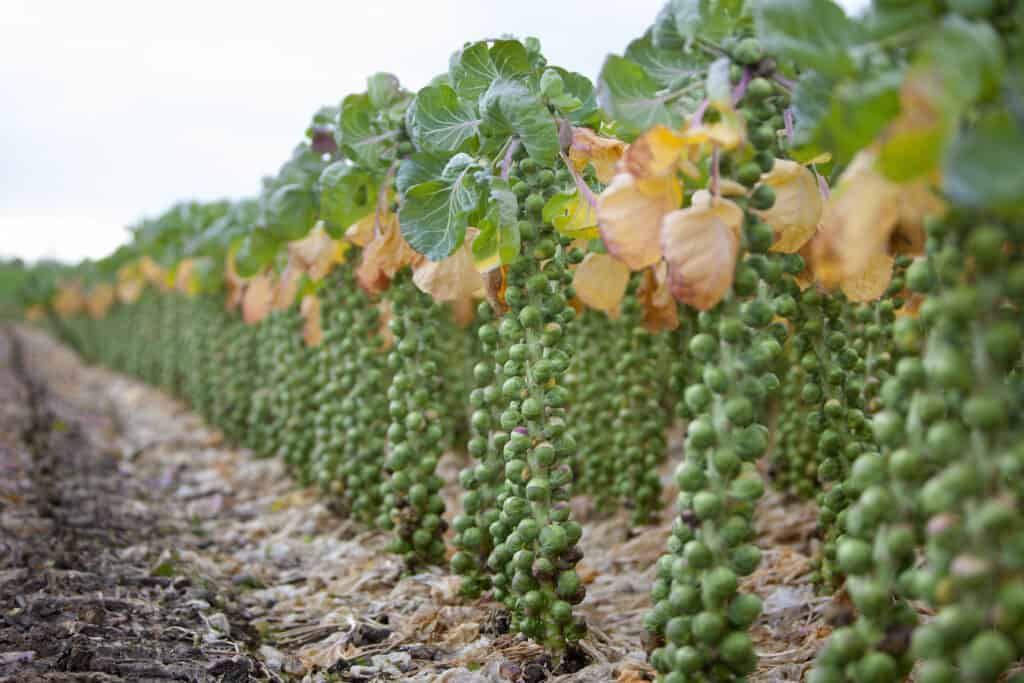
Brussels sprouts grow best in cool temperatures.
©Anton Havelaar/Shutterstock.com
Because they grow best in cool temperatures, most gardeners plant Brussels sprouts so they are ready for harvest in the fall, avoiding maturation during the summer heat. Brussels sprouts seeds germinate at temperatures between 40 and 85 degrees Fahrenheit.
These cool-weather plants develop a better flavor when exposed to a frost or two while maturing and can handle temperatures down to 10 degrees Fahrenheit.
Generally, for a fall and winter harvest, it’s best to sow your seeds directly into the soil about 10-12 weeks before the first expected frost date. When direct sowing your seeds, plant them about 1/4″ into the soil and space them 6″ apart. You can thin them to 18″ apart once the seedlings reach 6″ tall.
Brussels sprouts are slow-growing, so expect your first harvest after 80-120 days after planting, depending on the variety.
For late spring and early summer harvests, most growers tend to start their seeds indoors well before the last frost, so they can get a jump start on this slow-growing plant before temperatures are suitable for outdoor growth.
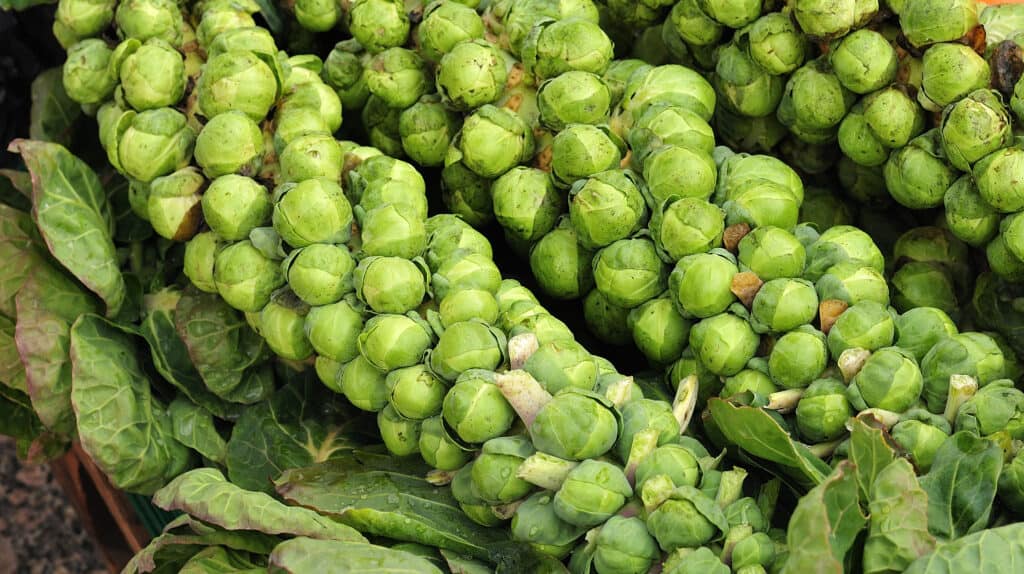
Transplanting Your Brussels Sprouts
stalks of brussels sprout laid out for sale at weekly market
©iStock.com/Carmen Hauser
If you plan on a spring or early summer harvest, starting your seeds indoors about 4 weeks before the last expected frost date or buying young seedlings is best. You’ll want to transplant your seedlings outside as soon as the danger of the last frost has passed. While these plants can improve with some frost exposure, they must be well-established with several weeks of growing outside under their belt first.
These cool-loving plants don’t like to grow in temperatures consistently above 70 degrees Fahrenheit, so make sure you live in an area suitable for cool weather growing a plant that takes 3-4 months to reach maturity.
Once your seedlings have produced 4-5 mature leaves and temperatures are above 40 degrees at night, it’s time to transplant them outside. Whether you bought them from an indoor nursery or started them from seed inside, you’ll need to first acclimate them to outdoor conditions over a week before transplanting. Achieve this by gradually increasing the amount of time they spend outside and in full sunlight. By the end of the week, they should be spending at least 6 hours in full sun and staying outside overnight.
Once the seedlings are hardened off to outside conditions, plant them 18″ apart in moist, fertile soil at a depth of about an inch deeper than their container depth.
The photo featured at the top of this post is © Brent Hofacker/Shutterstock.com


How to Add Us to Google News


Thank you for reading! Have some feedback for us? Contact the AZ Animals editorial team.