
Quite delicious on a variety of dishes in its raw and cooked forms, artichokes are a widely popular food around the world. They’re also a rather lovely plant and a joy to grow. While most people grow them for food, the flowers they produce are beautifully purple and ornamental.
In this guide, we’ll cover the botanical classification of artichoke, its native range, characteristics, and the key information you need to know to grow a successful crop.
Alright, let’s get to it!
Artichokes: Botanical Classification, History, and Characteristics
If you come across an artichoke plant before it produces its bud, you may easily mistake it for thistle as their foliage are strikingly similar to one another. Both plants belong to the Asteraceae family, which contains over 32,000 species across 1,900 genera. Artichoke is currently classified as Cynara cardunculus var. scolymus and is a domesticated descendent of the herbaceous perennial cardoon plant (or artichoke thistle), Cynara cardunculus. While you eat the stems of cardoons, the edible part of artichoke plants is the immature flower bud.
The wild ancestor of the artichoke is native to the western and central Mediterranean region, where the domestication process that created cultivated artichokes began in the first century AD. This domestication likely occurred in Sicily, in which farmers selectively bred for large, non-spiky heads that increased the edibility of the flower buds.
Cultivated artichoke plants typically grow up to 5 feet tall with their flower spike, and 3 feet across. They produce deeply serrated, lobed, and jagged leaves that look almost identical to the thistle plant. The edible portion of the artichoke is the immature buds, emerging from tall stalks that produce one large terminal head with several smaller buds. When the buds mature, they produce bright purple flowers similar to thistles.
Today, people enjoy artichokes for their earthy, slightly nutty, and herbal taste. The petals tend to have a crisp texture while the heart (the base of the flower bud) is much softer.
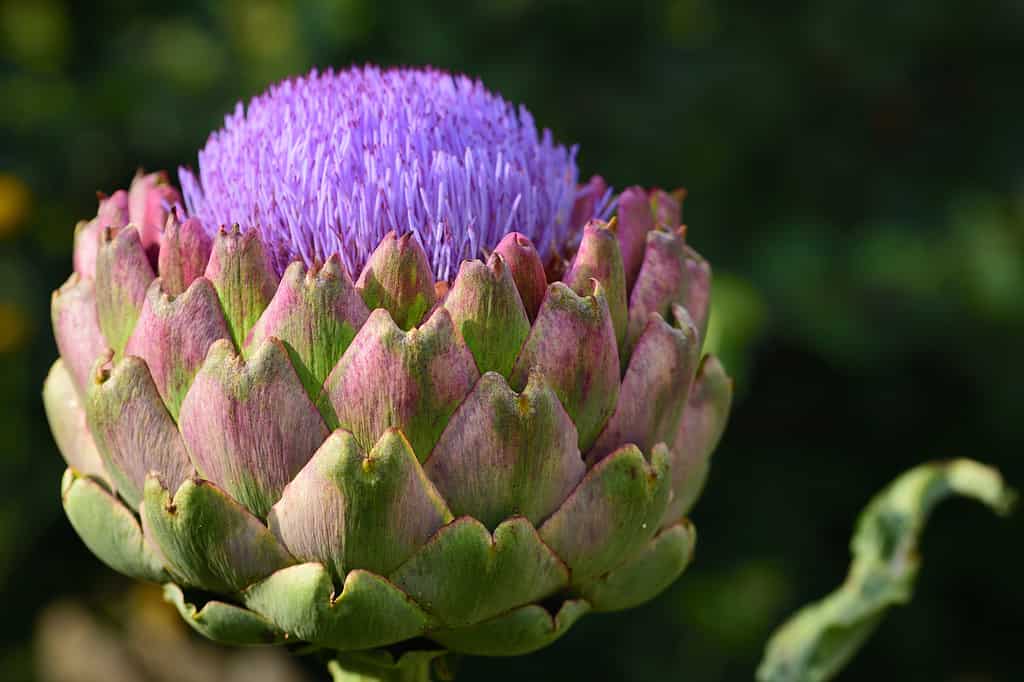
When artichoke buds mature, they produce bright purple flowers similar to thistles.
©leopictures/Shutterstock.com
How to Grow Artichokes
To successfully grow artichoke, you’ll need to know what climate zones this plant is hardy to, understand its ideal soil and sunlight conditions, watering and fertilizing requirements, and how to grow it from seed and from transplanting. Below, we’ll delve into each of these categories to help you ensure your artichokes thrive.
USDA Hardiness Zones for Artichoke
To grow artichoke as a perennial you’ll need to live in USDA Hardiness Zones 7-11 as this Mediterranean plant is not particularly cold-hardy. If you plan on growing artichoke outside of these Zones, you’ll need to either grow it as an annual or over-winter this plant inside.
How to Grow Artichokes: Ideal Soil Conditions
For best results, grow artichokes in sandy to loamy, deep, well-draining, moist, and fertile soil. Their soil pH preference is slightly acidic-to-neutral (6.0-7.0). These plants can develop a deep root system of 3-4 feet, so providing an ideal soil structure that is at least that deep will help ensure your plants thrive.
Due to their sensitive, deep root systems, artichokes don’t fare well in compacted or rocky soils that prevent them from adequately spreading. If you have soil that is primarily clay, you’ll likely need to build healthy soil on top of the ground, as tilling amendments multiple feet into the soil can lead to further compaction problems, requiring you to deep-till your garden every year.
For soil that is mostly sand, you can add in peat, well-aged compost, and manure to help retain moisture and nutrients.
Ideal Sunlight Conditions
Artichokes can grow in partial to full sun, but they definitely prefer at least 6 hours of full-sun conditions. Growing in south-facing beds is ideal for this sun-loving plant. When planting, it’s best to space them about 4 feet apart to allow room for growth but also to prevent larger plants from shading out the smaller ones.
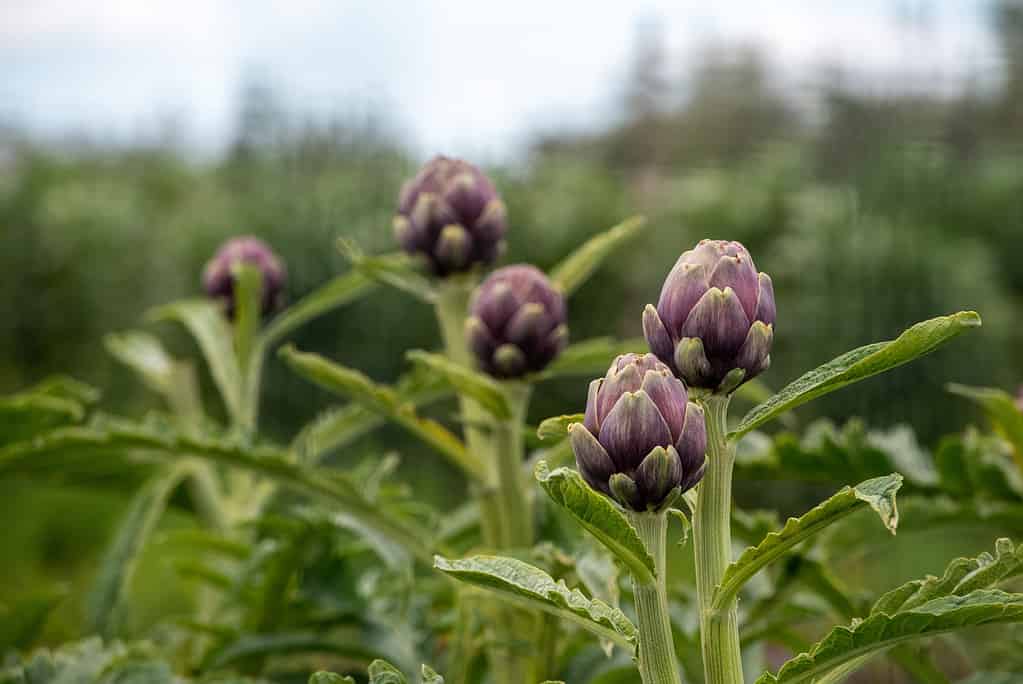
Artichoke plants prefer at least 6 hours of full-sun.
©iStock.com/imagoDens
How to Grow Artichokes: Watering Requirements
Artichokes require a lot of water to produce their tasty flower heads. They need about 1-2 inches of water per week during their growing phase, spread out by about 2-3 applications per week. Your goal is to fully soak the root area, but not create puddles. Puddling is a sign that the roots are no longer up-taking the moisture and that the soil is having trouble draining the excess water. If your soil is sandy, you can add a layer of mulch around the plants to help retain moisture.
How to Grow Artichokes: Fertilizer Requirements
These plants are heavy feeders and they specifically need high amounts of nitrogen in their fertilizer mix. For best results, apply 2 teaspoons of a high-in-nitrogen fertilizer once a month to encourage strong foliage and flower bud production. For this plant, you can use NPK (nitrogen-phosphorus-potassium) mixes such as 21-0-0 and 16-4-8 NPK liquid mixes that you can apply when watering your plants.
If you’re growing from transplants, you can wait 3-4 weeks after transplanting to apply fertilizer. This can prevent root burn to the plants since they are already in a sensitive state from transplanting.
Growing Artichokes from Seed
If you plan on direct-sowing your artichoke seeds outside, you’ll need to wait for the soil to warm up enough for them to successfully germinate. Some plants require cold exposure to trigger seed germination, but artichoke is the opposite. These warm-loving plants need soil temperatures of 70-80 degrees Fahrenheit before you can direct sow them into the garden.
Since you may be waiting many weeks before spring temperatures increase the soil temp to this degree, many gardeners opt to start their seeds in-house or in greenhouses. You can start them in seed flats, planting at 1/4 in moistened potting mix. Place the trays in a sunny location and keep the soil slightly moist. Germination of artichoke seeds typically takes 10-14 days. Once your seedlings have emerged and reached 2-3 inches tall, it’s time to transplant them into small pots while you await for ideal outdoor temperatures.
Most varieties of artichokes reach harvest maturity from seed in 85-100 days.
How to Grow Artichokes: Transplanting
Whether you’re buying young artichoke plants from a nursery or growing them from seed inside, the process of transplanting your seedlings outside is the same. You’ll need to first harden them off to outside conditions over about 10 days, depending on weather conditions. This will help ensure that the young plants don’t succumb to transplant shock. Follow the below steps to successfully outside-acclimate your seedlings:
- Choose a mild, cloudy, windless day with temperatures above 60 degrees, and set your seedlings in a shady location for 2 hours. Then bring them back indoors. Repeat this first step for days 1-3.
- On day four, set your plant outside for 2 hours in partial shade and 2 hours in full sun. Repeat this second step for days 4-5.
- On days 6-7, set your plant outside for 2 hours in partial shade and 4 hours in full sun. If temperatures don’t drop below 60 degrees, leave the plants out overnight.
- On days 7-10, leave your plants outside for at least 6 hours of full sunlight and overnight if weather permits. At this point, your seedlings should be much better prepared for growing outside.
Once temperatures are routinely over 70 degrees and any risk of frost has well-passed, you can transplant your seedlings outside. They should be about 8 weeks old at this point and have 4-5 healthy leaves on them with a bouncy, upright stem. To transplant artichoke seedlings, dig holes that are about an inch deeper than their containers, then space them about 4 feet apart with rows 6-8 feet apart.
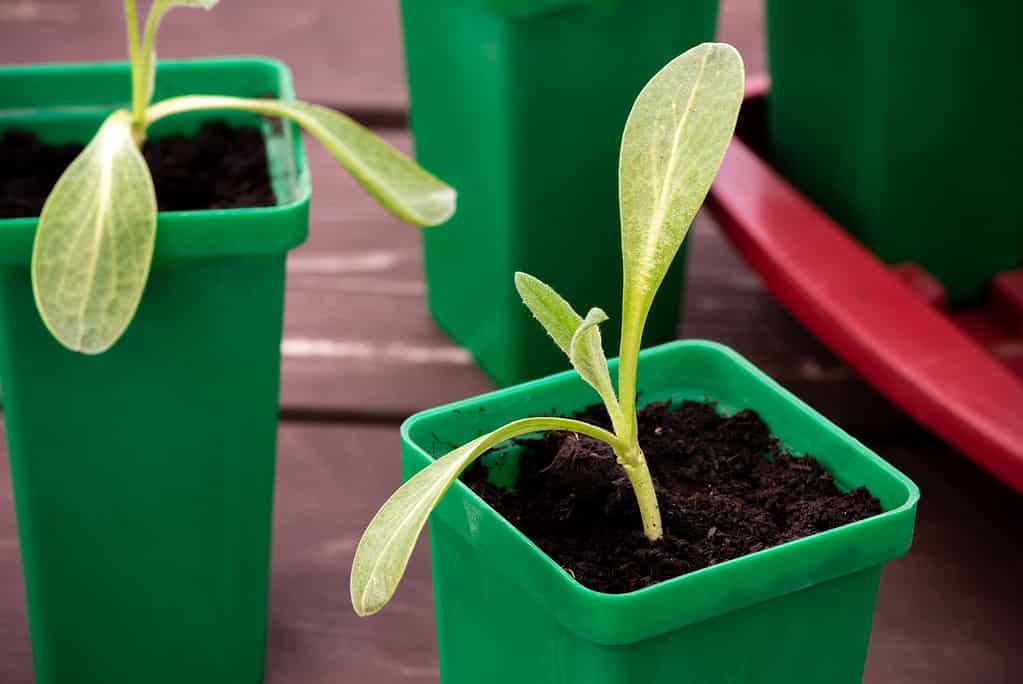
Prior to transplanting your artichoke seedlings outside you’ll need to first harden them to outdoor conditions over a period of roughly 10 days.
©Svetlana Monyakova/Shutterstock.com
The photo featured at the top of this post is © pokku/Shutterstock.com


How to Add Us to Google News


Thank you for reading! Have some feedback for us? Contact the AZ Animals editorial team.