
Interested in growing delicious edible mushrooms at home? Well, the great news is that you can, and there are various methods!
This guide will explore indoor and outdoor methods of growing mushrooms and explain the processes in depth. We’ll only discuss growing saprobic mushrooms, as successfully cultivating mycorrhizal mushrooms can be a much more complicated process.
So, without further ado, let’s begin!
Main Methods of Growing Mushrooms at Home
If you want to cultivate mushrooms at home, you have two main options:
- Outdoor growing
- Indoor growing
We’ll cover both of these methods broadly and then give a step-by-step example of each method. The general process of cultivating saprobic mushrooms involves inoculating the mushroom in a suitable growing medium with the mycelium of the species. What type of log or growing medium (such as sawdust or mulch) you use depends on the species or genus of mushroom you’re growing.
Saprobic mushrooms derive their nutrients from decaying dead organic matter. So to grow fruiting bodies, saprobic mushrooms need to grow in a medium where they can decompose and derive nutrients. This will allow them to form their fruiting bodies and, thus, create more spores.
Growing Mushrooms at Home Outdoors
The oldest method of cultivating edible mushrooms involves growing them outdoors in suitable climates by inoculating the growing medium with spawn. Mushroom spawn is a substrate with mycelium growing on it. You can either purchase spawn or grow mycelium through a spore culture or through cloning. For the outdoor method, the medium you’ll want to inoculate with the mycelium is typically either freshly fallen logs or a mushroom growing bed. We’ll discuss each of these outdoor growing methods below.
Whether you choose the log or mushroom bed method, you’ll want to consider shade requirements and wind protection when choosing your growing location.
Log Method
To cultivate mushrooms on a log, you’ll need to first pair the right log with the species of mushroom you’re growing. For example, if you want to grow pearl oyster mushrooms (Pleurotus ostreatus), you’ll want to inoculate the spawn into a healthy hardwood species. Oysters are highly adaptable and will grow on many hardwood species, so you can often pick a hardwood local to your area. Oysters grow well on birch, oak, alder, poplar, maple, beech, aspen, elm, and willow.
Ideally, you’ll want to choose logs about 4-6 inches in diameter, cut into 3-4-foot long sections. This length ensures the logs aren’t too heavy to move around, while the diameter measurement ensures you can drill into the logs to create inoculation holes. A general rule of thumb is that your log will produce one year for every inch it is wide. So, if you have a log that is 5 inches in diameter, it can produce flushes for as many as 5 years.
Resting Your Logs
Choosing a freshly cut or fallen log that is not diseased is important, as it will likely already be invaded by other fungi, and your mycelium will have to compete to grow. Some sources say you’ll also want to let the cut log rest for 2 weeks or more (depending on where you live) to kill off any natural fungicides, but this doesn’t seem to be necessary. This same process can aid in drying out any overly saturated logs.
If the log is too wet, the mycelium doesn’t have any air space in the log to grow. If the log is too dry, the structure of the wood is changed to the point that it won’t properly support fungal growth. The log becomes too dry when it has 20-30% moisture content.
If your logs are too dry, you can submerge them in water for 24 hours, let them rest for another 24 hours, and then inoculate your logs. However, these logs will often need more moisture support before each flush.
For example, if you live in the Northeast of the US and cut your logs in the Winter and store them uncovered, you’ll likely have to wait several months before the logs thaw and are dry enough to inoculate. A convenient way to check your logs’ moisture content is to use a moisture meter. You can also look for signs such as hairline cracking at the ends of the logs. These cracks should be no more than 1/3rd to 2/3rd the width of the log end.
Inoculating the Logs
Once your logs are ready to support the growth of your mushrooms, you’ll want to inoculate the logs. One of the easiest ways to do this is with mushroom plugs. You can purchase these plugs, which are small, cylindrical hardwood dowels inoculated with cultures from various species. Keeping with our pearl oyster example, you’ll want to make sure you purchase a strain of Pleurotus ostreatus that will thrive in the season in which you’ll be inoculating the logs. This is most important when starting your plugs in the Fall or Winter since you’ll want to order a cold-hardy Pleurotus ostreatus strain. Below, we provide a step-by-step guide for inoculating logs.
- Once you have your plugs, it’s time to prepare the log by drilling (with a 5/16th drill bit) an approximately 1-inch hole every 6 inches along its entire length.
- Rotate the log every 2-3 inches, drilling another row with the holes offset from the previous row by 3 inches. This creates a diamond pattern of holes around the log and supports the plentiful mushroom flushes.
- Next, fill the holes with mycelium-filled plugs and gently tap the plugs in (if tightly fit) with a hammer or mallet.
- Seal them by brushing melted wax over the top of the plugs. Sealing the holes protects the spawn from drying out or being contaminated by other fungi.
- Finally, you wait for the mushrooms to flush! The time will depend on the species and strain of mushrooms, the thickness of the logs and environmental conditions with most logs taking between 6 months to 18 months before their first flush.
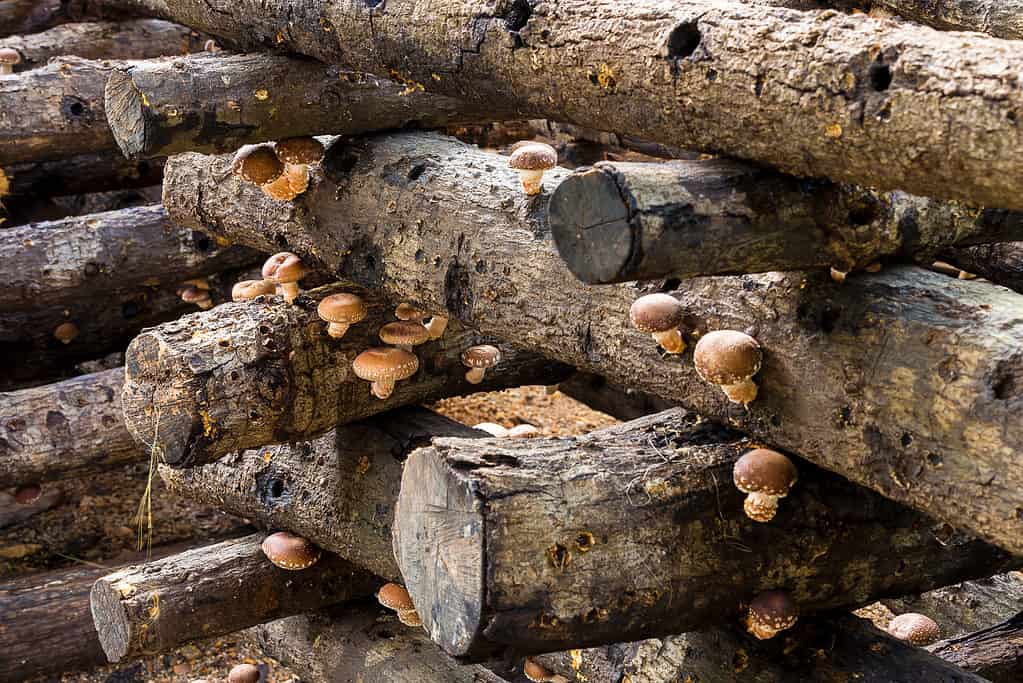
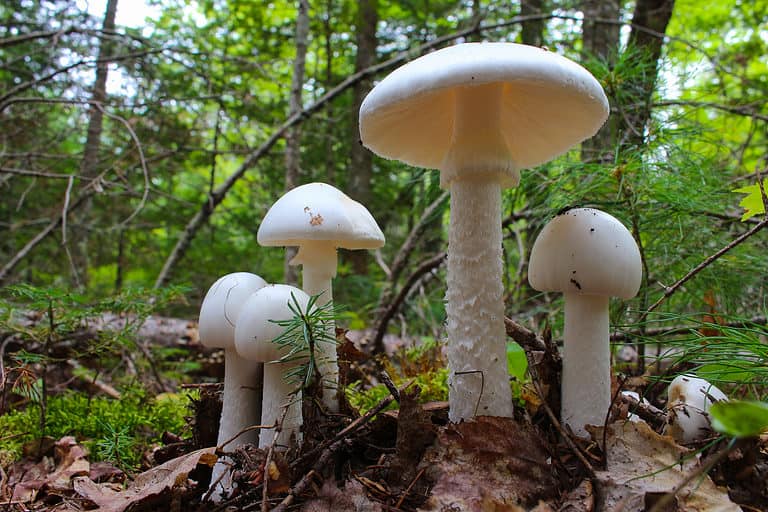
Cultivating mushrooms on logs requires the perfect pairing between species of log and species of mushroom.
©Saravut Biacharas/Shutterstock.com
Water Management
Also, note that if you live in an arid region or the log’s moisture content drops below 25%, you’ll need to keep the logs watered. Ideally, you should keep your logs between 35-50% moisture content. When watering, know that infrequent and deep watering is preferable to frequent, light watering. Ultimately, your watering needs will depend heavily on your local climate. Leaving them at least partially shaded and away from direct wind can help with moisture retention.
Outdoor Mushroom Bed Method
Another common method of growing mushrooms at home outside is to build mushroom beds. These beds are similar to garden beds for plants, except they’re built to support mushrooms’ nutritional and environmental needs.
Choosing the Location and Growing Medium
Firstly, unless you’re growing a mushroom that thrives on sunny lawns, you’ll want to pick a shady spot protected from the wind to grow your mushrooms. You can fill in areas of your garden where sun-loving plants don’t thrive with shade-loving mushrooms!
Next, you’ll need to choose a growing substrate. This substrate can be hardwood wood chips, compost, straw, or organic materials. What medium you choose depends on the species you are growing. Crimini mushrooms (Agaricus bisporus), for example, thrive in a moist compost mix of straw, gypsum, chicken manure, and canola meal. In contrast, Wine cap mushrooms (Stropharia rugosoannulata) grow wonderfully in straw or wood chip mediums. Below, we’ll provide a step-by-step guide to building a mushroom bed.
Building the Bed
- The best way to prevent competition from other fungi is to lay damp cardboard on the chosen area. You can line the cardboard with logs to create a bordered area.
- Next, sprinkle a dusting of mushroom spawn over the cardboard. Then, add in about 3 inches of the growing medium and mix in about half of your spawn. You’ll need to ensure you’re using the correct ratio of a spawn-to-growing medium in the mushroom bed. For example, if using straw, it’s ideal to use 1lb of spawn for every 5-20 lbs of straw.
- After mixing in your spawn and substrate, you’ll want to remove large air gaps in the growing substrate by compacting the bed.
- Lightly water the mushroom bed.
- Add a layer of torn-up cardboard to help the bed retain moisture.
- Then, mix in another 3 inches of substrate and the rest of the spawn.
- Once your spawn is mixed in, add shade, more moisture retention, and protection from the wind by adding a couple of inches of leaves.
Water Management
So, your mushroom bed will need to stay moist but not soaking wet, which will create an anaerobic (lacking oxygen) environment. If you grab a handful of the substrate, you should be able to squeeze out a couple of drops of water, but it should not be soaking wet. It also should not be dry to the touch. Generally, you’ll want to water your mushroom bed daily for the first week after inoculation, dropping to every other day the following week and then watering as necessary to keep the bed moist.
Harvesting
Growing in mushroom beds typically results in much faster flushes than on logs, as the mycelium has easier and quicker access to nutrients. For example, oyster mushrooms growing in a straw bed often fruit in 4-6 weeks after inoculation. But again, the fruiting time depends on the mushroom species, growing substrate, and your climate. You’ll likely need to add a couple of inches of substrate each year. Most mushroom beds last 1-2 years before needing more substrate added and possibly even more spawn.
Growing Mushrooms at Home Indoors
Growing indoors is an awesome way to cultivate delicious edible mushrooms. To succeed, you’ll need to create the proper growing conditions for your mushrooms which involves light, humidity, airflow, substrate, and temperature requirements.
Two of the various methods of growing indoors include purchasing a grow kit or inoculating a substrate-filled pasteurized or sterilized bag with a mycelium culture. You can also purchase indoor grow kits with containers inoculated and shipped just before the mushrooms are ready to fruit.
Indoor Growing Requirements
Most fungi require high humidity, low light, and consistent airflow to produce large, successful flushes.
For example, shiitake mushrooms (Lentinula edodes) require 8-12 hours a day of indirect sun or supplemental lighting to trigger fruiting. Their humidity requirements are 80-90% for fruiting and require consistent fresh air flow. Depending on the shiitake strain, the mushrooms will fruit anywhere between 41°F to 86°F. Strains are separated into cool, warm, and wide-ranging temperature categories. Make sure to know your specific shiitake strain’s temperature requirement for fruiting.
Closets can be a great place to set up a small growing location. In closets, you can isolate and control the light, temperature, humidity, and airflow. Note that this mushroom’s requirements differ in the mycelial growth phase before fruiting.
So, just make sure you know what the species and strain of mushroom that you’re growing indoors requires to thrive. If you buy a kit, it will include detailed instructions.
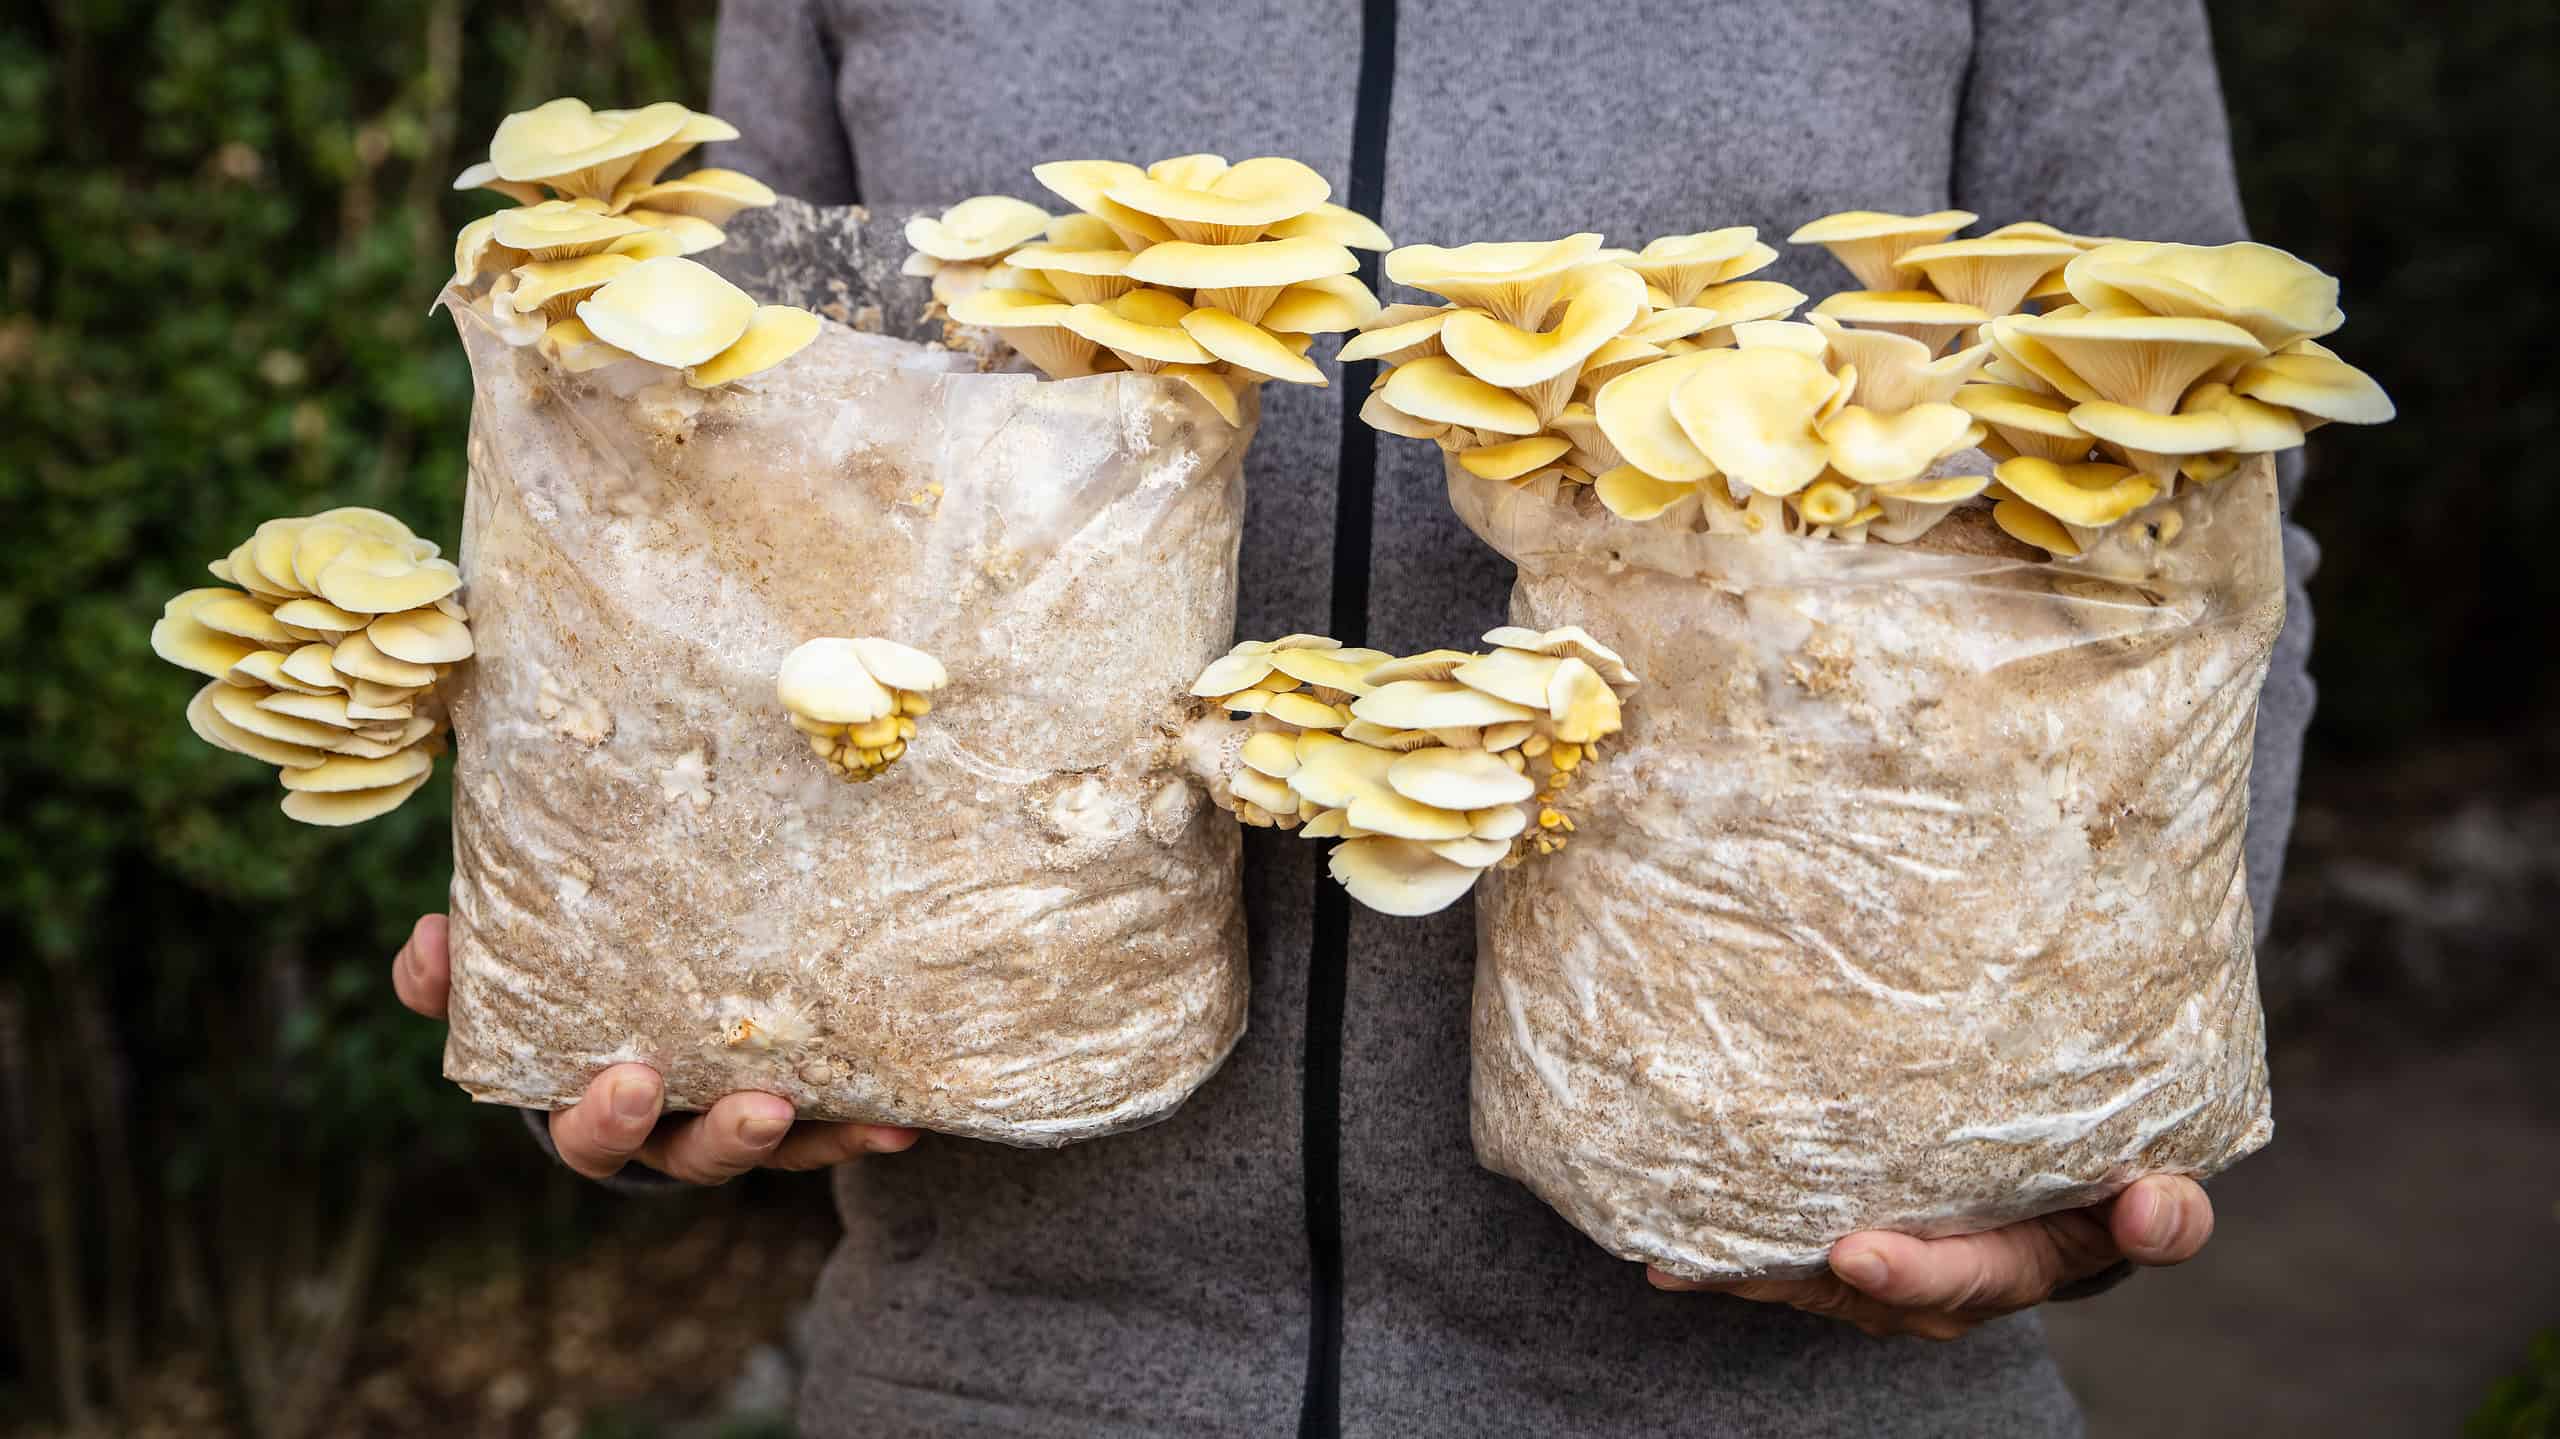
Grow Kit
Purchasing a grow kit is the easiest way to grow mushrooms indoors and is a great option for beginners growing mushrooms at home for the first time. Grow kits contain a block of a sterilized substrate (often supplemented sawdust) that is inoculated and fully colonized with live mycelium culture.
When you purchase a kit, it contains everything needed to flush mushrooms. Upon receiving your grow kit, you’ll need to place it in a suitable environment in your house (which depends on the mushroom species), expose it to air to trigger fruiting, and mist the bag 1-2 times per day.
Directions are different depending on the kit but usually involve cutting slits into the sealed bag, allowing airflow and creating spaces for the mushrooms to fruit through. You may need to place a clean, clear bag over, but not touching, the grow kit to reach the required humidity level.
Typically, kits are received when the mycelium has fully colonized the substrate, and fruiting can occur about a week after the mycelium is exposed to fresh air.
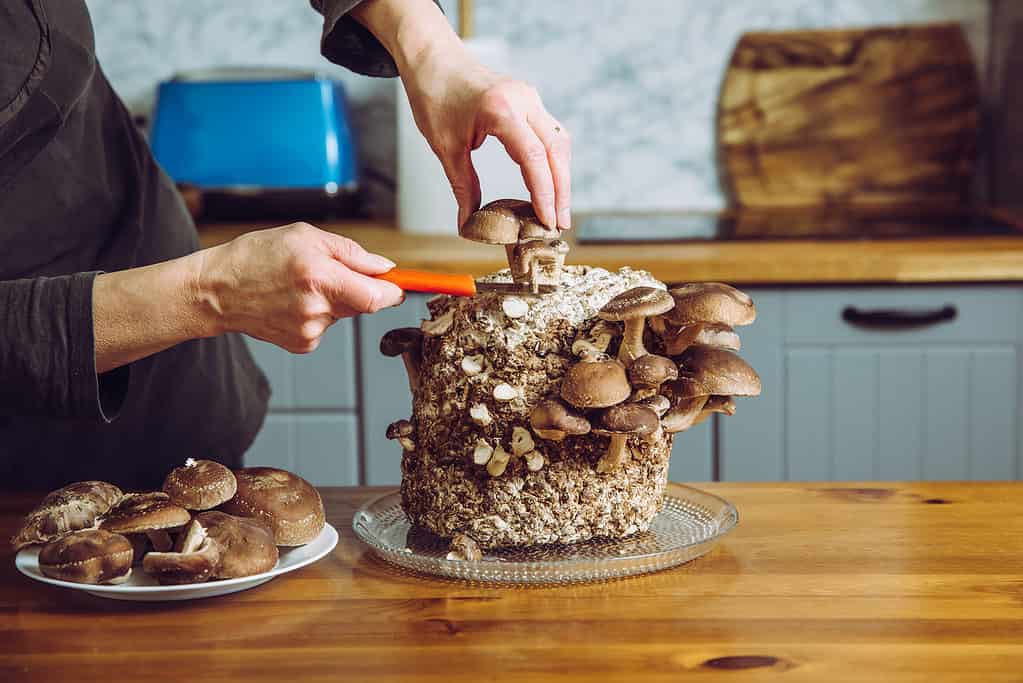
Shiitake mushrooms, or Lentinula edodes, are shown here being harvested in a home kitchen.
©FotoHelin/Shutterstock.com
Bag Method
A highly effective way to grow mushrooms at home indoors is by inoculating pasteurized or sterilized, substrate-filled grow bags with liquid mycelium culture. Growing mushrooms indoors on pasteurized substrates increases the amount produced and greatly reduces the time for the mushrooms to flush because you provide a non-competitive environment and substrate that mycelium can quickly colonize.
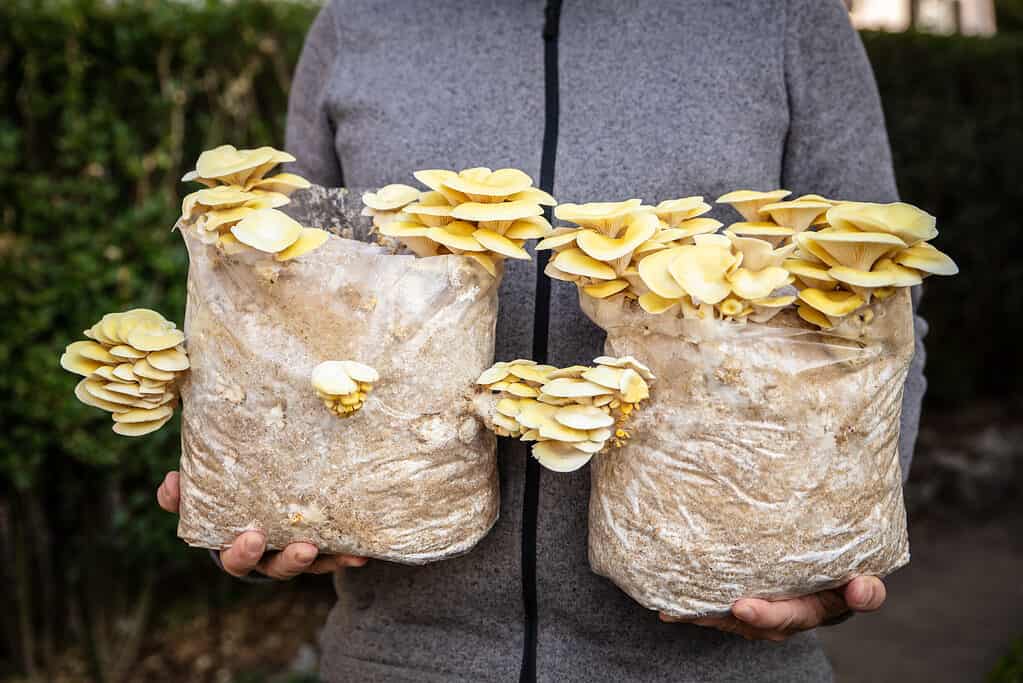
You can grow a number of mushrooms species via the bag method.
©Miriam Doerr Martin Frommherz/Shutterstock.com
Obtaining the Mycelium Culture
With this method of growing mushrooms at home indoors, you’ll need to either make a mycelium culture from a spore print, by cloning a fresh mushroom specimen or by purchasing the liquid culture from a supplier. For beginners, purchasing spawn or a liquid culture from a reputable supplier is highly recommended, as making your own culture can initially be challenging and finicky.
Choosing the Substrate
Next, you’ll need to decide what substrate you’re using, which will depend on the mushroom species. You’ll ideally use hardwood sawdust lightly supplemented with oat or wheat bran for shiitake. You will need to pasteurize or sterilize this substrate to eliminate other microbial life which can compete with or harm the mycelium. Before pasteurization, you’ll need to hydrate the substrate, continuing with our shiitake in hardwood sawdust example, 48-50% water.
Treatment methods include heat treatment, cold fermentation, lime treatment, and peroxide treatment.
Inoculating the Substrate
Once the substrate is ready for inoculation, you’ll need to insert the mycelium into the bag through the syringe port. Understand that successfully inoculating a bag without allowing contamination requires pasteurizing the substrate, using a sterilized bag with a syringe port, and sterilizing the syringe needle, which contains the liquid spawn culture. You’ll need to work in an area with essentially no airflow to decrease the chance of microbial contaminants in the air traveling into the bag. To achieve this, many inoculate the bags in a still-air box, which you can purchase from mushroom-growing suppliers or possibly even make on your own.
Place in Optimal Environment for Mycelium Colonization and Fruiting
Once you’ve inoculated the bag with the mycelium culture, you’ll need to place the bag in an ideal area for mycelial colonization of the substrate, known as the incubation phase. The ideal temperate for the incubation phase is 72-77 degrees F. Some people create these conditions by using temperature, and humidity-controlled grow rooms or tents. You can also purchase small grow tents through mushroom-growing retailers.
For shiitakes grown indoors in sawdust substrate bags, mycelial colonization of the substrate typically takes around 8 weeks, at which point the mycelium is ready for fruiting. You’ll see a browning of the mycelium for shiitake, which should cover the bag’s interior. Once it’s ready for fruiting, you can slit some openings for the mushrooms to grow through and create the required fruiting conditions described in this guide’s “Indoor Growing Requirements” section.