
Tomatoes are a major crop in California’s farms and home gardens, and the state ranks high in tomato production. Knowing when to plant tomatoes in California is essential for success, as they are vulnerable to frost. Proper timing is important, so gardeners should look up recommended planting dates for their area before getting started.
Tomatoes should be planted in California about two weeks after the last frost, although the exact timing varies by location. In this article, we’ll discuss the best time to plant tomatoes in California and some helpful garden tips.
California’s Tomato Planting Season: When to Get Started
California’s diverse geography provides advantages for its agriculture. The north region has a consistently cold climate ranging from 5a to 10b, and the south region covers Zones 5a to 11a with minimal subzero temperatures.
The ideal timing for crop planting depends on the particular region in California. For instance, it’s common knowledge to plant tomatoes roughly two weeks after the last frost. To help with planting schedules, here’s an essential guide for Northern, Central, and Southern California.
Northern California
Tomato seeds can be planted in Northern California’s cooler regions between March and June. Ground temperatures need to be between 65-85 degrees Fahrenheit for successful germination. In Crescent City, CA, the last frost is usually around March 25, so planting can start on April 8 — two weeks later. Warm-season crops can be planted all year round in counties like San Francisco, Oakland, and Alameda in the Bay Area since frost is less likely.
Central California
Knowing the expected frost dates in Central California is crucial as they vary. For Fresno, CA, the last spring frost typically happens on January 29; planting tomato plants can therefore start from February 12. Madera’s last spring frost is on February 28, so growing tomatoes from March 14 is okay. As the primary agricultural area, the Central Valley region permits year-round tomato cultivation within the 55-85 degrees Fahrenheit temperature range. You can use a frost blanket or plastic tarp to safeguard the plants from slightly cooler temperatures.
Southern California
Southern California’s extended growing season for tomatoes results from its favorable climate and location. SoCal residents can cultivate tomatoes in their gardens from March or April onwards. San Diego and Los Angeles, in particular, experience rare frost occurrences, enabling residents to grow tomatoes year-round.
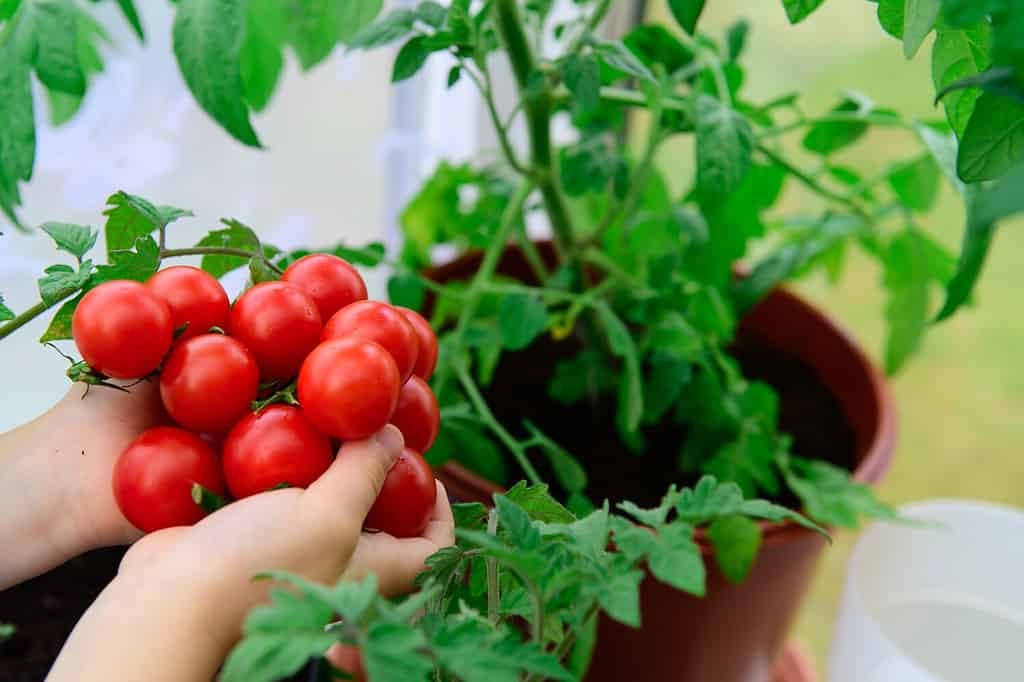
Tomatoes are one of the most popular vegetables around the world. They contain a wide range of vitamins and minerals, including A, B6, C, K1, and potassium.
©Sireli/Shutterstock.com
Tips and Tricks for Successful Tomato Planting in California
Tomatoes are among the most problematic vegetables. To produce tasty tomatoes, you must select the best varieties, start the plants off correctly, and prevent issues before they occur. Follow these established tomato growing tips to guarantee bragging rights for your tomatoes this year:
1. Select Your Ideal Tomato Seed
Starting tomato plants from seed is a cost-effective and straightforward process. To get the most out of your tomato garden, consider the following factors:
- Opt for certified organic seed to obtain organic produce.
- Choose a robust tomato variety if your region is susceptible to plant diseases.
- Choose determinate varieties if you prefer to preserve your tomatoes all at once. Indeterminate varieties produce fruit over a longer period.
- Keep the mature size of the plant in mind. Determinate plants tend to be smaller than indeterminate ones. Look for names like “patio” or “pixie” when selecting small container plants.
2. Prepare Your Planting Containers
Maximize the efficiency of container gardening by dampening potting mix before putting it into the containers. Follow these steps:
- Add water gradually and incorporate it into the soil.
- Continue adding water until the mixture is compact in your hand but not excessively wet.
- Test the soil by poking it with your finger to ensure it breaks apart easily.
- Next, fill your containers with the potting soil.
- Gently compress the soil until it’s about an inch from the top of the container.
3. Sow Tomato Seeds
Dig a small trench in the potting mix, just a quarter-inch deep. Drop two or three seeds into the trench and cover them with a light layer of the mix. Press down the mixture softly to help the seeds attach to the soil. If the surface feels dry, spray some water on it. Put your containers in a warm spot now. Check if the soil is damp but not too wet daily, and look out for sprouting. Tomatoes usually start growing in 5 to 10 days.
Additionally, give them ample space to grow, removing weaker seedlings and leaving only one strong plant per pot or cell. Crowding can stunt growth, causing stress and potentially leading to disease. Once the seedlings have sprouted their first true leaves, transplant them into separate 4-inch pots.
4. Care for Your Tomato Seedlings
Tomato seedlings require ample, direct sunlight, but during winter, even proximity to a sunny window may not be adequate due to short days. Artificial plant lighting for 14-18 hours daily is optimal for indoor growth unless a greenhouse is available. Achieving sturdy tomato plants requires keeping the young plants near fluorescent grow lights, a mere few inches away. As the seedlings mature, adjust the height of the lights accordingly. Once prepared for transplanting, select a location in the sunniest area of your vegetable garden.
Tomato plants require movement from the wind to strengthen their stems. While this occurs naturally outside, indoor seedlings need air circulation to promote growth. To achieve this, turn on a fan for five to ten minutes twice daily. Even this brief period of circulation can significantly impact plant development. You can lightly stroke the tops of the tomato plants a few times daily as an alternative. However, this requires extra effort, but you’ll enjoy their delightful aroma as a bonus.
Finally, tomatoes flourish in heat and need warmth in soil and air for optimal growth. Before planting, covering the soil with black or red plastic can accelerate warming. Evidence suggests that using red plastic mulch could enhance tomato yield.
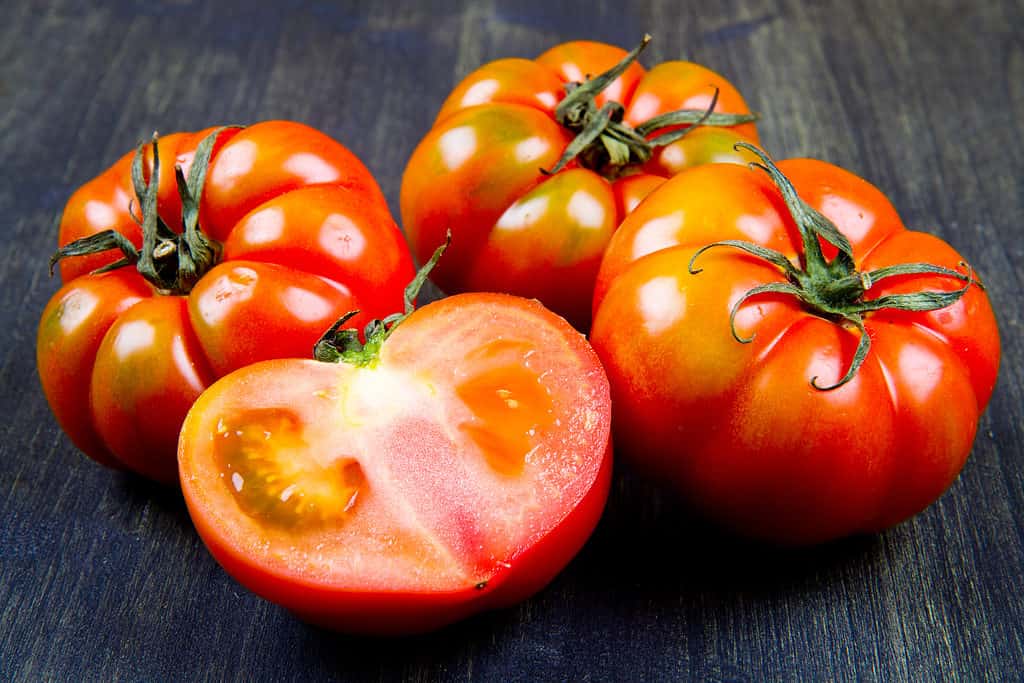
Tomatoes are an incredibly versatile vegetable that can be used in many dishes, from salads to sauces.
©Luca Santilli/Shutterstock.com
5. Transfer Tomato Seedlings into Larger Pots
Transfer the seedlings to bigger containers when they grow 2-3 inches tall and have a couple of true leaves. Ideally, 3-4-inch containers are suitable, but if planting outdoors isn’t feasible, you may have to relocate them to larger pots later.
Refill the fresh pots with damp potting soil as before. If multiple seeds sprouted in one container, you must remove some seedlings. Gently separate twisted roots or trim the unwanted seedlings from the soil’s surface; this will protect the seedling you desire to keep from harm.
Dig a hole in the new pot and put the tomato seedling — deeper than before. You can bury it up to the top leaves if it’s tall and spindly. Finally, press the soil around it softly.
6. Move the Seedlings Outside
After planting your tomato seeds, let the seedlings grow in pots and eagerly await transplantation. However, they’ll be prone to harsh environmental conditions, such as scorching heat, dehydrating winds, and pest attacks. As a result, young tomato plants face numerous risks. Thus, before transplanting, preparing the soil and hardening off the plants is crucial to ensure their protection.
Hardening Off
The hardening-off process gradually helps plants adjust to the outdoor conditions, resulting in healthier plants. Tomatoes are delicate at this growth stage and require special attention. It’s best to harden them off on clear or cloudy days without rain, with daytime temperatures no lower than the mid-50s and with minimal wind. Here are the steps to harden off your tomato seedlings:
- Find a sheltered spot outside with filtered sunlight and no wind, such as under a shade cloth.
- Bring the seedlings outside for a few hours on the first day before bringing them back inside.
- Leave them outside for a bit longer than the previous day on the second day.
- Repeat this process for five or six days, leaving them outside for longer periods each day and gradually exposing them to more sunlight.
- For the remaining four or five days, leave the seedlings outside overnight, but bring them in if there’s a risk of frost.
Remember that hardening off tomato seedlings takes patience and care, much like helping a child adjust to kindergarten.
Can You Skip The Hardening Off Process For Tomato Plants?
Nursery tomato plants are usually toughened and garden-ready. If you get them from a heated greenhouse early in the season, it’s wise to inquire if they have been hardened off. If not, leave them outside for a few days to adjust before planting them in your raised beds. It’s better to be cautious than regretful.

Hardening off helps plants adjust to life outside by slowly exposing them to direct sunlight, wind and varying temperatures. It’s a great way to ensure success when transplanting.
©lfstewart/Shutterstock.com
Soil Preparation
The soil must be prepared properly for the tomato garden to grow juicy, tasty tomatoes. Begin by tilling the area for your garden. Test the soil to determine nutrient levels and pH. Add compost and fertilizers as needed to create the best environment for your plants. Once you’ve adjusted the soil, plant your tomatoes with proper spacing, stake them for support, and water them to help them take root.
1. Tilling The Soil
- Pick a spot that receives at least 6 hours of unobstructed sunlight. Ensure the chosen location for your tomato patch has adequate sunlight to facilitate growth and yield. Stay away from areas near structures or beneath trees that may obstruct the sunlight intermittently.
- Dig the soil. Excavate approximately 8-10 inches deep using a shovel or tiller in the chosen garden area. Remove all grasses and plant roots from the topsoil. Ensure that the ground is dry before commencing the digging process.
- Eliminate rocks and debris from the soil: Search for roots, sticks, or any unwanted objects during soil excavation. Employ a garden hoe to sift through the dirt and extract sticks and debris. Remember to uproot any above-soil root systems to prevent regrowth in the garden.
- Break apart hard soil clumps using a garden hoe or your hands. Tough soil lumps can impede the roots of your tomato plants from penetrating the soil when you plant them. Use a garden rake to sift and break up large clumps for better penetration.
2. Regulating pH and Boosting Nutrient Levels
Evaluate the soil to determine its nutrient and pH content; this is crucial as plants have varying pH requirements to flourish. Identifying the nutrient content can also guide you on what to add to the soil to foster tomato plant growth. Use a testing kit to obtain and assess a soil sample from where you intend to cultivate the tomatoes.
For ideal growth, tomatoes require slightly acidic soil with a pH level ranging from 6.2 to 6.8. If the soil pH drops below 6.0, tomato plants will struggle. To produce a bountiful harvest of healthy fruit, your tomato plants need a balanced combination of potassium, phosphorus, and nitrogen. Imbalances in nutrient levels can negatively impact their health.
To get the right pH for your soil:
- Try eggshells or coffee.
- Add 1 pound of crushed eggshells for every 100 square feet if it’s too low.
- If it’s too high, mix equal parts water and cold coffee in a watering can, then apply it to the soil.
Nitrogen Levels
If your soil lacks nitrogen, consider incorporating a natural source like:
- Alfafa
- Blood meal
- Fish meal
- Feather meal
After adding the nitrogen source, check the soil to ensure the levels are balanced. Synthetic nitrogen fertilizers include ammonium sulfate or ammonium nitrate.
Phosphorus Levels
To increase phosphorus in the soil, use bone meal — an organic source. Mix it in the soil and retest it to ensure uniform levels of nitrogen and potassium. Superphosphate and rock phosphate are artificial fertilizers for phosphorus. Buy bone meal and phosphorus fertilizers at garden stores or online.
Potassium Levels
Add granite dust or wood ash to the topsoil and mix thoroughly to boost your soil’s potassium levels to match nitrogen and phosphorus content. Afterward, test the soil to confirm that it’s well balanced. Alternatively, you can use rock sand or potassium sulfate as synthetic fertilizers to increase your soil’s potassium content.
Take time to monitor your garden’s soil to ensure that these elements remain optimized for optimal growth.
©knelson20/Shutterstock.com
3. Planting The Tomatoes
Preparing the Soil for Planting
About two weeks before planting, warm up the soil gradually to avoid shocking the plants. Cover the tilled soil with black plastic to soak up the sun’s heat and warm the ground. When planting the tomato plants, remove the plastic and secure it with heavy objects like rocks or bricks at the corners. You can purchase black plastic rolls at various locations, including online, garden nurseries, and home improvement stores.
Spacing and Arranging Tomato Plants
Plant your crops with 2 feet of distance between each plant. Keep the rows 50 inches apart to give yourself room for watering and weeding. Arrange your plants into straight rows for easier watering, weeding, and harvesting. Ensure the rows are evenly spaced for simplicity in watering and accessing the plants.
Properly Planting Tomato Seedlings
Cover two-thirds of the stem when planting tomatoes to enhance their strength and root system. Dig a small hole in the soil, then position the plant and cover the stem, exposing only a third of the plant. Avoid piling soil around the stem and ensure the hole is deep enough to cover the entire plant. When using stakes to support your tomato plants, choose a 1×1 inch stake, 4 feet tall, and drive it 6-8 inches deep into the soil. Place one near each plant, 2 inches away, when planting. Please wait until the plants grow to tie them to the stakes.
Watering Newly Planted Tomato Plants
Once you’ve put your tomato plants in the ground, give them water immediately. Please don’t use too much water, or it could damage them. Water the entire garden, but don’t soak it. Just make sure the top layer of soil is damp. If watering reveals more of a plant, add more soil to cover at least ⅔ of the stem.
Closing Notes on the Best Time to Plant Tomatoes in California
The ideal time to plant tomatoes in California varies depending on the region. While the north is cooler and requires planting between March and June, the central and south areas experience more extended growing seasons. Tomatoes are vulnerable to frost, so planting should start about two weeks after the last frost. Once prepared for transplanting, select a location in the sunniest area of your vegetable garden. Following these tomato growing tips can produce a bountiful and delicious tomato crop.
The photo featured at the top of this post is © Shannon Birchler/Shutterstock.com


How to Add Us to Google News


Thank you for reading! Have some feedback for us? Contact the AZ Animals editorial team.