
Peppers are vegetables that thrive in warm weather and come in many vibrant colors and sizes. Furthermore, most varieties of peppers are resistant to garden pests and diseases. This guide will provide detailed instructions on growing and harvesting peppers successfully.
About Bell Peppers
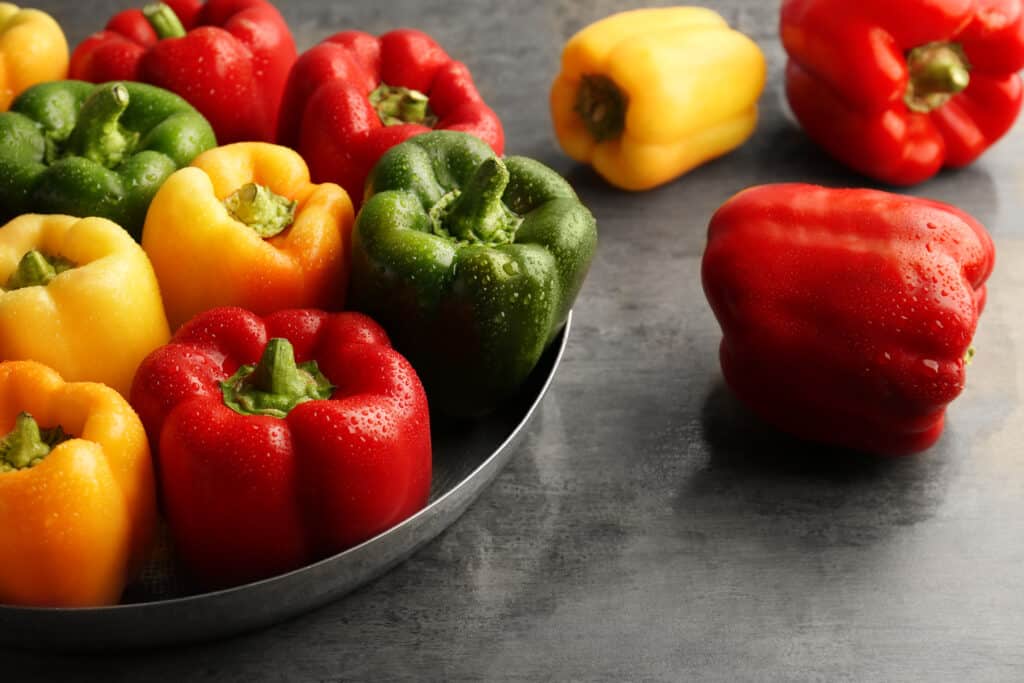
Bell peppers are safe for your dog, but only if eaten raw and without added spices!
©Africa Studio/Shutterstock.com
Growing bell peppers is a rewarding experience. Because they have a long growing season (60 to 90 days), most home gardeners opt for the convenience of buying starter plants from the garden nursery.
If you prefer to start your own pepper seeds indoors instead, Northern gardeners should warm outdoor soil by covering it with black plastic in late winter/early spring, as soon as possible. This will help ensure that your pepper plants get off to a good start when they are transferred outdoors later on in the season.
Bell peppers, which come in a variety of colors, including red, yellow, green, and orange, are an excellent source of vitamins and minerals. They contain high amounts of vitamin C as well as some vitamin A. Additionally, bell peppers have small amounts of several minerals, such as potassium and magnesium, that are essential for good health.
Bell peppers can be enjoyed raw in salads or with dip or hummus for a healthy snack. They can also be stuffed and baked to make delicious dishes. On this page, we will focus on cultivating sweet bell peppers. However, if you want to grow hot peppers, the growing guidelines are the same.
Where to Plant Bell Peppers
When growing peppers, find a spot with lots of sun and moist, well-draining soil. To ensure that your soil drains well and warms quickly, try to create rich, loamy soil with sand mixed in for drainage. You can also cause compost or leaf mold to break up heavier soils. Peppers can’t handle having wet feet, so drainage is a key ingredient to your success.
Crop rotation is another important factor in successful pepper growing. It is best to avoid placing peppers in the soil where any other nightshade plants have recently been grown. So if you grew eggplants, potatoes, or tomatoes in this spot last year, don’t plant your peppers in the same location.
When to Plant Bell Peppers
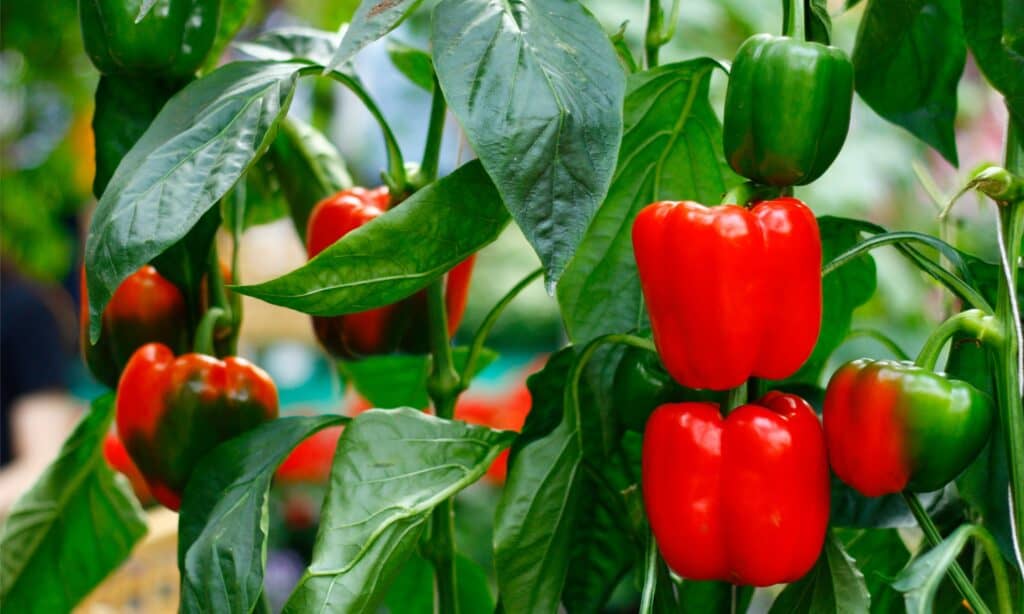
How to grow bell peppers indoors best: sow seeds 8 to 10 weeks before last frost.
©iStock.com/Vasin Hirunwiwatwong
When growing bell peppers, you must decide if you want to start them in pots indoors and plant starts or transplants outdoors. If starting indoors in pots, sow the seeds 8 to 10 weeks before your last spring frost date. This will give the plants time to develop before they can be moved outside. For outdoor planting, wait until 2-3 weeks after any threat of frost has passed and ensure that the soil temperature has reached 65°F. Planting too early could result in cold damage or the death of your pepper plants due to unpredictable weather conditions.
How to Plant
If you want to grow bell peppers indoors, plant the seeds about a quarter of an inch deep in a pot filled with potting mix. To help them germinate faster, keep the soil temperature at 70°F or higher. This might require a heat mat and some grow lights. You should see seedlings appear within two to five weeks, but don’t give up too soon. When they begin to sprout, thin out the weakest seedling and let the remaining two grow together in one pot. This will protect the peppers better than having two separate plants. Prepare your seedlings for transplanting to the outdoors by gradually exposing them to cooler temperatures over a period of 10 days. Peppers are particularly vulnerable to low temperatures, so this step is important.
If you purchase pepper seedlings, make sure they have strong stems, between 4 and 6 leaves, and no flowers. To harden off the pepper plants, position them outdoors after the frost-free date or when the average temperature is 65°F. Before placing them in the garden, mix compost into the soil about ten inches deep. When the soil temperature reaches 65°F, transplant the peppers. You can hasten the warming of the soil by covering it with black plastic or dark mulch a week before planting.
It is recommended to transplant peppers at night or on an overcast day to prevent them from wilting due to dehydration. Plant the peppers in holes that are four inches deep and 12 to 18 inches apart, with rows spaced three feet apart.
Before putting the plants in the soil, fill the empty holes with water and let it absorb. Place one teaspoon of high-phosphorus, low-nitrogen fertilizer in each hole.
When removing the plants from their trays or pots, handle them carefully and keep as much soil around the roots as possible. Plant them slightly deeper than they were originally in their container and fill the hole with soil, lightly packing it around the plant and leaving a slightly concave area to hold water.
Lastly, water the plants with liquid fertilizer and place a stake or tomato cage around each plant. Doing this while they are still young is best so you don’t pierce the roots with your stake later.
How to Grow
If the soil is dry to the touch, it’s time to water your bell peppers. Water them regularly with 1-2 inches of water per week. Avoid shallow watering as this will not sufficiently hydrate the plant and its roots. Instead, opt for slow and deep watering, which provides a stronger root system.
Ensure you do not let pepper plants wilt, as this can decrease yield and fruit quality. This is especially important in hot or desert climates where you may need to water daily during summer. Additionally, inconsistent watering can lead to blossom end rot, affecting pepper fruits’ growth and production.
To help protect your peppers from heat stress, use shade material to provide protection against the sun’s direct rays. This is especially important during hot weather, as exposure can cause blisters and papery patches on the pepper’s skin. Additionally, you should keep an eye out for temperatures that are above 85°F to 90°F or below 60°F at night. If your plants get too hot or cold due to a sudden change in temperature, then flower blossoms may drop off.
Cover the soil with mulch to keep it moist and keep weeds away. Be careful when weeding around the plants to prevent damaging the roots. Contrary to what many people think, spraying Epsom salts on pepper plants does not help them grow.
When to Harvest
The optimal time to harvest bell peppers is when they have reached their full size and color — usually red, yellow, or orange, depending on the variety. This can be 60-90 days after the seeds are planted, so check your seed packet to be sure you have the timing right. Picking them at this stage ensures that you get the highest quality fruits with a sweet flavor and a high vitamin C content.
Additionally, regular picking encourages plants to produce more flowers, leading to more fruit production! It’s important to note that leaving your bell peppers on the plant longer than necessary will become overripe and lose some nutritional value.
How to Harvest Bell Pepper
When harvesting bell peppers, use a sharp knife or scissors to clean the fruits off the plant. Check your plants every day after your first harvest and promptly pick any ripe fruits as soon as you see them so that the plant can put its energy into growing more. If left on too long, the pepper plant will stop producing fruit entirely and will be finished for the season. Check your plants regularly and pick mature fruits quickly to ensure an abundant harvest of bell peppers throughout the summer.
How to Store Bell Pepper
You’ll have a few options when storing your bell peppers. Refrigeration is the simplest and most common storage method for freshly harvested peppers. Place them in plastic bags and refrigerate them for up to 10 days. Freezing is also an option if you want to save the peppers longer term.
A popular way to preserve peppers is by drying them. Prepare the peppers for drying by slicing and removing the seeds. Cut them into 1/2-inch strips before steaming them for about 10 minutes. Then spread on baking sheets and dry in the oven at 140°F for 4 – 6 hours, turning occasionally and switching tray positions as needed until they are completely dried out. Finally, cool them down before storing them in bags or containers in a refrigerator or other cool areas of your home, away from direct sunlight or extreme temperatures that could cause spoilage. With proper care, these stored bell pepper can last several months, depending on their condition when first stored away!
Best Companion Plants
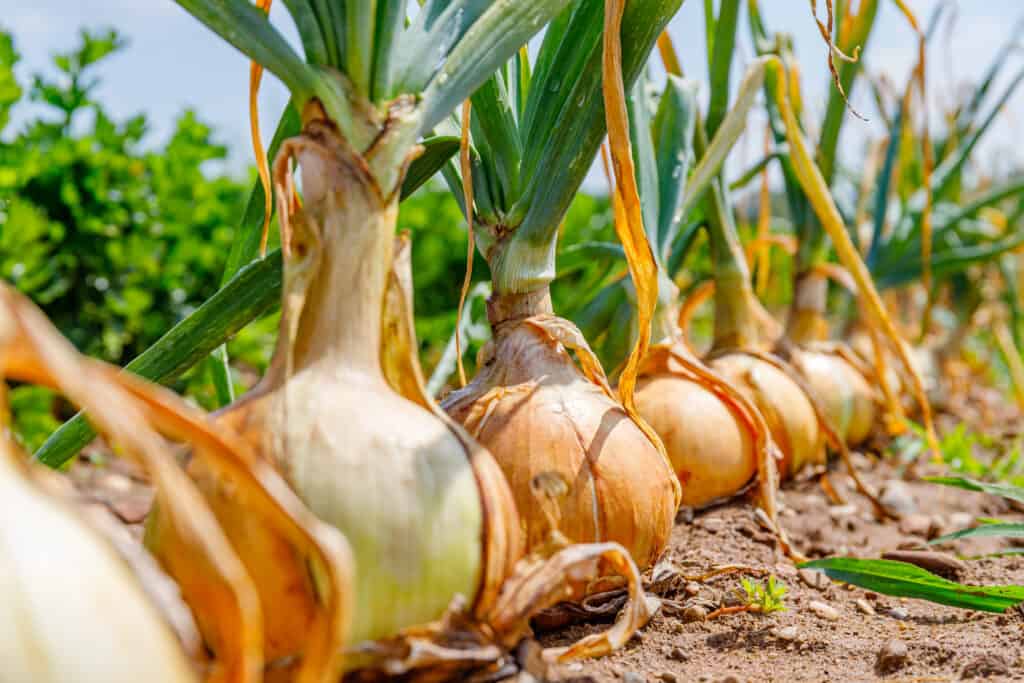
Onions make good companions when growing bell peppers.
©nnattalli/Shutterstock.com
Basil, carrots, eggplant, nasturtiums, petunias, marigolds, geraniums, onions, dill, cilantro, marjoram, oregano, chives, spinach, and tomatoes all make excellent companion plants to help your bell peppers thrive.
Basil: Growing basil with your bell peppers can improve the taste of the peppers and may also help protect them from certain pests such as aphids and thrips.
Carrots: Carrots and bell peppers are a great combination in the garden as they don’t take up the same space or sun. And carrots act as a living mulch that prevents weeds. Peppers also provide carrots with the necessary shade.
Eggplant: Bell peppers thrive when planted with other nightshades, such as tomatoes and eggplants. These plants share similar growing needs in terms of temperature, soil composition, sunlight exposure, and water requirements. Planting bell peppers together with these companion plants can create a thriving environment for all the vegetables involved. Additionally, many crops benefit from being planted together as they provide natural pest control that helps keep each plant healthy.
Flowers: Adding flowers to your pepper patch can be beneficial in many ways. Nasturtiums, petunias, geraniums, and marigolds are good companions to peppers. Not only do these flowers provide a splash of color, but they also attract helpful pollinators and keep away troublesome pests. For example, geraniums repelled Japanese beetles, while marigolds fend off squash bugs and soil nematodes.
Onions: Onions are great companions for bell peppers because they don’t require much space, guard against cabbage worms, and repel slugs and snails. These plants pair well in salsa and in the garden!
Herbs: Strong-smelling herbs like cilantro, chives, dill, oregano, and marjoram are great to plant around bell peppers because they don’t take up much space and can help ward off pests. Dill is especially useful in protecting against hornworms. Planting flowering herbs can also draw helpful bugs like ladybugs, butterflies, and moths.
Spinach: Spinach is a great supporting plant for bell peppers because it suppresses weeds without hogging sunlight or water. Furthermore, its presence creates an environment with cool and moist soil for the roots of the pepper to thrive.
Tomatoes: Tomatoes and peppers grow well together, but they must be given enough space to prevent disease and pest problems. Additionally, tomato plants need more room, so they can overshadow pepper plants if not spaced properly. Still, they make great garden friends by confusing pests.
Bad Companions
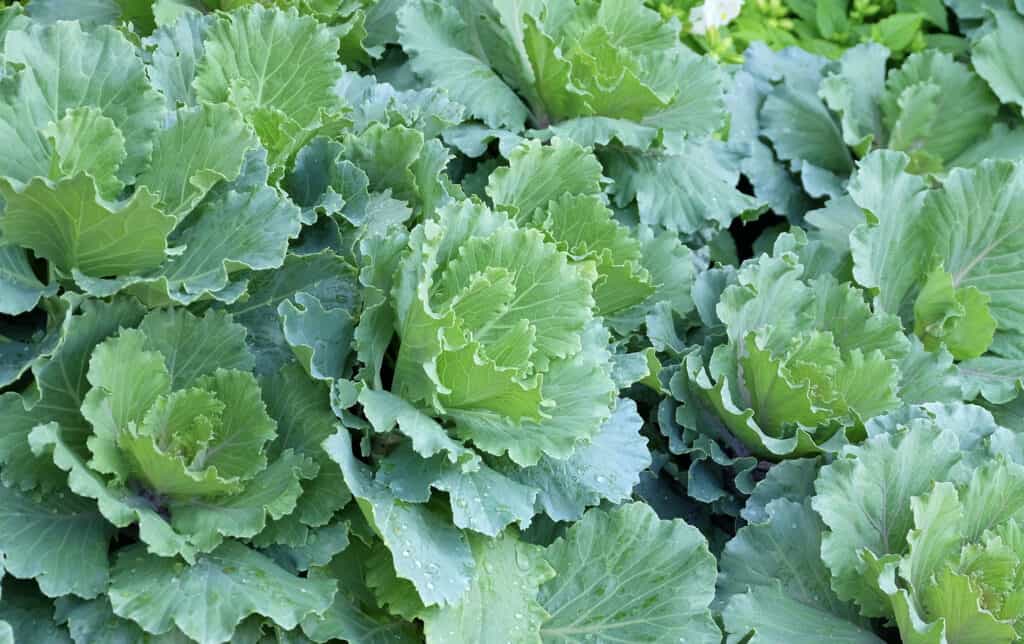
Brassica makes a poor companion to bell peppers.
©iStock.com/Arayabandit
When it comes to companion planting, certain plants should not be planted with bell peppers. This is because some plants can attract pests and diseases or compete for resources like sunlight and water. Here is a list of those plants which do not make good companions when growing bell peppers:
Apricot: You should be careful when planting peppers near apricot trees. A fungal disease called Phytophthora capsici is a common problem for bell pepper plants and can infect your apricot tree, potentially ruining the fruit crop you are trying to cultivate. To prevent this from happening, it’s best to avoid placing peppers within 12 feet of apricot trees.
Beans: Beans and peppers are not good companions to grow together in the garden. Beans fix nitrogen into the soil, but excess nitrogen can stunt pepper growth. Additionally, bean vines can be invasive and take over a space quickly, competing with pepper plants for nutrients and light. The long vines from the bean plant may even wrap around pepper plants, choking them.
Brassicas: The brassica family – kale, cauliflower, broccoli, and Brussels sprouts – has different soil preferences than peppers. Brassicas prefer neutral soil with a pH of 6-7, while peppers like acidic soils with a pH range of 5.5-6.5. Planting these two families together can lead to nutrient deficiencies in the pepper crop due to competition between the two plants for nutrients from the soil. Brassicas will also attract flea beetles and cabbage worms, which you don’t want anywhere near your pepper plants.
Fennel: Fennel has many benefits in the garden, including attracting beneficial insects. While this can be great for other plants, it is not ideal for bell peppers. Fennel is a highly competitive plant that needs many nutrients to grow and thrive. Therefore, when grown near bell peppers, it will consume more than its fair share of essential nutrients like nitrogen and phosphorus from the soil, leaving less available to the pepper plants, which can inhibit their growth. Therefore, fennel should not be planted close to bell peppers as companion plants.
Summary of How to Grow Bell Peppers
| Growing Peppers | Pepper Recommendations |
|---|---|
| Sun | Full sun. 6 or more hours of direct sunlight per day. |
| Soil | Rich soil that has sand mixed in for drainage. pH 5.5-6.5 |
| When to Plant | Seeds – 8 weeks before the last frost date. Seedlings – Plant outside 2 weeks after the last frost date when the soil temperature is 65°F. |
| Planting Measurements | Plant deeper than the original container by one inch. Space plants 12 inches apart. Rows two feet apart. |
| When to Harvest | 60-90 days. Harvest continuously for a larger yield. |
| Storage | Fridge – wrapped in plastic for ten days. Freezer- 6 months. Dried – 1 year. |
| Companion Plants | Basil, carrots, eggplant, nasturtiums, petunias, marigolds, geraniums, onions, dill, cilantro, marjoram, oregano, chives, spinach, and tomatoes |
The photo featured at the top of this post is © iStock.com/Vasin Hirunwiwatwong


How to Add Us to Google News


Thank you for reading! Have some feedback for us? Contact the AZ Animals editorial team.