
The hardest part about drawing a horse is getting the proportions right. I broke down the first step in this tutorial into several smaller steps to help make sense of it all.
My favorite digital tools for drawing are Adobe Photoshop, Huion HS611 graphics tablet, and a new addition is a drawing glove. There are links to these at the bottom of the tutorial.
For drawing on paper, this project works well on smooth Bristol paper, standard drawing pencils, moldable and rubber erasers, watercolor pencils, and a few small brushes.
| Supplies | Reason for Preference |
|---|---|
| Drawing paper of your choice | You can choose any paper you like to work with. I prefer Bristol smooth because of its versatility. |
| Drawing pencils | Check your local dollar store. There’s no need to spend a lot on these at first, and a plain old pencil will do just fine. |
| Watercolor pencils | You only need about five colors but choose a few you really like. |
| Erasers | Moldable putty-type erasers and regular rubber erasers. |
| Blending stumps or blending pencils | My hands are always a mess after drawing anything, but a blending stump or pencil is far more accurate than your finger. |
| White gel pen | Experiment with this. A white gel pen is great for adding highlights. |
| Watercolor paint brushes | In smaller drawings, I use round brushes because I can control the placement more easily. |
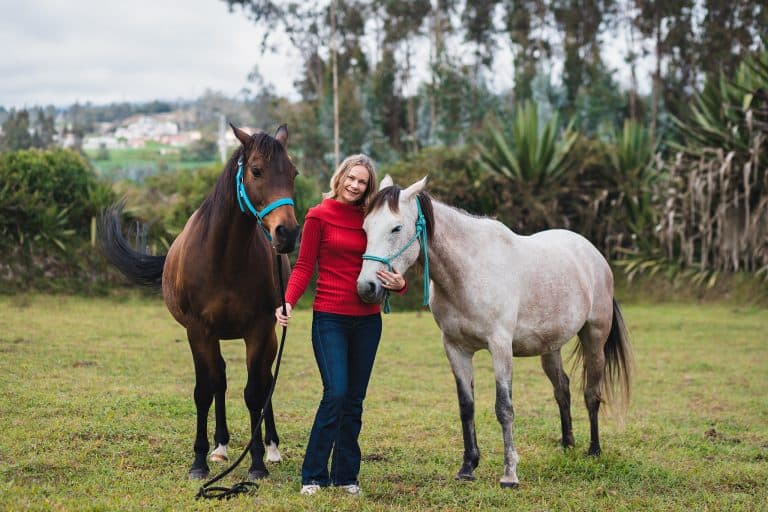
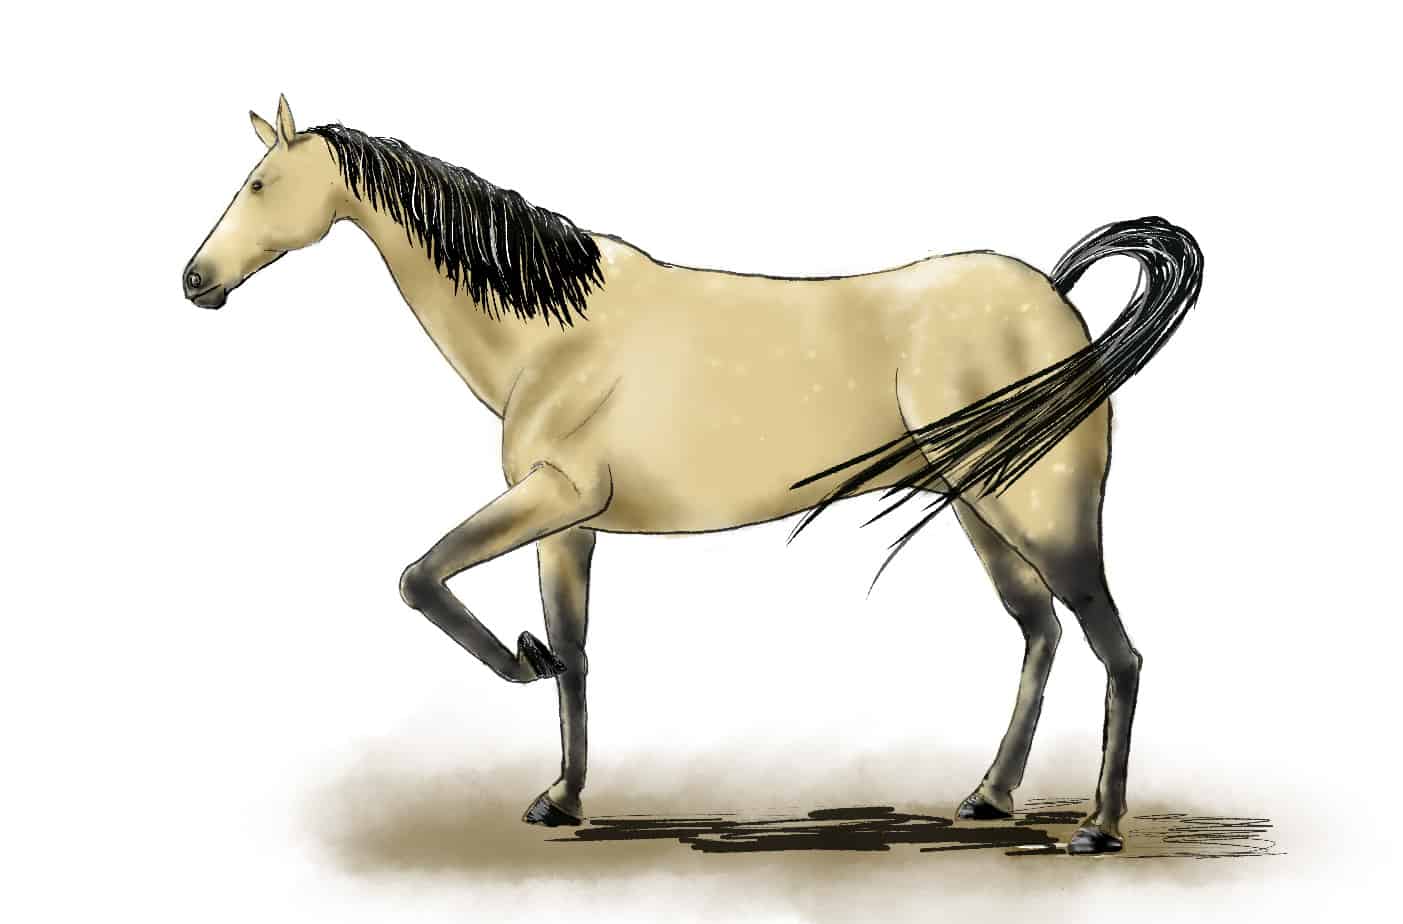
For my horse drawing, I chose the buckskin coat color. Horses with this color can be of several different breeds, but what they have in common is their color genes: Buckskins have a cream color gene that dilutes the darker bay gene. A buckskin horse ranges in color from pale tan to golden brown and always has dark legs, muzzle, mane, and tail. They might have white on their legs and can even have amber-colored eyes.
1 – Give Your Horse Drawing Structure
All drawings need structure. If you have seen any other art tutorials, even something as simple as a flower needs a framework on which to lay the details. Since horses are more complicated than, say, a sunflower, we need to lay even more framework out. While this may seem like one step, in reality, it’s several smaller ones.
As you work on your horse drawing, be sure to sketch each of these very lightly because you’ll need to be able to adjust or erase them later.
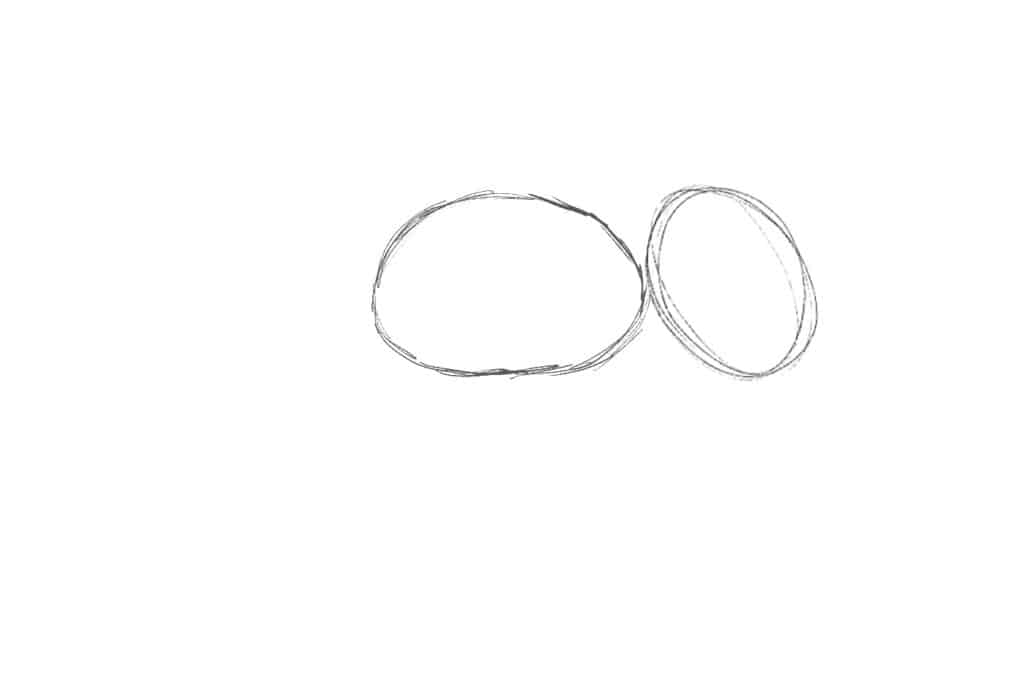
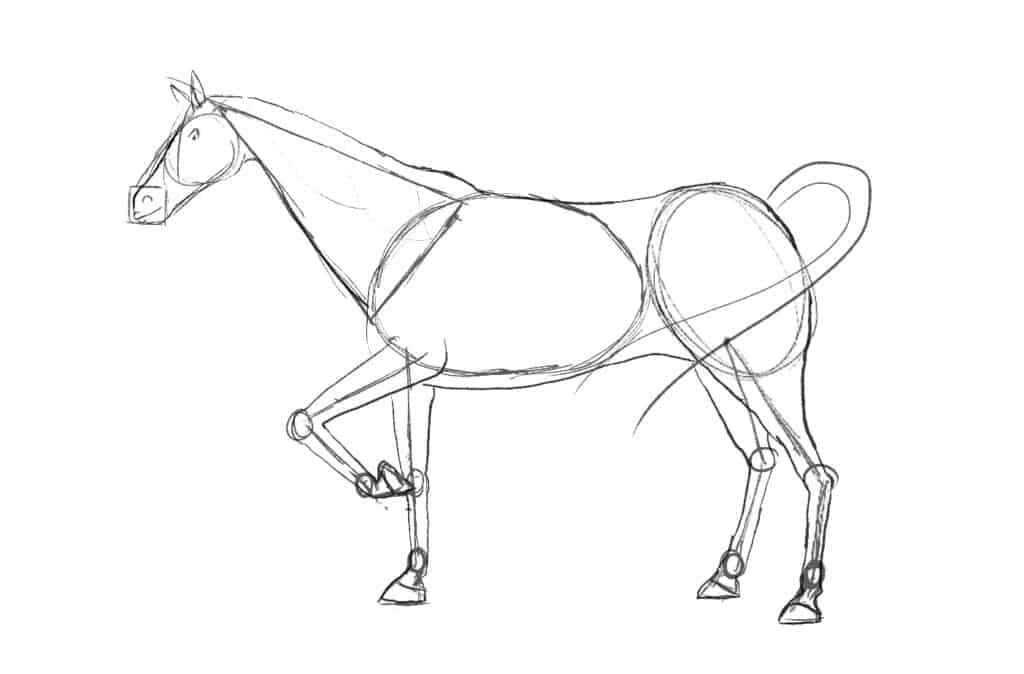
The Body
Start with a couple of rough oval shapes. Make the first one wider from side to side; make the second one smaller and sort of lean against the first oval.
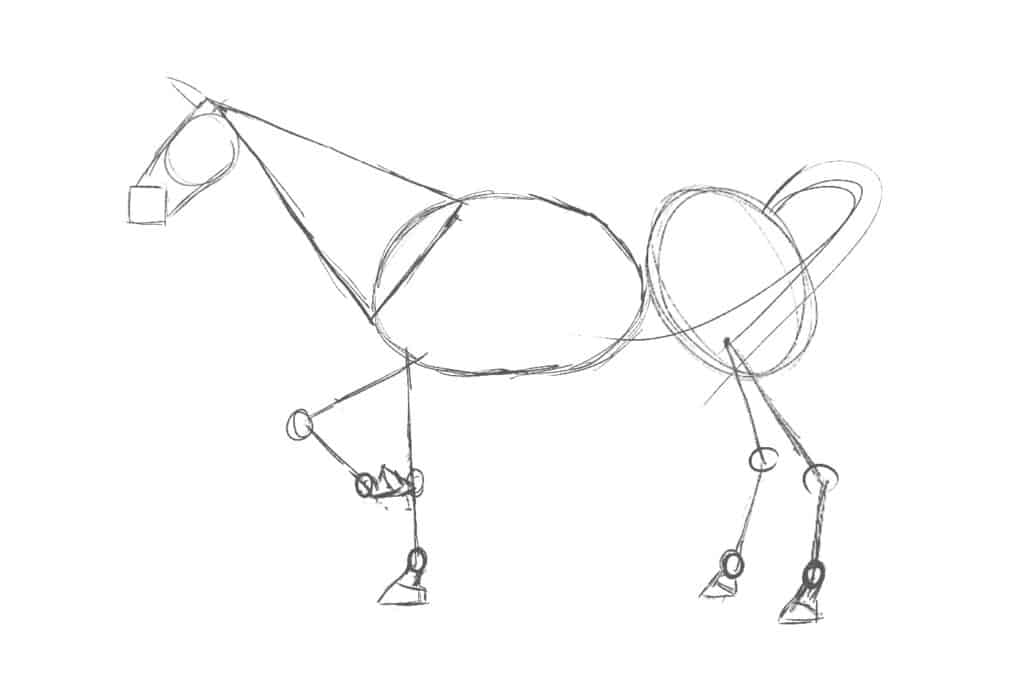
The Head and Neck
Once you’re satisfied, add a triangle to the top left, with a circle just below the top of the triangle, as shown below. The square, oddly enough, will become the mouth in your horse drawing. When you are happy with the jaw circle and mouth square, connect them with two straight lines as shown.

The Legs, Mane, and Tail
Although it looks like you’re drawing sticks and circles for legs, look at it as a skeleton, where the sticks are bones and circles are joints. You can even add a swish of a tail and a little for the mane if you like, but the only thing I feel is necessary is a stump of a tail for placement.
2 – Sketch an Outline for Your Horse Drawing
Getting the ratios right for drawing a horse or any other animal is really difficult at first, so be patient. If you start drawing the outline and your drawing looks less like a horse and more like a giraffe, go back a step or two and adjust.
Horses’ necks are rounded, so curve the top line out a little so it doesn’t look like a building block. Also, add a little hump where its neck connects to its back – that’s where its whithers should be placed. You should start to see a horse coming together from all the parts at this point.
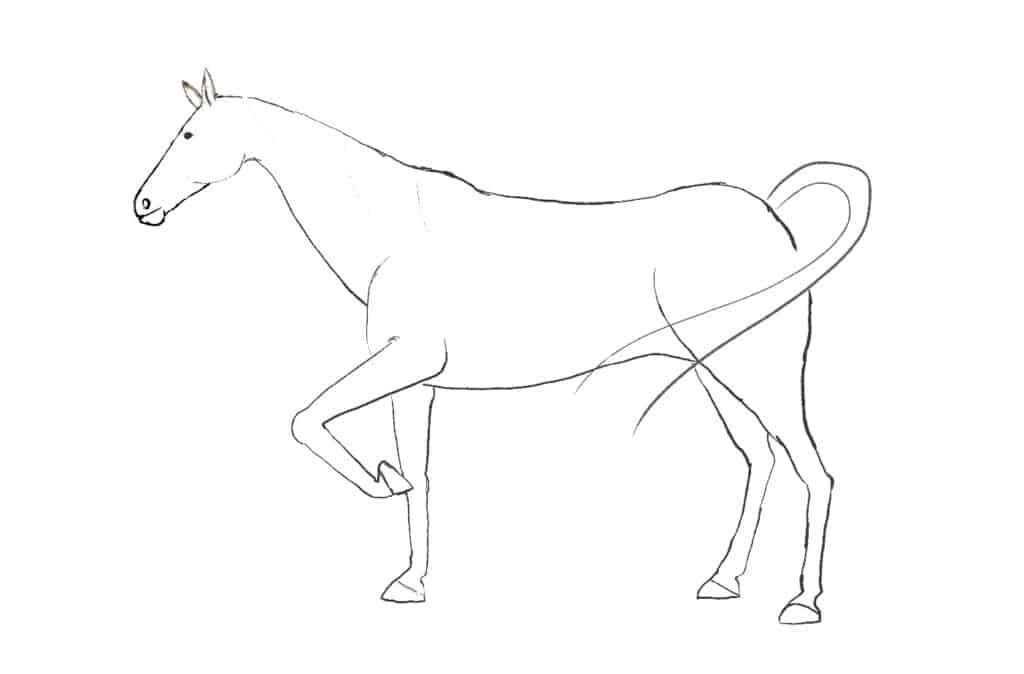
3 – Clean Up Your Horse Drawing Outline
Now it’s time to remove the early shapes. So clean up the drawing by erasing those and drawing a clean outline over the top of your horse sketch.
Double check the eye, ear, and nostril placement against a reference photo if necessary. Again, you’re still drawing lightly, so erasing and adjusting is just part of the plan of drawing your horse. A horse’s eyes sit almost on the top of its head, and its nostril is pretty big. Also, if you put its ears too far forward it will look “off.”
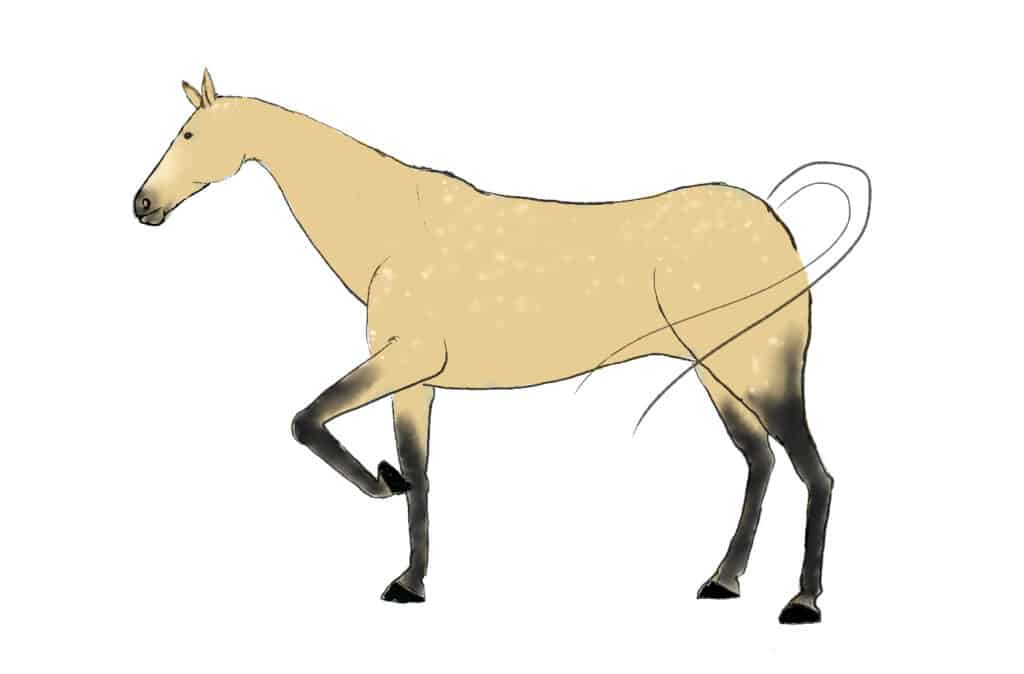
4 – Add Color to Your Horse Drawing
As you may have noticed, I have a thing for buckskin horses. There’s something about the contrast between the dark legs, mane, and tail and the light-colored body. Wait until the very end, after you have shaded and highlighted almost every other part of the horse, before adding the mane and tail. Buckskin horses can be anything from a pale tan to a golden brown.
For my horse, I chose a medium tan for the main coat color and black for the legs. The gene that dilutes the dark bay color leaves all the dark points of a bay-colored horse. Some buckskin horses also develop a bit of dappling, where the color has little spots. I think it’s cute, so I added those too. Color the hooves black, while you’re at it.
Blend the colors with a blending pencil or blending stump. Sometimes buckskin horses have white faces or just a blaze, and they can also have white bits on their legs.
If you’re using watercolor pencils, this is where I would typically take a paintbrush and gently, oh so gently, dab a little water onto the colors. It will make all the colors pop and once it’s dry you can draw and blend shadows and highlights over the top using your blending stumps and white gel pens.
5 – Creating a Shapely Horse Drawing with Shadows
The dreaded shadows. I used to dread shading until I also studied some photography. It taught me a lot about how light works. If you remember that light generally travels in a straight line, you’ll realize that it’s going to be strongest closer to the light source. This means that if the horse in your drawing is facing the light, the first thing to be “touched” by that light is its face. The horse’s face is now blocking other things from getting light, like the bottom part of its jaw and neck, casting a shadow there!
In the illustration below, the purple lines represent the light. It should give you a better idea of how the light is going to work when you’re adding shadows. I also included the mane and tail because those things tend to affect how the shadows land. Keep this illustration handy for the highlights in the next step too! Those light rays create all sorts of beautiful effects.

Here’s the tricky part. If you add shadows with your black pencil, your horse drawing will look like it has something “off” in its coat. Use the same color you used for the body color, just put more on. Colored pencils and watercolor pencils function similarly, so layering on the color will give you the shadows you want.
If you need a harsh shadow, as if standing in bright light, go ahead and use black, but be gentle and sparing with it.
Blend all those shadows until they move in and out of the muscle groups to give a sense of strength. Shadows are darkest when they’re furthest from the light, so make those darker and let the shadows trail away as you move into the light.
Horses have rather large eyes, which naturally follow into having rather large eye sockets. Above your horse drawing’s eye, draw a few curved lines. They should be bigger near the eye, and get smaller as they move towards the ear. Blend those in, and notice how the curve you created in the lines creates a rounded shape to the top of the eye. Underneath its eye, do the same thing.
Horses are big muscular animals. Show it in your horse drawing, and feel free to go find a few reference photos from which to draw inspiration.
6 – Highlighting Your Way to a Great Horse Drawing
Shadows are but one part of the shading equation. I always save highlights for the end because everything else has to be right in order for me to even bother with any highlights.
If you look at the image with the purple light rays, they were coming from the top left of the image. Your horse’s face needs some highlights, as do the front edges of its ears, legs, and hooves. Any part that light hits needs a highlight. You’ll also place some along the mane and tail – remember, that’s hair, so it’s probably going to reflect a little light.
Something that’s often overlooked in drawings is that “edge” where the light just barely creeps around the edge of the object. Look at the horse’s lower neck, chest, and thighs. You’ll want a thin line of highlight along those edges.
When you highlight the eyes and hooves – don’t blend it in as much as you would the highlights on the horse’s body. The highlights on hard or wet surfaces, like eyes and hooves, tend to have sharper edges.

Finishing Your Horse Drawing
Often, you’ll get to the end of a drawing and think that it needs something else. That’s normal, and I do it all the time, as do many artists. The key is not to overdo it. The easiest way to prevent that is to let it sit for a few days or weeks while you work on something else. Then, when you go back to your horse drawing (or any drawing), you’ll have a fresh perspective, and be able to make whatever adjustments are necessary without overdoing it.
Links to Supplies:

- 157 lb. paper with neutral pH
- Sturdy, 2-ply paper with smooth rendering surface
- Perfect for pencil, pen, dry brush, and other mediums
- 11" x 14"
- Made in the USA

- Includes 48 artist-grade colored pencils
- Highly pigmented
- Water-soluble
- Unique triangular design makes these pre-sharpened watercolor pencils easier to hold and control
- Break-resistant

- Designed for artists of all skill levels
- 17-piece set includes pencils, charcoal pencils, compressed sketch sticks
- Also includes a standard eraser, a kneaded eraser, a blender/smudge stick, and a dual-barrel sharpener
- Allows artists to experiment and combine different techniques
- Budget-friendly

- Set of 2
- Add a pop of milky white color to any artwork
- Features smooth gel ink
- Works equally well on light or dark-colored paper
- Latex-free grip for comfortable drawing

- Pack of 6
- Kneaded rubber/gummy erasers
- Erases and/or lightens most dry media
- Also helpful for blending, highlighting, shading, smoothing, correcting, and brightening drawings
- Easy to clean by kneading between your fingers

- This is the first graphics tablet equipped with 8 multimedia keys
- The multimedia keys are intuitive and can be used for a variety of artistic needs
- Can be connected with Android 6.0 (or later) phones or tablets via an adapter
- Battery-free stylus doesn't require a battery or charger
- Sleek and slim design available in 3 colors?

- Wear on either hand
- Prevents smudges from your hand transferring to your tablet
- Comfortable, soft, Lycra and Nylon
- Flexible
- Black