Looking for a beginner-friendly and wonderfully edible mushroom to cultivate at home? Look no further than the easy-to-grow, resilient oyster mushrooms. An excellent choice for those who don’t have a lab setup, oyster mushrooms grow quickly on a huge range of non-sterilized substrates.
In this guide, we’ll cover how to grow oyster mushrooms at home using the most accessible, successful methods. Read on to learn more.
What Are Oyster Mushrooms?
Oyster mushrooms belong to the genus Pleurotus and are widely distributed throughout the North America, South America, Asia, North Africa, Europe and Australia. These fungi display saprobic, weakly parasitic, and predatory behaviors. Largely, however, they exist in a saprobic role as decomposers of organic matter. In their case, they facilitate a white rot of deciduous broadleaf trees, especially oaks and beeches.
Through the process of decomposing hardwood logs and branches, they contribute to crucial carbon sequestration and nutrient recycling. Less commonly, they are weakly parasitic on unhealthy trees. Finally, fungi in the genus Pleurotus can practice predation, using toxic structures on their hyphae against microbes such as nematodes.
The mycelium of Pleurotus generates the clusters of gilled, typically dome-capped fruiting bodies we know as oyster mushrooms. Some commonly foraged and cultivated oyster mushrooms include the following:
- The common oyster (Pleurotus ostreatus) and its varieties.
- The blue oyster (Pleurotus columbinus).
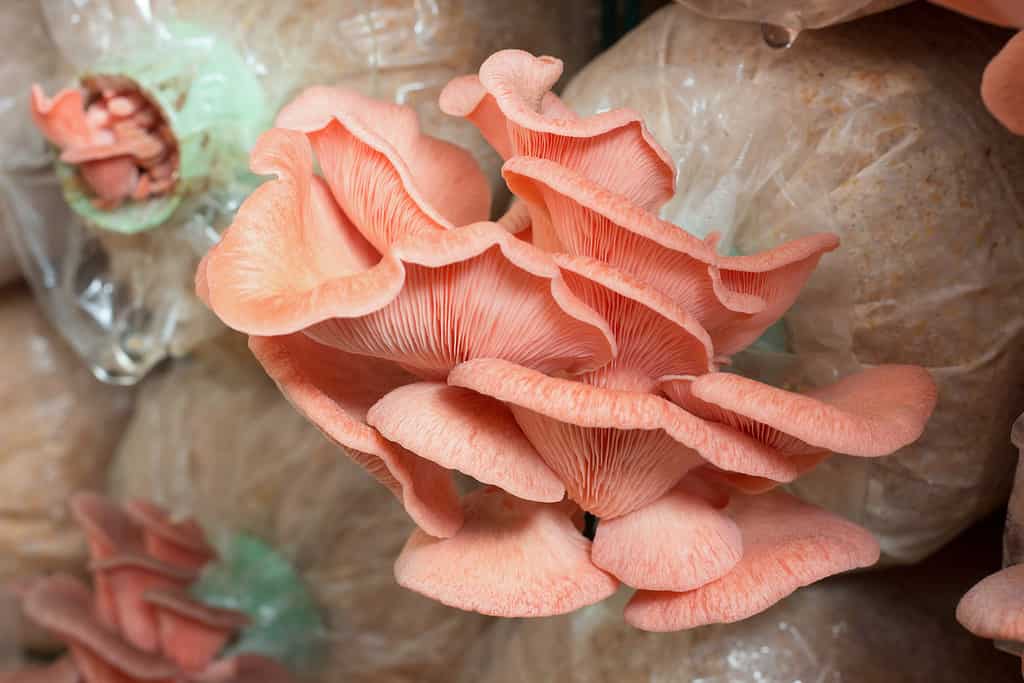
- The pink oyster mushroom (Pleurotus djamor).
- The golden oyster mushroom (Pleurotus citrinopileatus).
- The king oyster mushroom (Pleurotus eryngii)
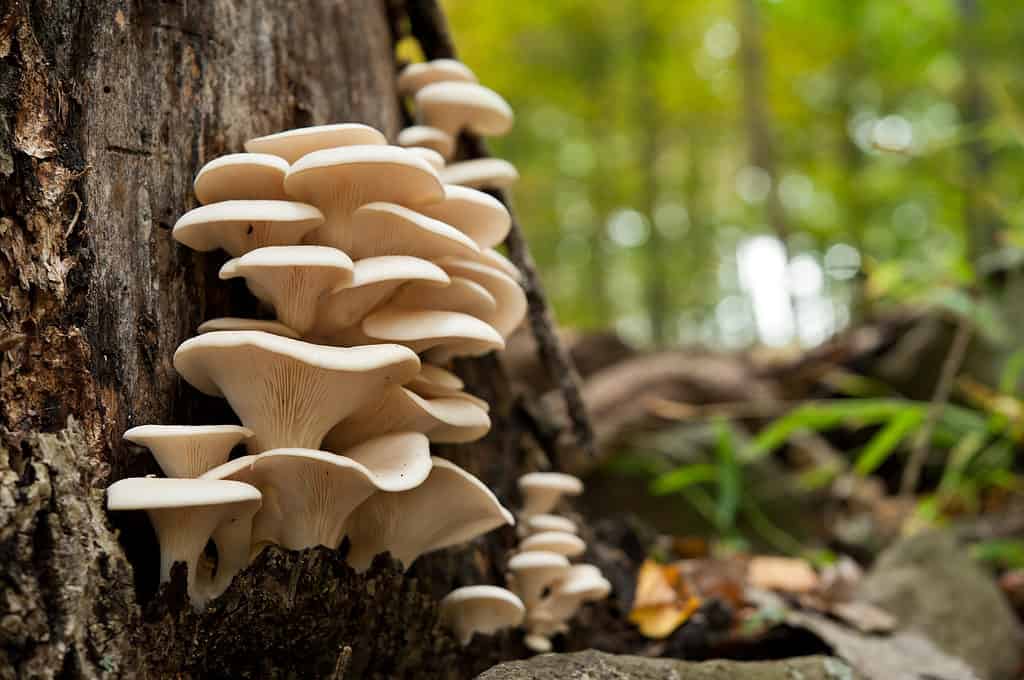
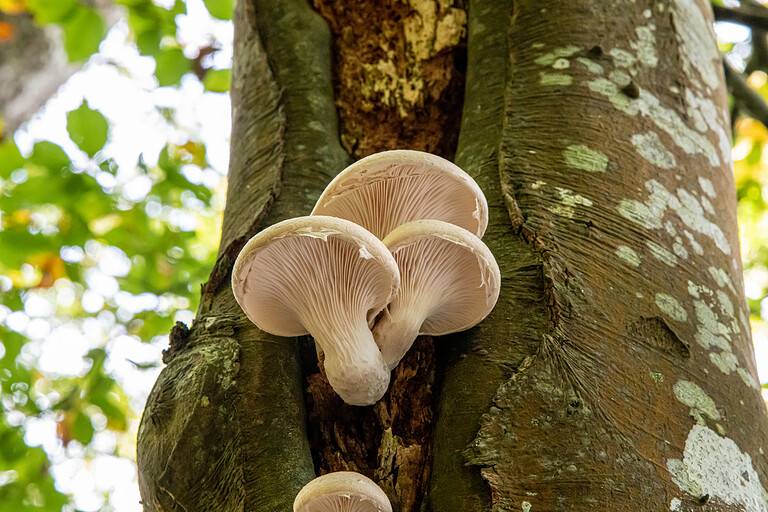
A group of fresh wild oyster mushrooms growing out of the base of a dead tree.
©iStock.com/lensblur
How to Grow Oyster Mushrooms at Home
All of the species of oyster mushrooms listed above can be grown at home. However, the most commonly cultivated oyster mushroom, especially for beginners, is the common oyster mushroom (Pleurotus ostreatus). To keep this guide the most beginner-friendly, we’ll cover in detail the most accessible methods for growing the common oyster mushroom at home.
Choosing the Substrate and Method
When growing Pleurotus ostreatus at home, you have a few different options. Oyster mushrooms are famous for their ability to grow on a wide range of cellulose-rich substrates including straw, sawdust, logs, coffee grounds, cardboard, and even toilet paper.
What you choose should depend on the setup you have available and the amount of time and effort you want to spend on the cultivation process. While some folks want to go with an option that results in getting a flush of oysters as fast as possible with as few steps, others are interested in participating more deeply in the cultivation process. Below, we’ll talk about two of the most common methods for growing oyster mushrooms at home.
Preparation of mycelium on organic substrate
©Miriam Doerr Martin Frommherz/Shutterstock.com
Purchasing a Grow Kit
The easiest route is simply to purchase a grow kit from a reputable mushroom growing and supply company. These kits come with a block of substrate, usually supplemented sawdust, fully colonized by the P. ostreatus mycelium.
When you receive the grow box, you’ll simply need to follow the directions to trigger the mycelium to fruit. This involves cutting holes to allow pin formation and increased air exchange, and placing the kit in an area with the appropriate humidity, temperature, and light ranges.
Pleurotus citrinopileatus growing from easy to make grow kits.
©Miriam Doerr Martin Frommherz/Shutterstock.com
How to Grow Oyster Mushrooms: Using a Straw Substrate
Cultivating oyster mushrooms on straw is one of the most common methods, especially for non-commercial growers. Cereal straws, such as wheat and oat, are particularly well-suited substrates for growing oyster mushrooms.
When you grow oyster mushrooms on straw, you won’t need to sterilize this substrate. This is because straw isn’t so nutrient-dense that the Pleurotus ostreatus mycelium will have to compete with a ton of other microbes. Instead, you can pasteurize the substrate, which reduces the overall load of competitor microbes, allowing the aggressive P. ostreatus mycelium an advantage.
Pasteurizing Straw and Reaching Field Capacity
Before inoculating the substrate with Pleurotus ostreatus mycelium, you’ll need to pasteurize your straw. Hot-soaking the straw is an excellent method that vastly reduces the overall microbial population and brings the substrate to proper field capacity. After watering a substrate, field capacity refers to the maximum amount of water the medium can hold. Above field capacity, the substrate will drain water. You want the growing substrate to reach field capacity, and you can confirm this with the squeeze test. At field capacity, the substrate, in this case, straw, should only release a few drops of water when firmly squeezed in your hand.
To hot-soak pasteurize the straw, follow the below steps:
- Chop the straw into 1-3 inch sections.
- Put the straw in a mesh bag or large mesh colander.
- Add the straw to a large pot full of water and keep it at 160-170 degrees Fahrenheit.
- Make sure the straw is fully submerged for 1-2 hours.
- Allow the substrate to drain to field capacity and cool to an internal temperature of about 75 degrees Fahrenheit. You should inoculate the substrate as soon as this internal temperature is reached. Waiting too long can result in contamination and drying out of the substrate.

Some people supplement their straw with other things like soy hulls.
©Miriam Doerr Martin Frommherz/Shutterstock.com
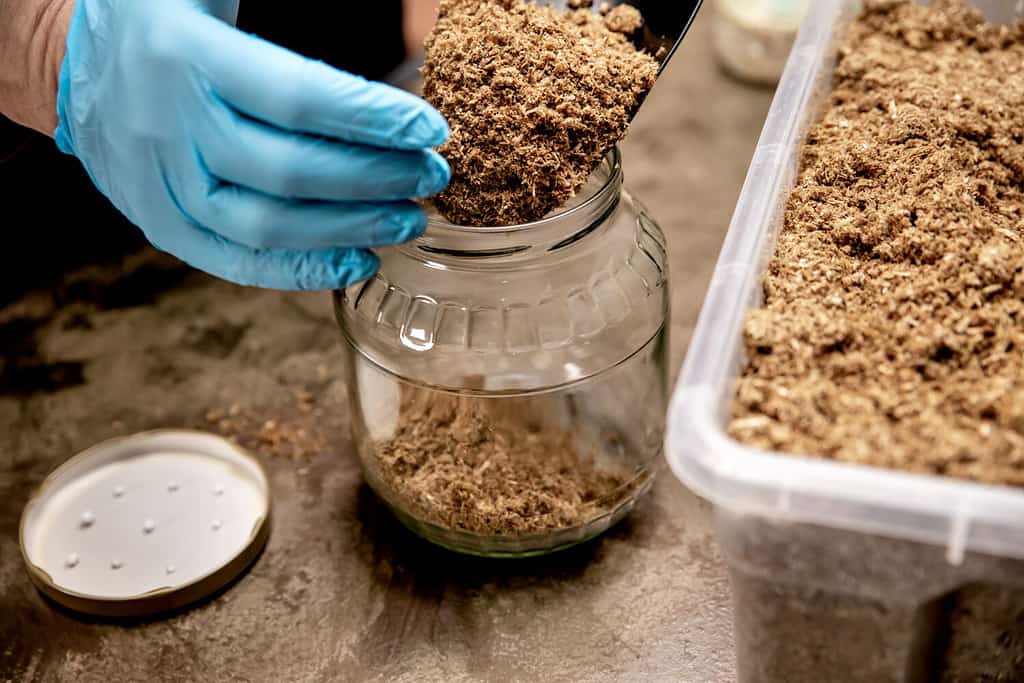
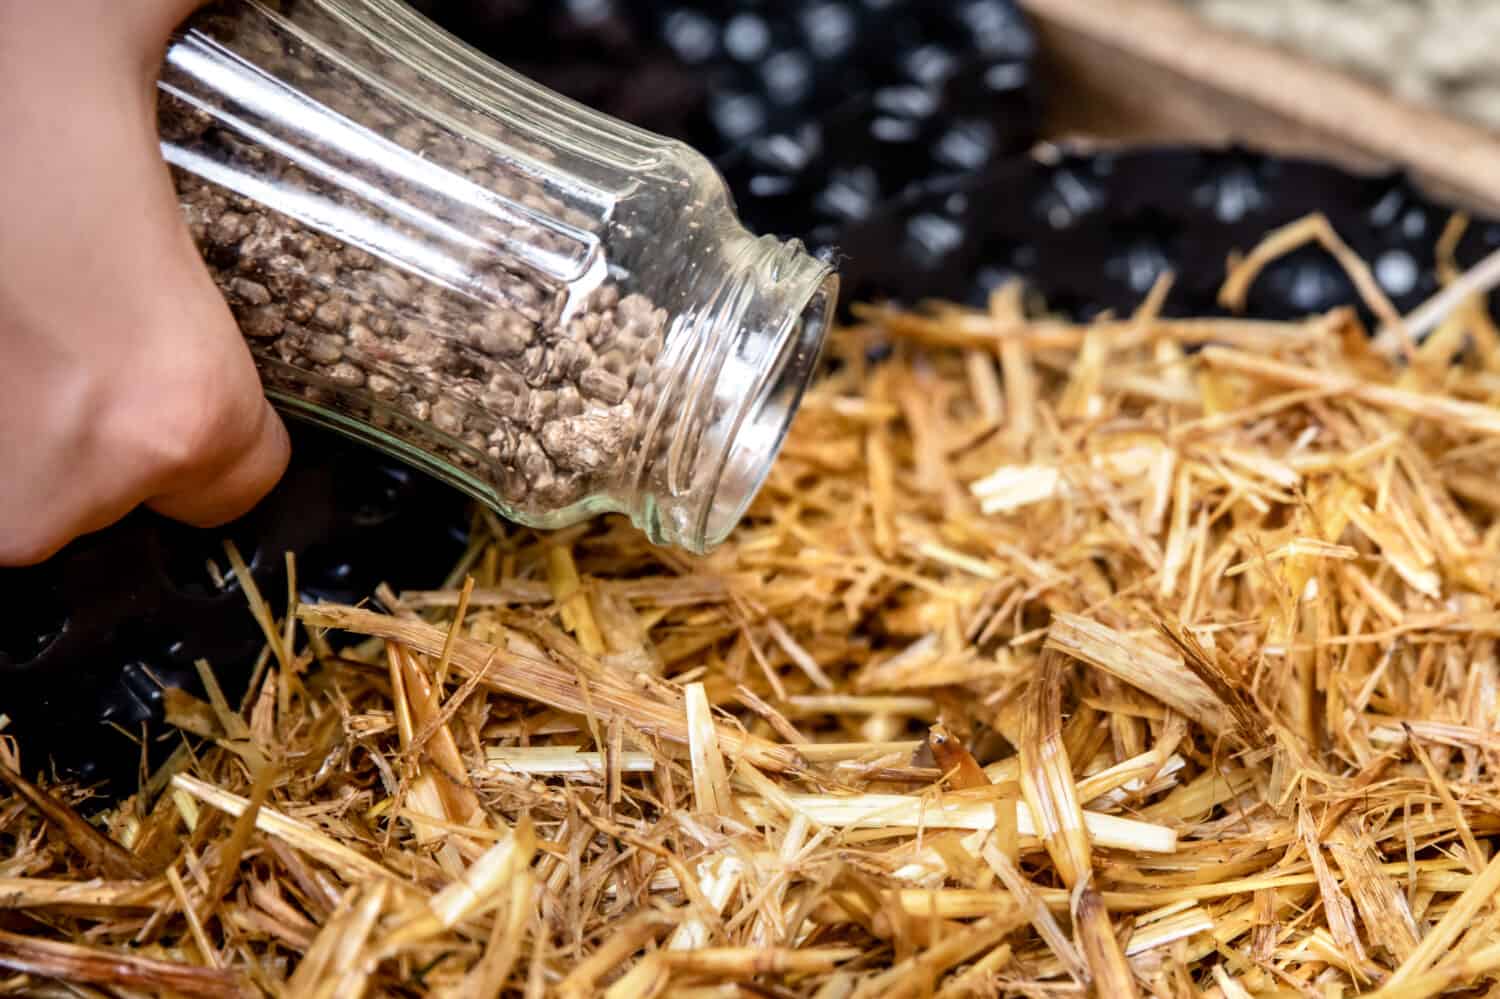
Inoculating the Straw Substrate
Once you’ve fully pasteurized the straw and allowed it to cool and reach field capacity, the next step is to inoculate the substrate with Pleurotus ostreatus spawn. For beginner cultivators, we recommend purchasing spawn rather than developing a spore culture at home, the latter requiring a sterile setup and more advanced skills.
You can purchase P. ostreatus spawn, in liquid or solid form, at reputable mushroom supply companies. Your best bet is to buy a bag of common oyster mushroom grain spawn. Grain spawn is a highly nutritive grain, like rye berries, that are inoculated and colonized by mycelium.
To inoculate your pasteurized straw with P. ostreatus grain spawn, follow the below steps:
- Wipe down a see-through 5-gallon bucket or tote with isopropyl alcohol.
- Add the pasteurized straw to the container.
- Add in the bag of P. ostreatus grain spawn.
- With gloved hands, mix the substrate and spawn together until they are evenly distributed. You should be aiming for a 10-20% spawn to 80-90% straw mix. Pack it down and add a little bit more of both substrate and spawn.
- Cover the container with a lid. You don’t want a tight seal as there needs to be air exchange allowed during incubation. A filter patch would be ideal, but you can also poke small holes in the lid or just let it air out every so often.
Add the grain spawn to you pasteurized straw after it has cooled down some.
©Miriam Doerr Martin Frommherz/Shutterstock.com
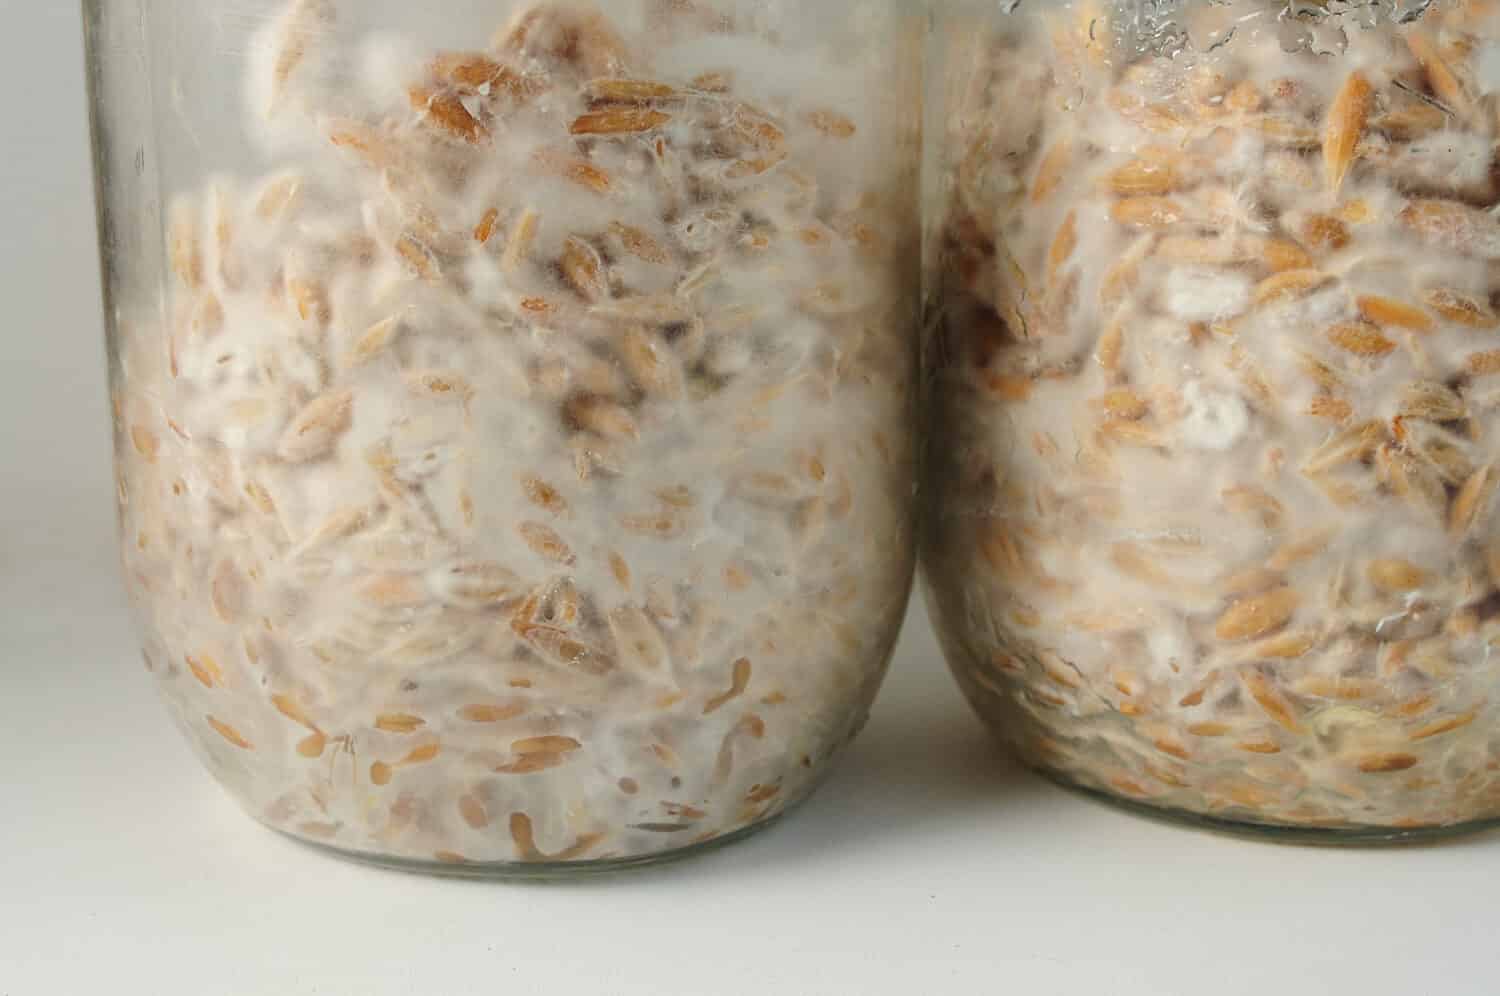
How to Grow Oyster Mushrooms: Incubation Phase
Once you have inoculated your straw substrate with grain spawn, it’s time for incubation. At this stage, the mycelium colonizes the substrate. Once the mycelium colonizes throughout the straw, you can trigger fruiting. By using a see-through container, you can watch the colonization process and ensure that contamination isn’t occurring. The mycelium of P. ostreatus should be white to pale white-grey. Any other colors present in the substrate are likely mold contamination.
To quickly and effectively incubate, the mycelium needs to grow in a specific range of environmental conditions. At ideal conditions, the P. ostreatus mycelium should colonize the container in about 10-16 days. For the common oyster mushroom, the incubation requirements are as follows:
- 68-75 degrees Fahrenheit
- consistent air exchange
- 85-95% humidity
While incubating, you can watch your mycelium grow.
©Cannabis_Pic/Shutterstock.com
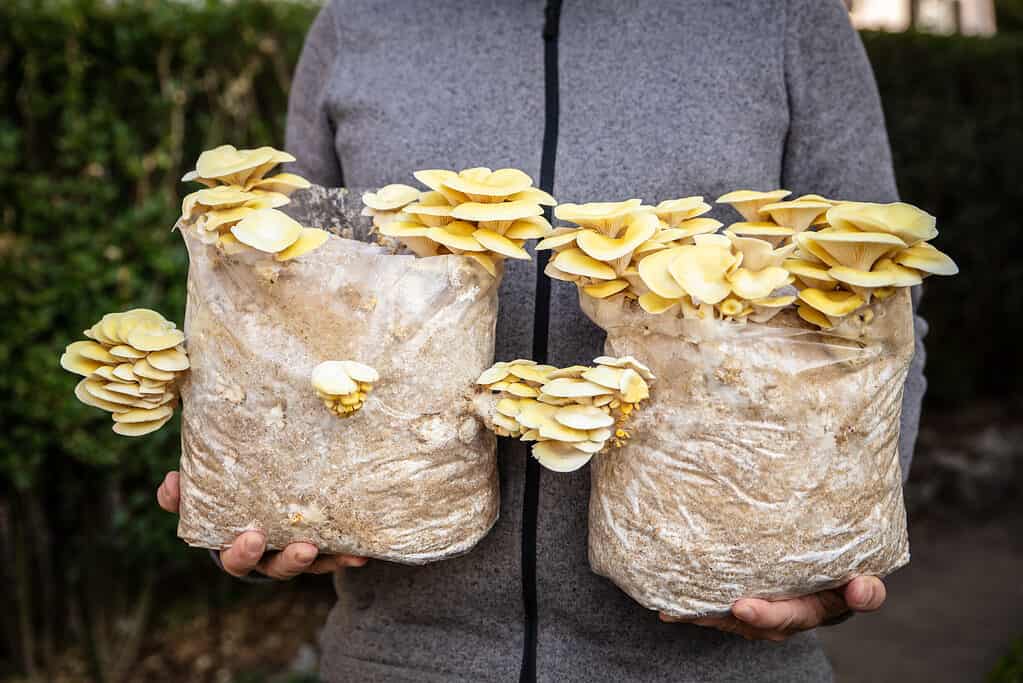
Fruiting Phase of Oyster Mushrooms
Once the mycelium fully colonizes the substrate, you’re ready to trigger mushroom formation. This is the stage at which most people receive their ready-to-fruit kits. To trigger fruiting, you’ll need to cut slits into the fruiting kit or drill small holes into the straw container. These holes increase air exchange and allow for the formation of pins, which are the first step in mushroom formation.
For Pleurotus ostreatus, the environmental conditions required for fruiting are as follows:
- About 60-70 degrees
- 85-95% humidity
- Low, indirect light
- Fresh air exchange
You should have beautiful, ready-to-harvest mushrooms in about 7-12 days after the formation of mushroom pins. Make sure to harvest these oyster mushrooms at the point when the caps are starting to expand outwards. You can keep these mushrooms unsliced in brown paper bags for about 5 days in the fridge.
Pleurotus djamor fruiting from a grow bag.
©socrates471/Shutterstock.com