
If you’ve spent much time working with plants, you’ve probably encountered spider mites at some point, whether you knew it or not. These tiny arachnids can be easy to miss and while they aren’t especially harmful in small numbers, they can cause a host of serious problems if left to multiply.
In this article, we’ll go over a few completely natural strategies you can use to get rid of spider mites on indoor plants. We’ll also talk about what conditions encourage spider mite infestations, why they are so common indoors, and how to deal with them before they become a real problem.
What Attracts Spider Mites Indoors to Begin With?
Spider mites thrive in warm, dry, dusty spaces. Outdoors, regular rain events wash leaf surfaces, pressure gradients keep air moving, and natural predators keep spider mite populations in check. Indoors, however, walls and partitions reduce air movement, dust settles on plants, and HVAC systems keep humidity relatively low. Unfortunately, that means that the conditions inside many homes create a perfect storm for an infestation. You’ll want to check for spider mites on your plants regularly as part of your normal care routine.
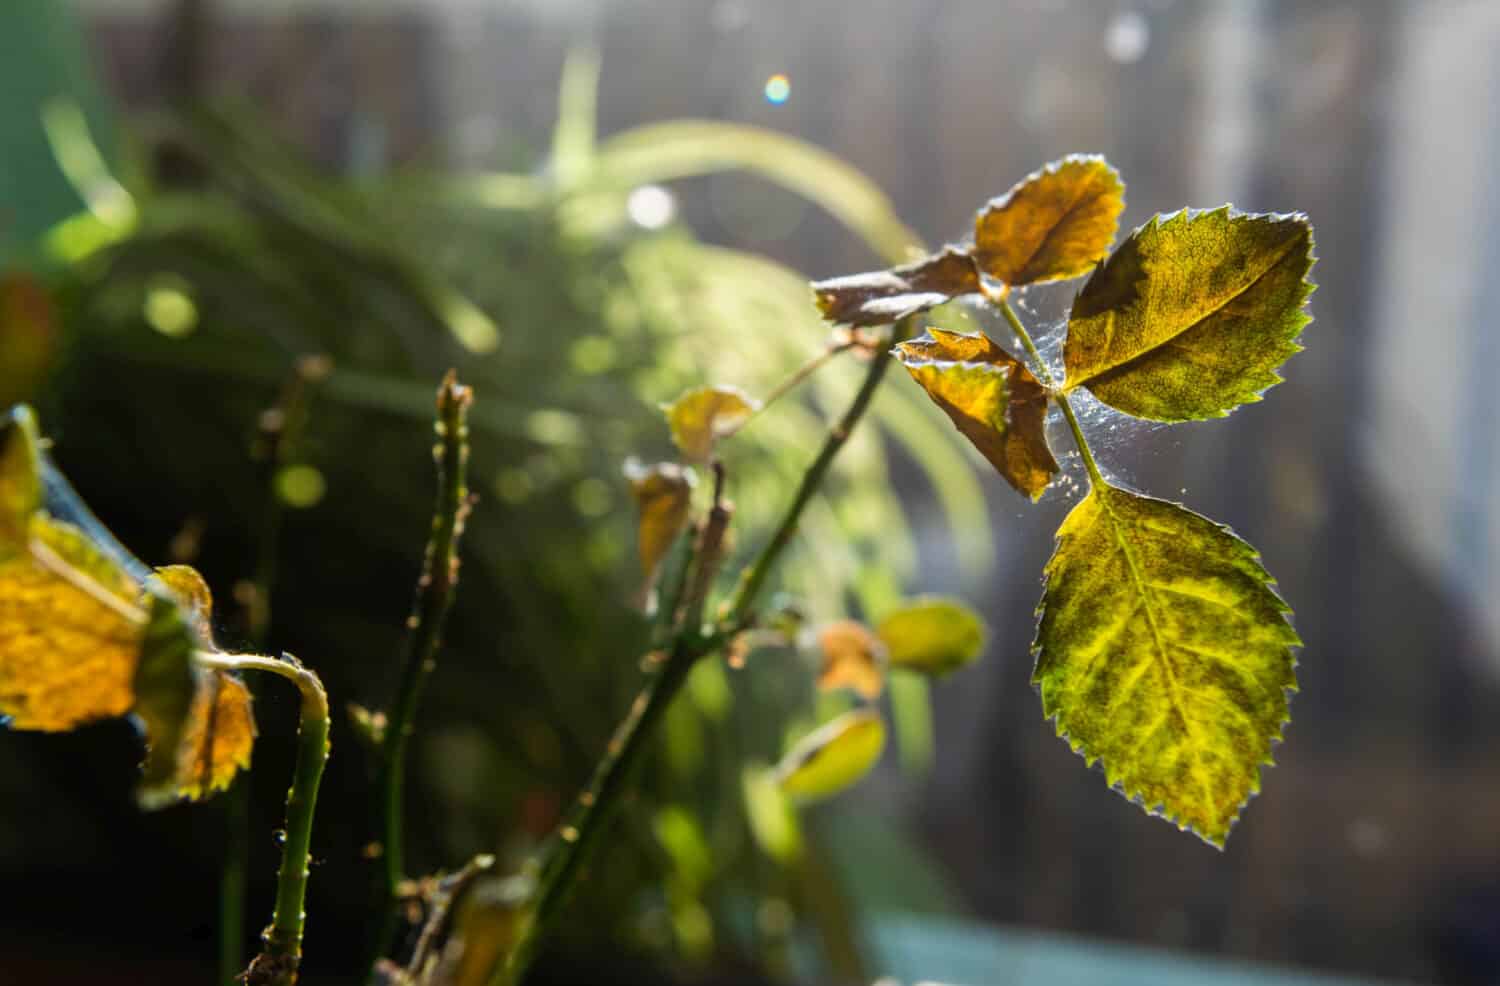
These nearly microscopic pests can cause serious damage to house plants if they are left to multiply.
©Wollertz/Shutterstock.com
Signs of a Spider Mite Infestation
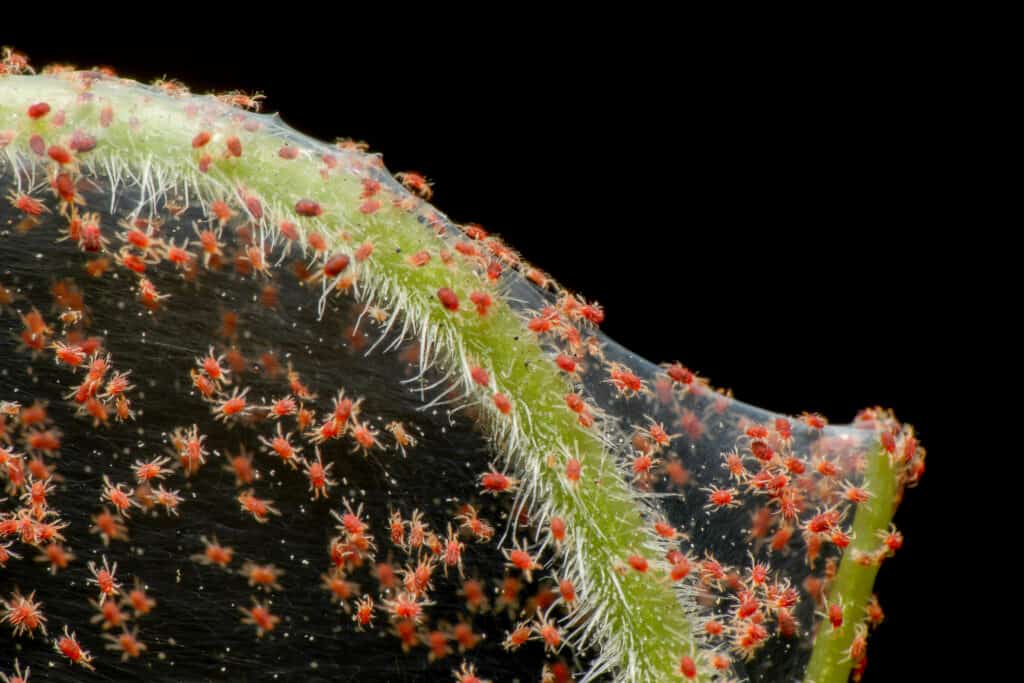
Spider mites are very tiny and can be difficult to see without a magnifying lens, so you’ll usually need to rely on your plant to tell you when something is wrong. While you may find a few different species of spider mites on indoor plants, infestations by any of them tend to cause similar symptoms.
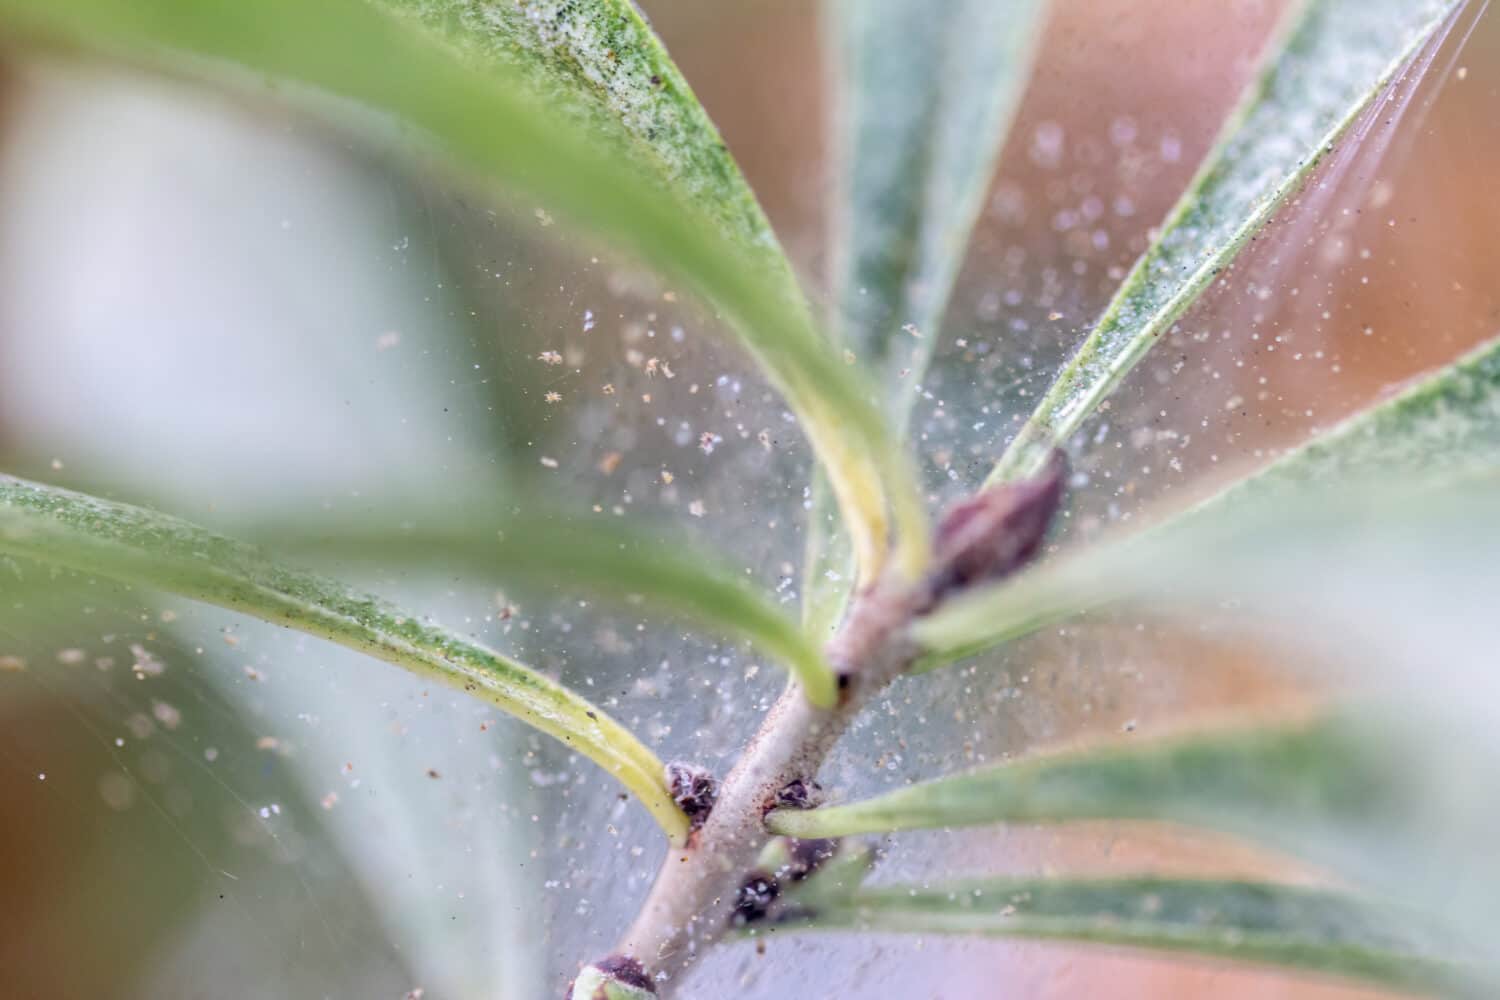
One quite obvious sign of a spider mite infestation is the presence of very fine webbing on the undersides or at the axils of leaves. As the mite colony expands, so does the amount of webbing on the plant. While harmless cobwebs may appear on your plant if you haven’t dusted in a while, the presence of any kind of webbing warrants further observation. Oftentimes, spider mites are easiest to see when moving across their webs.
Spider mites build very fine webs on the undersides of leaves and at their axils.
©BirdShutterB/Shutterstock.com
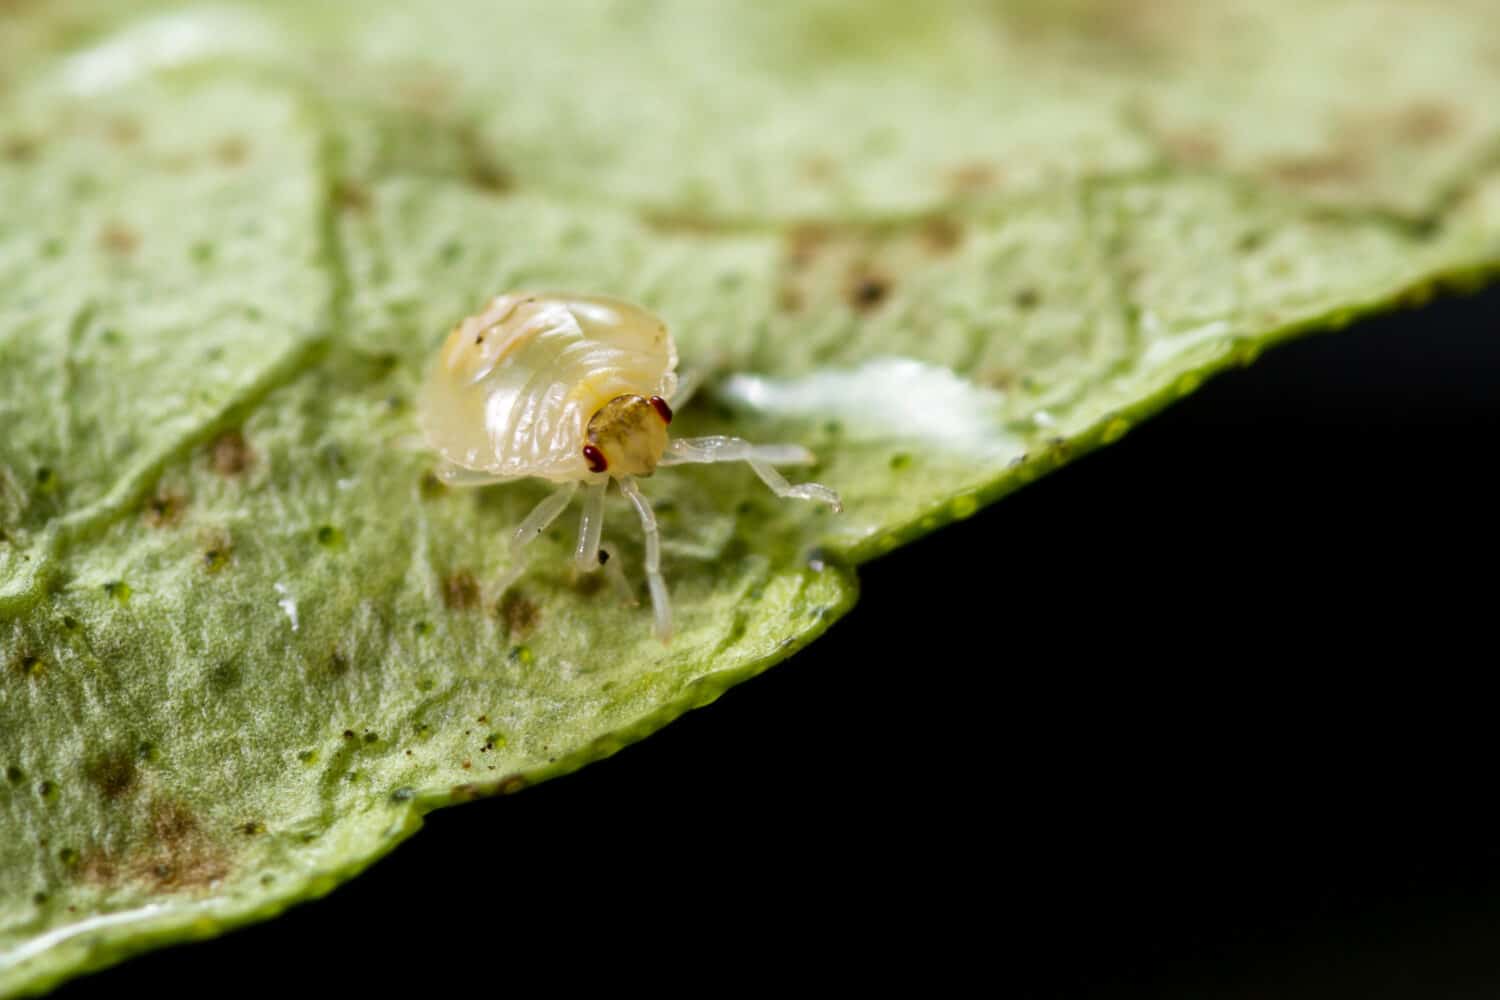
Other signs that you may be dealing with spider mites include changes in leaf color. Using their chelicerae to snip open the leaf tissue, spider mites feed on the contents of the plant’s cells. Early on in an infestation, this may present as stippling — small pale or chlorotic spots at feeding sites where there is no longer any chlorophyll. As mite populations grow, entire leaves may lose their pigmentation and fall off. Sometimes, leaves may begin to turn bronze. Either or both of these changes may occur depending on the plant.
There can be tactile evidence of spider mites as well. As the mite colony grows, individuals will leave behind shed skins, frass (insect feces), and webbing. Older members of the colony will also die, often remaining on the leaf surface. If your plant’s leaves feel especially gritty or dusty, it warrants a closer look.
6 Natural Ways to Effectively Prevent and Eliminate Spider Mites
If you’ve found spider mites on your plant, or are worried you might, you’re probably wondering how to deal with them. Luckily, some of the most effective ways to get rid of spider mites are also the easiest. If you’re looking for natural ways to rid your plant of spider mites, without soaps and pesticides, these are the approaches you’ll want to try first.
1. Spray Them Off
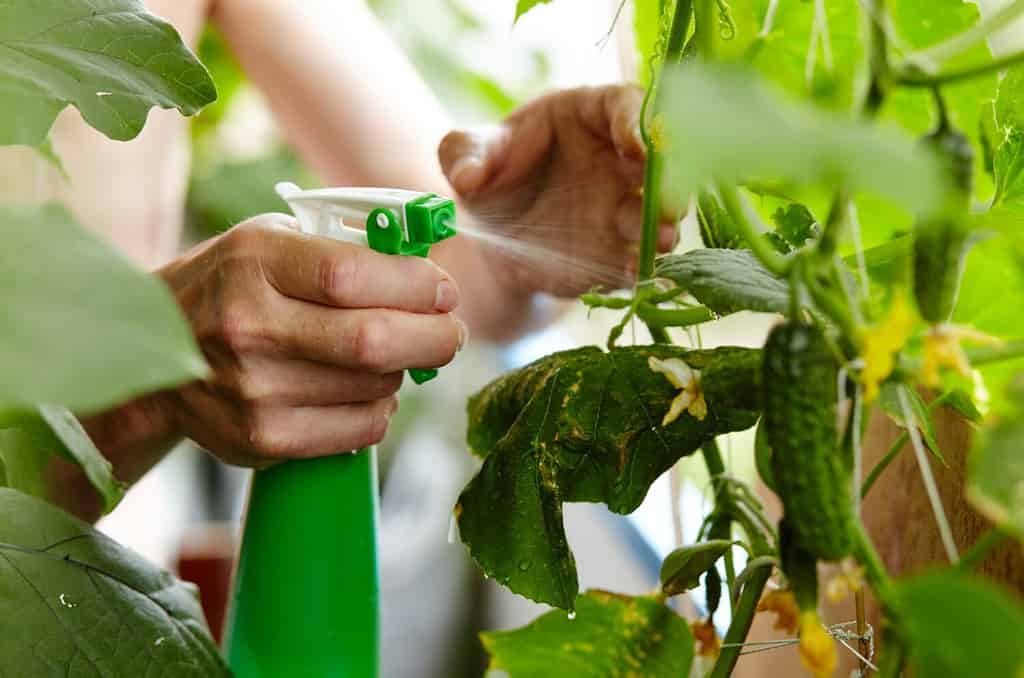
Inside or out, you can use a spray bottle to knock spider mites off of your plants.
©Andrii Salomatin/Shutterstock.com
If you’ve spotted a colony of mites hiding among your plants, you can physically remove them with water. Simply knock them off the plant with a strong blast of water from a spray bottle. This is best to do outside, over the sink, or in the tub, so that you don’t make a mess and any mites you remove can’t return to the plant. Monitor your plant for the next several days and repeat as necessary to bring down their numbers.
2. Monitor and Increase Humidity
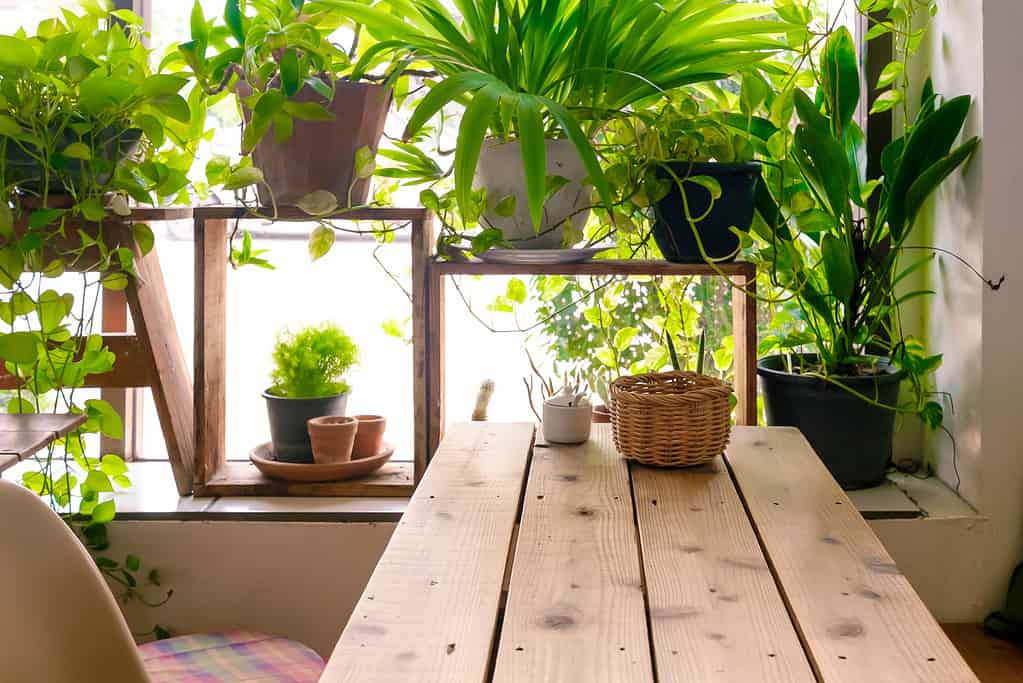
In tight groups, healthy houseplants can support each other, creating humid microclimates between their leaves as they transpire.
©imnoom/iStock via Getty Images
Spider mites love the low humidity that modern HVAC systems tend to cause indoors. To counteract it, there are a few things you can do. The first is to occasionally mist your plant’s leaves. As the water evaporates, it contributes to the local humidity around the plant’s foliage, discouraging spider mite colonies from setting up shop. If you go this route, make sure that the leaves dry off afterward or else you may encourage fungal diseases.
You can also help keep things humid by placing your plant over a humidity tray. Fill a pot saucer with pebbles and then top it off with water. The pebbles act as spacers to keep your plant’s pot above the water level so its soil can still drain properly. As the water in the tray evaporates, it will contribute to the relative humidity around your plant. Continue to fill the tray as the water level gets low.
Another route toward increasing humidity is to group houseplants together. Denser arrangements of foliage help trap humidity as water evaporates from the soil and the plants transpire through their leaves. As with misting, this more hands-off approach encourages a humid microclimate between leaves that spider mites just can’t abide. The downside here, however, is that spider mites can travel more easily between plants. If you have an infested plant, don’t shove it in close to its neighbor.
3. Wipe Down Leaves
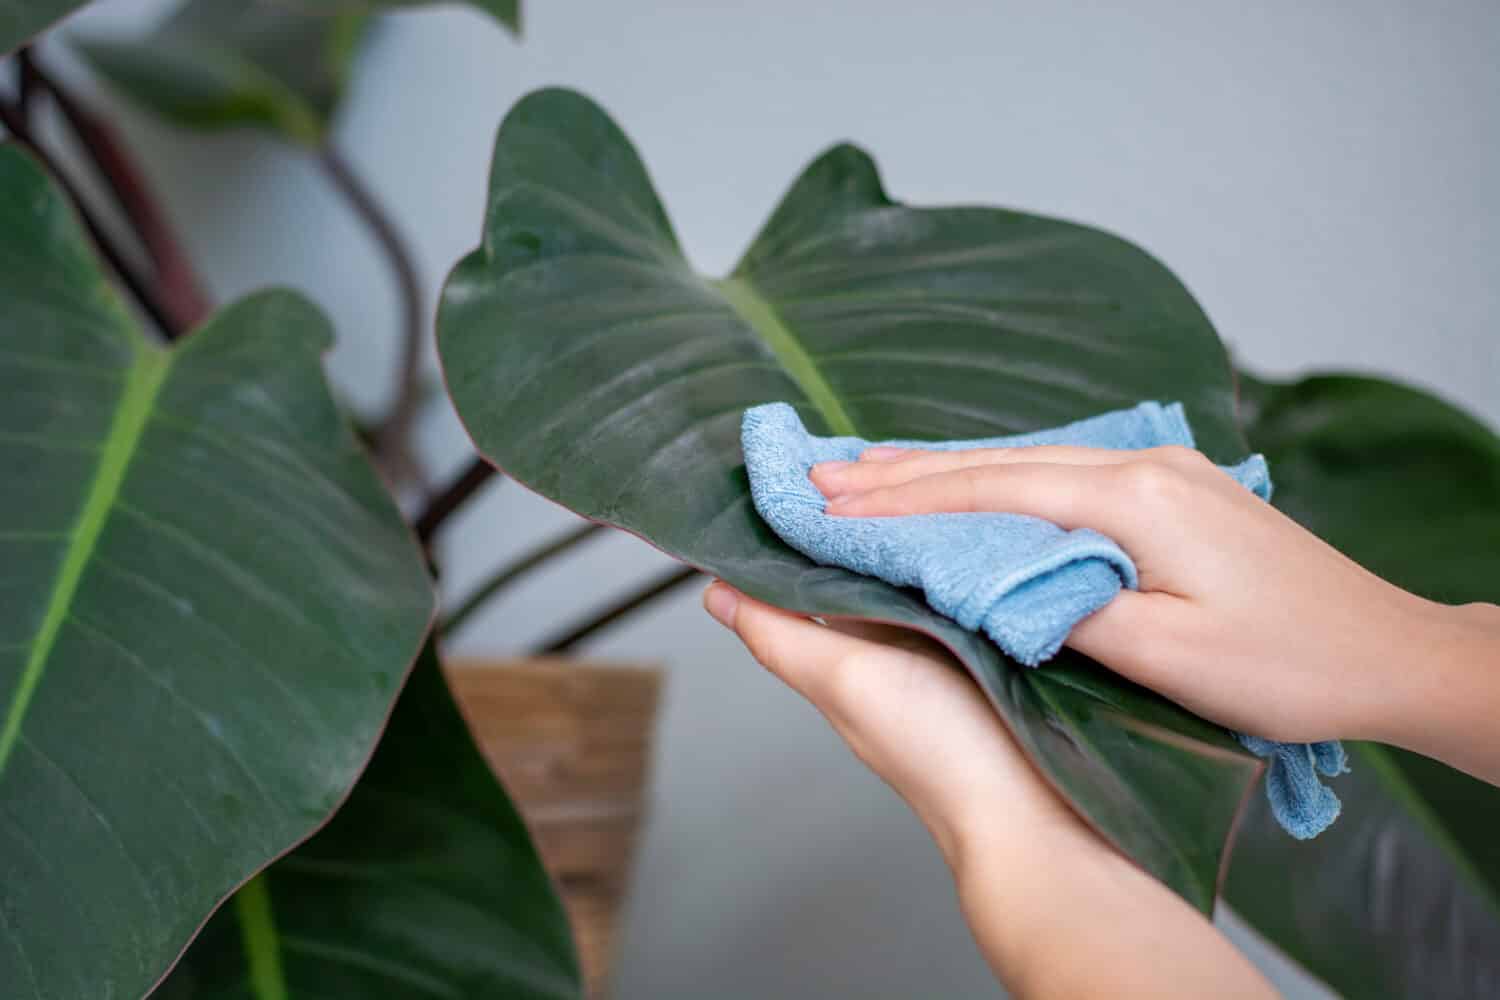
Dusting your plants goes a long way toward preventing spider mites and removing them before they become a problem.
©Ellyy/Shutterstock.com
If you’ve got spider mites indoors, household dust may be partially to blame. As dust collects on leaf surfaces, it clogs pores and blocks light, stressing your plant and leaving it more susceptible to infestation. While thorough rain would wash dust away outside, you’ll have to remove it yourself indoors.
Start by using a soft cloth or brush to sweep away loose dirt and dust, taking care not to damage the plant. Then, to remove the finer, more stubborn particles, dampen the cloth and give the leaves a gentle wipe down, supporting them from the underside as you do. If the plant can tolerate it, you can give it a final rinse with your spray bottle and allow it to dry.
Cleaning down your plants’ leaves goes a long way toward preventing spider mites. The interval at which you’ll need to wipe down your plants will vary depending on how clean you are and how much air movement there is in your home.
4. Trim the Plant
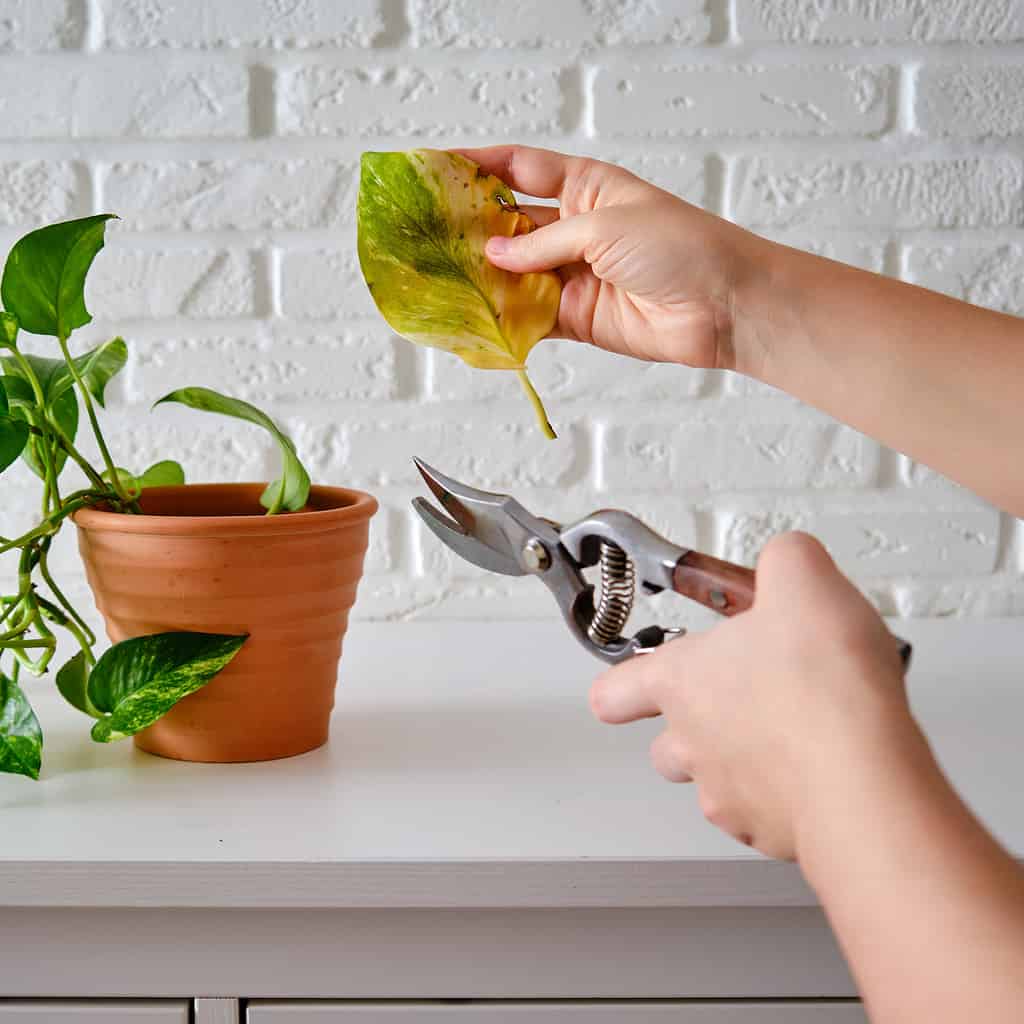
If a spider mite colony is local to a single leaf or stem, a simple trim may resolve the problem.
©iStock.com/Andrey Zhuravlev
If you have a small spider mite colony that is limited to just a few leaves, you may be able to address the problem by simply removing those leaves. Carefully snip them off close to the base and leave them outside, far from your home. You may also opt to burn them or throw them away in your outdoor trash.
Some plants respond better to trimming than others. While a healthy plant will almost certainly survive a good trim, this may not be the best option for some cultivars — especially if they are struggling.
5. Quarantine New Plants
Like most problems, the best way of solving a spider mite infestation is to prevent it from happening to begin with. If you’ve just picked up a new houseplant, don’t immediately introduce it to its new friends. Instead, isolate it for a week or two so that any pest eggs that may have hitched a ride can hatch and potential problems can be made apparent. This way, any problems that pop up remain localized and don’t spread to your other plants.
6. Move or Remove Infected Plants
When dealing with spider mites on indoor plants, the best thing to do is separate infected plants from healthy ones.
©Jana Janina/Shutterstock.com
In a similar vein, quarantining a plant can help you address the problem once it has begun. By isolating an infested plant in a different area of the house, you can prevent spider mites from migrating to nearby plants. This gives you plenty of time and space to safely address the problem.
It’s never our first choice, but there may be times when an infestation is too much to handle. If your plant is severely infested and most of its parts have been colonized, it may be time to say goodbye. If this is the case, cover it with something impermeable like a plastic bag before moving it to prevent mites from spreading through the house on the way out. It may be hard to let go, but allowing a severe infestation to continue can put all of your other houseplants at risk.